In this article, I am going to show you how to install VMware Workstation Pro 15.5.6 on Ubuntu 20.04 LTS. So, let's get started.
Enable Hardware Virtualization:
If you want to use VMware Workstation Pro 15 on your Ubuntu 20.04 LTS machine, you must enable hardware virtualization VT-x/VT-d (for Intel processors) or AMD-v (for AMD processors) from the BIOS of your computer. Otherwise, your VMware Workstation Pro virtual machines (VMs) will run very slow, and you won't get the desired performance.
Downloading VMware Workstation Pro 15.5.6:
In this section, I am going to show you how to download the VMware Workstation Pro Linux installer.
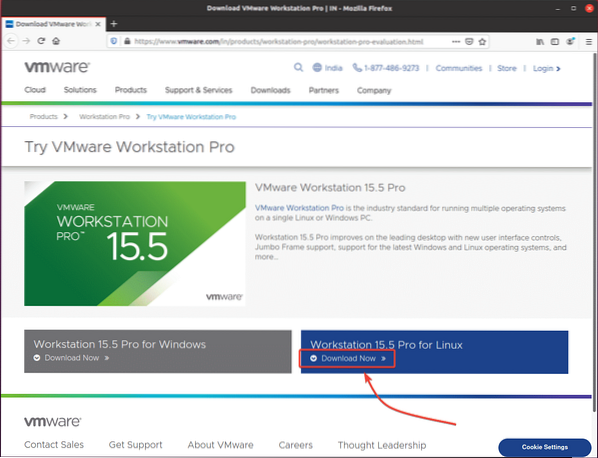
First, visit the official web page of VMware Workstation Pro. Once the page loads, click on the Download Now button from the Workstation 15.5 Pro for Linux section, as marked in the screenshot below.
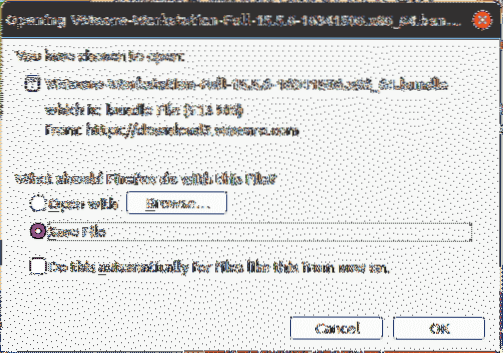
Your browser should prompt you to save the VMware Workstation Pro installer binary file. Select Save File and click on OK.
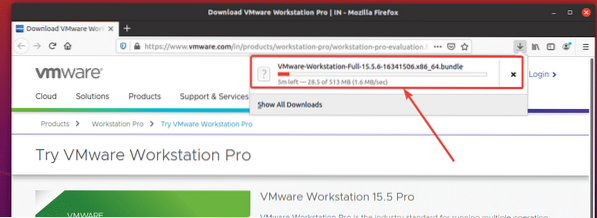
Your browser should start downloading the VMware Workstation Pro installer binary file. It may take a while to complete.
Installing VMware Workstation Pro 15.5.6:
Once VMware Workstation Pro 15 installer binary is downloaded, the installer file should be available in the ~/Downloads directory of your Ubuntu 20.04 LTS machine.
$ ls -lh ~/Downloads
Add executable permission to the VMware Workstation Pro 15 installer binary file with the following command:
$ chmod +x ~/Downloads/VMware-Workstation-Full-15.5.6-16341506.x86_64.bundle
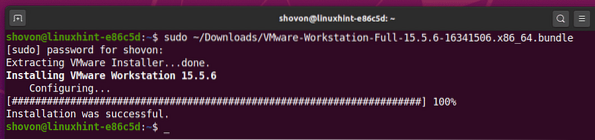
To install VMware Workstation Pro 15.5.6, run the VMware Workstation Pro installer with the following command:
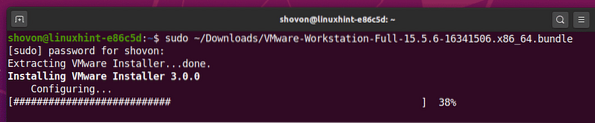
$ sudo ~/Downloads/VMware-Workstation-Full-15.5.6-16341506.x86_64.bundle
VMware Workstation Pro 15.5.6 is being installed. It may take a while to complete.
The installation is 99% complete at this point.

VMware Workstation Pro 15.5.6 is installed.
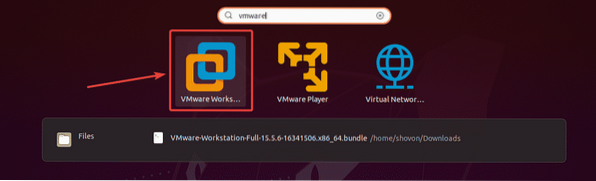
Now, you have to do some initial configuration. To do that, run VMware Workstation Pro 15 from the Application Menu of Ubuntu 20.04 LTS.
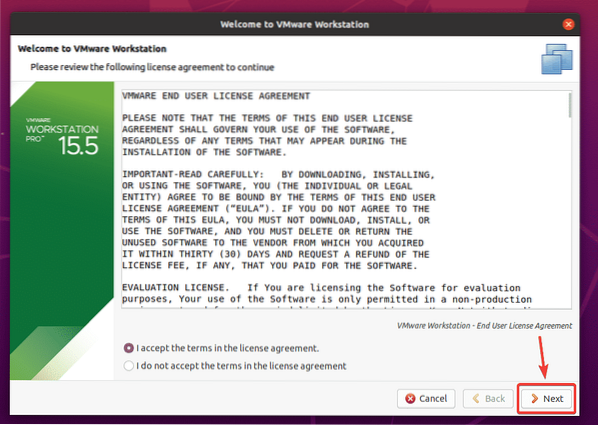
Click on I accept the terms in the license agreement to accept the VMware End User License Agreement for VMware Workstation and click on Next.
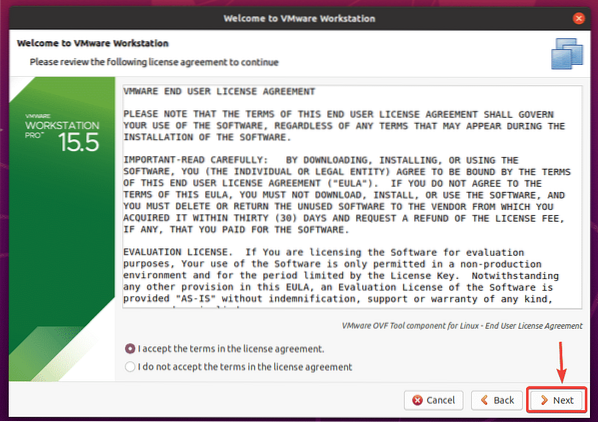
Click on I accept the terms in the license agreement to accept the VMware End User License Agreement for VMware OVF Tool component for Linux and click on Next.
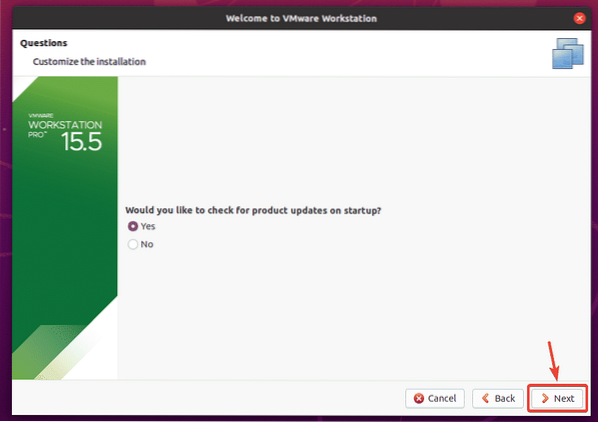
If you want VMware Workstation Pro to periodically check for a newer version of VMware Workstation Pro and notify you if an update is available, select Yes. Otherwise, select No.
Once you're done, click on Next.
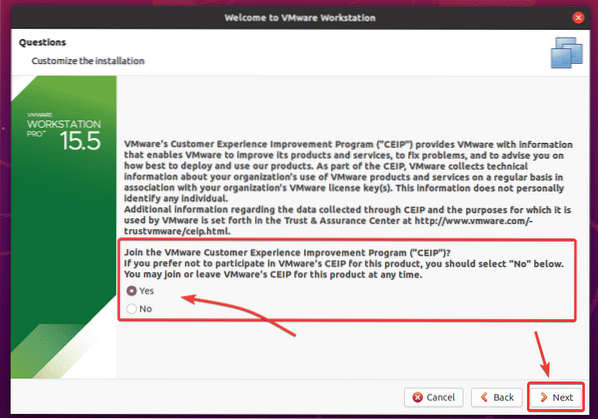
VMware's customer experience program will automatically collect data necessary to improve VMware products.
If you want to join the VMware's customer experience improvement program (CEIP), then select Yes. Otherwise, select No.
Once you're done, click on Next.
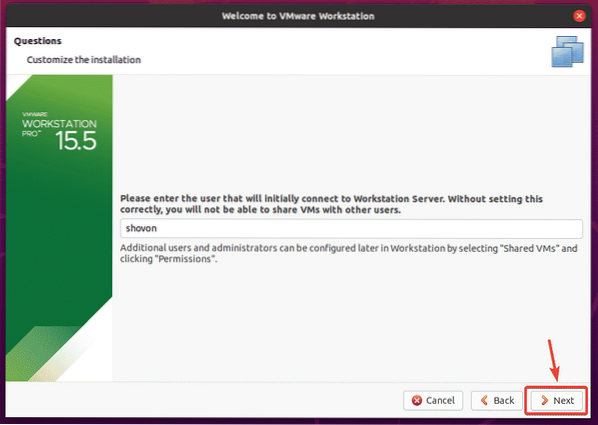
VMware Workstation Pro 15 has support for Shared virtual machines (VMs). You can share a VMware Workstation Pro virtual machine running on your Ubuntu 20.04 LTS machine and access it from VMware Workstation Pro 15 running on another computer (i.e. Windows, Ubuntu, CentOS, etc.). To access shared VMs, you need to setup a user account.
Type in the username that you want to use to connect to VMware Workstation Pro for accessing shared VMs. By default, it should be your login username. I recommend you leave it as it is. Once you're done, click on Next.
NOTE: The password should be the password of your login username by default. If you've set another username for shared VMs, then the password should be the password of that user.
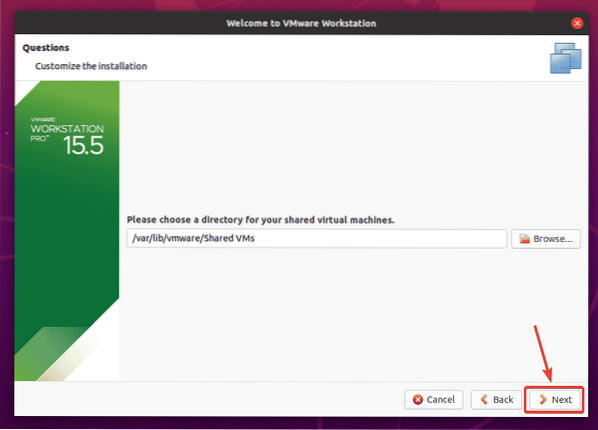
By default, shared VMs will be saved in the /var/lib/vmware/Shared VMs directory. If you want to save your shared VMs in some other directory, you can change it from here. You can change it later as well. I will show you how to change it from the VMware Workstation Pro Preferences in a later section of this article. So, I am going to leave it as it is for now.
Once you're done, click on Next.
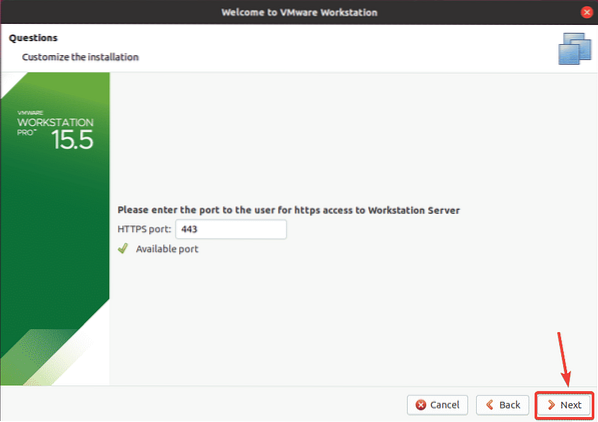
By default, VMware Workstation Pro uses the port 443 to allow access to the VMware Workstation Pro VMs remotely from another instance of VMware Workstation Pro running on another computer. The default port number 443 is okay unless the port 443 is busy running another process.
Once you're done, click on Next.
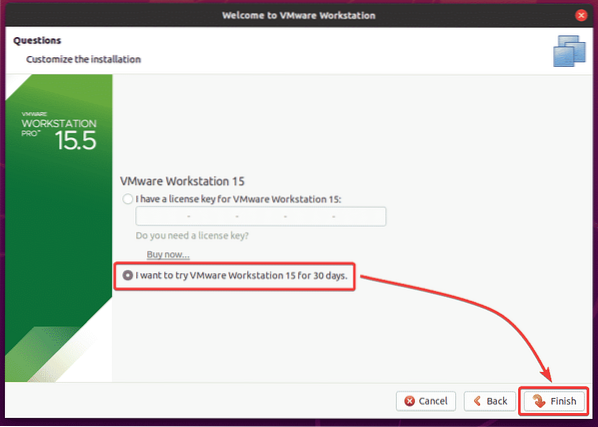
If you have bought VMware Workstation Pro 15 license, then you can enter the license key for VMware Workstation Pro 15 here.

If you just want to try out VMware Workstation Pro 15 before buying it, then select I want to try VMware Workstation 15 for 30 days and click on Finish.
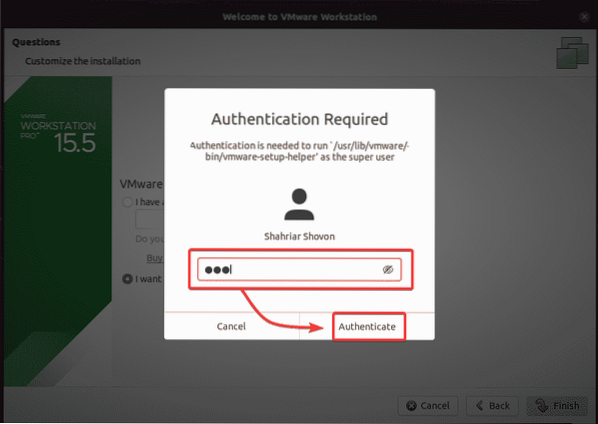
Type in the password of your login user and click on Authenticate.
Click on OK.
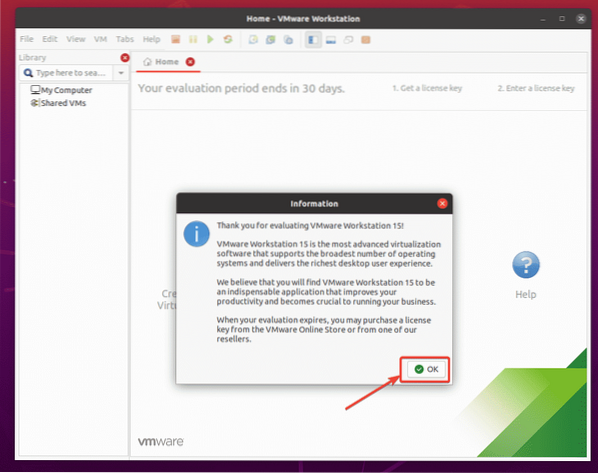
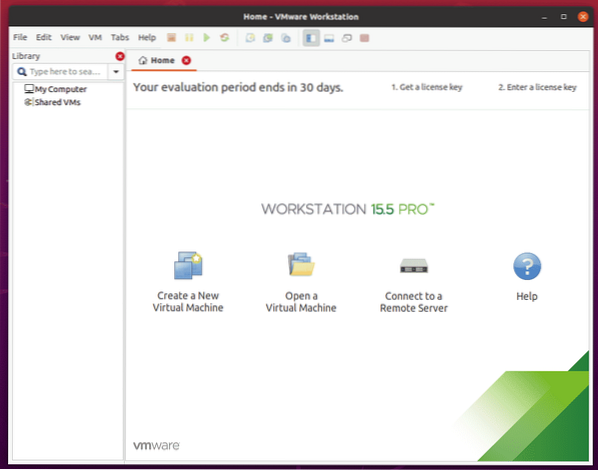
This is the dashboard or main window of VMware Workstation Pro 15. You can manage your VMs from here very easily.
Changing VM and Shared VM Path of VMware Workstation Pro 15:
I like to keep things organized. So, I usually keep the VMs and the shared VMs data in the vmware/ directory of my HOME directory.
In the local/ subdirectory of the vmware/ directory, I keep all the VM data.
In the shared/ subdirectory of the vmware/ directory, I keep all the shared VM data.
You can create this directory structure with the following command:
$ mkdir -pv ~/vmware/local,shared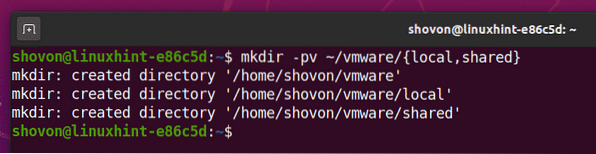
To change the VM and shared VM path, open VMware Workstation Pro 15 and go to Edit > Preferences as marked in the screenshot below.

The VMware Workstation Pro 15 Preferences window should be opened.

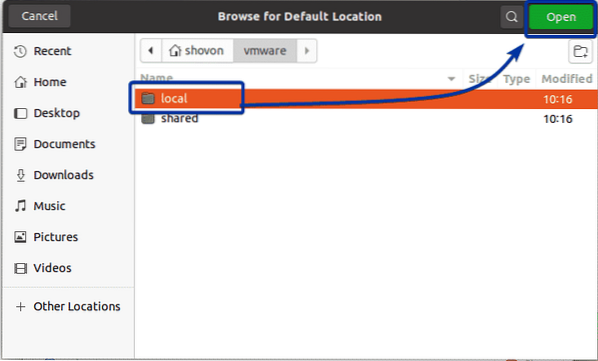
To change the VM path, go to the Workspace section and click on the Browse button, as marked in the screenshot below.

Now, select the ~/vmware/local directory and click on Open.
The default VM path should be changed.

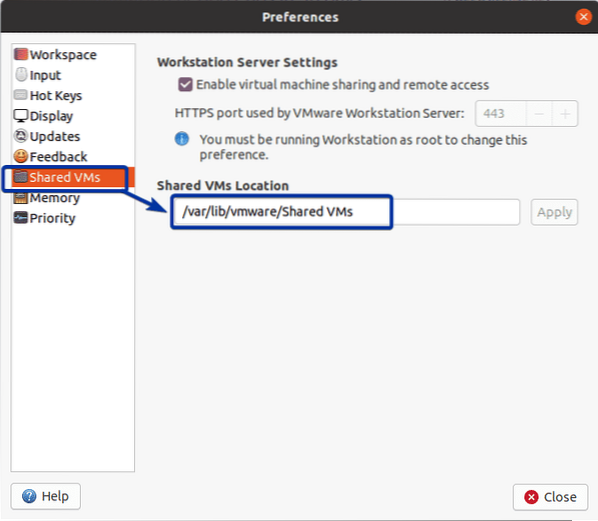
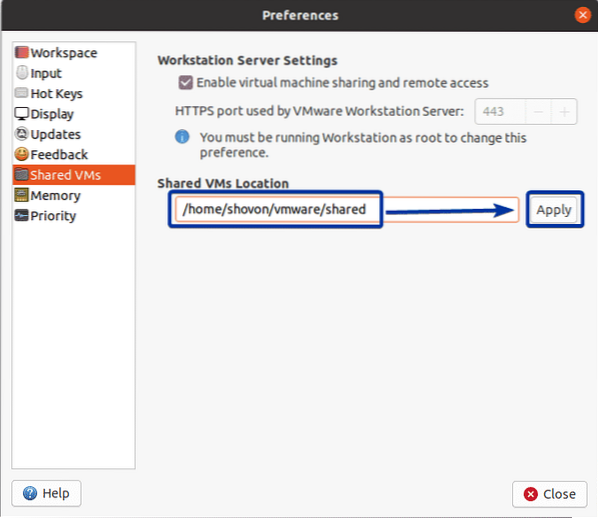
To change the shared VM path, go to the Shared VMs section. Your default shared VM path should be in the Shared VMs Location text box, as you can see in the screenshot below. You can't browse and select directory here like before. Instead, you have to type in the absolute path of the directory where you want to save your shared VM data.
To find the absolute path of your shared VM directory ~/vmware/shared/, run the following command:
$ readlink -f ~/vmware/shared/The absolute path of the ~/vmware/shared/ directory should be printed on the console. Copy the absolute path.

Paste the absolute path of the ~/vmware/shared/ directory in the Shared VMs Location section and click on Apply.
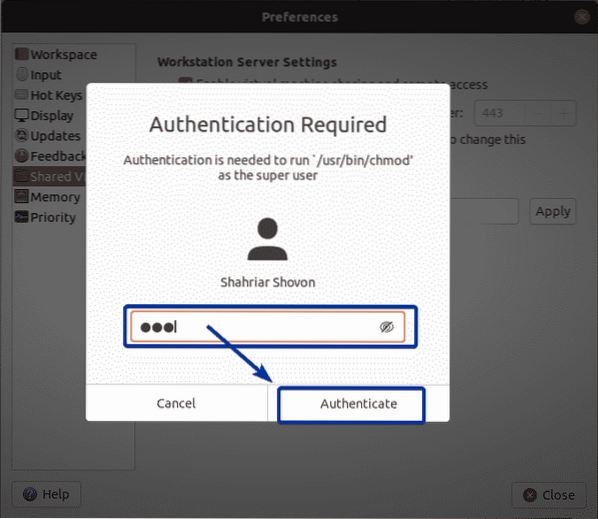
Type in your login password and click on Authenticate.
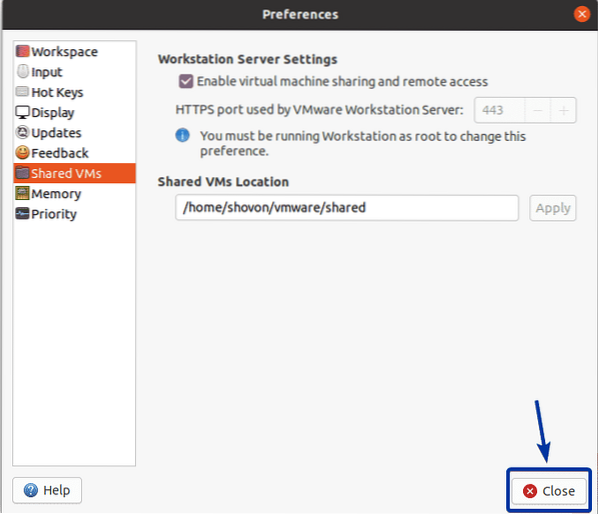
Once you're done, close the Preferences window.
Activate VMware Workstation Pro 15:
If you have bought a VMware Workstation Pro 15 license and you would like to activate it using the serial number, then this section is for you.
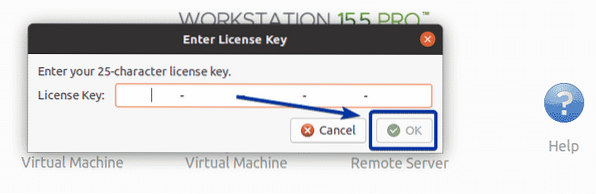
Open VMware Workstation Pro 15 and go to Help > Enter Serial Number… as marked in the screenshot below.
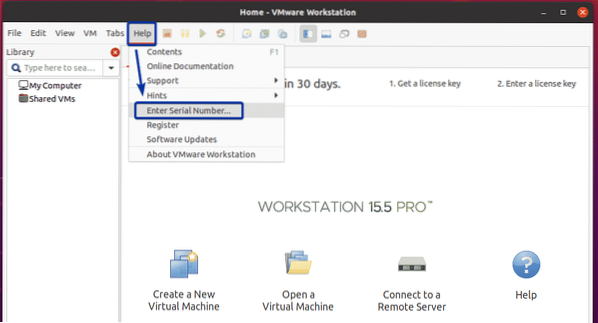
Now, type in your serial number and click on OK. VMware Workstation Pro 15 should be activated.
Creating an Ubuntu Server 20.04 LTS VM:
In this section, I am going to show you how to create a VMware Workstation Pro 15 VM and install Ubuntu Server 20.04 LTS on it.
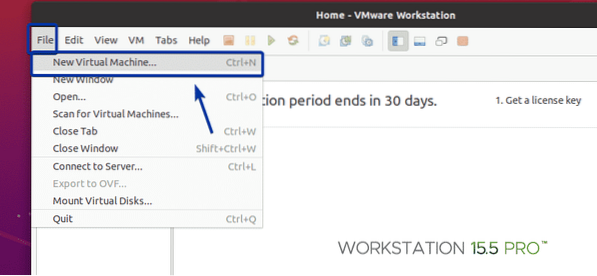
To create a virtual machine (VM), open VMware Workstation Pro and click on File > New Virtual Machine… as marked in the screenshot below.
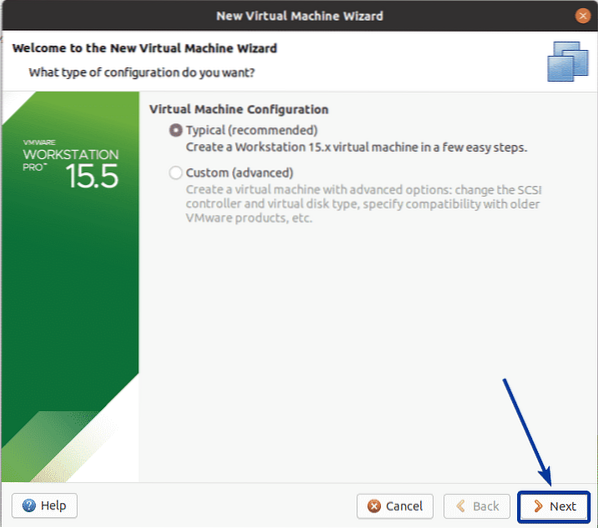
Click on Next.
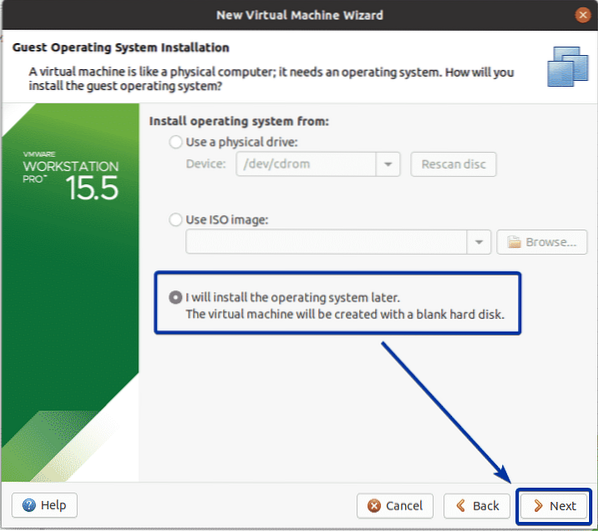
Select I will install the operating system later and click on Next.
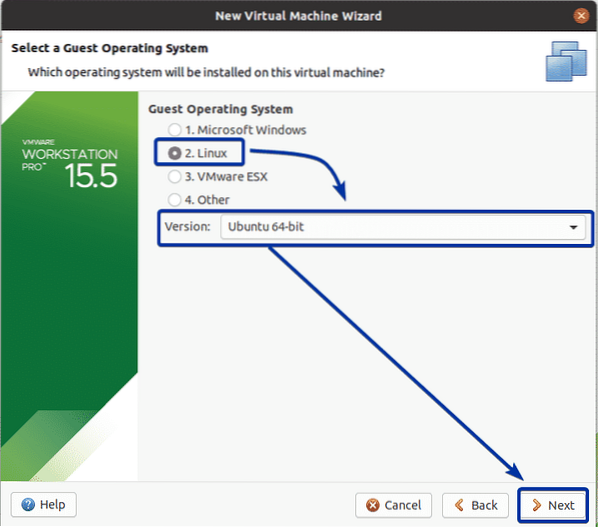
Select Linux as the Guest Operating System and select Ubuntu 64-bit as the Version.
Once you're done, click on Next.
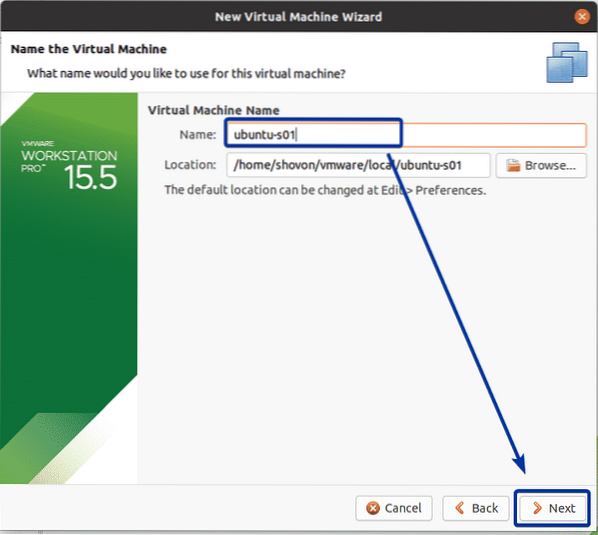
Type in a Name for your VM and click on Next.
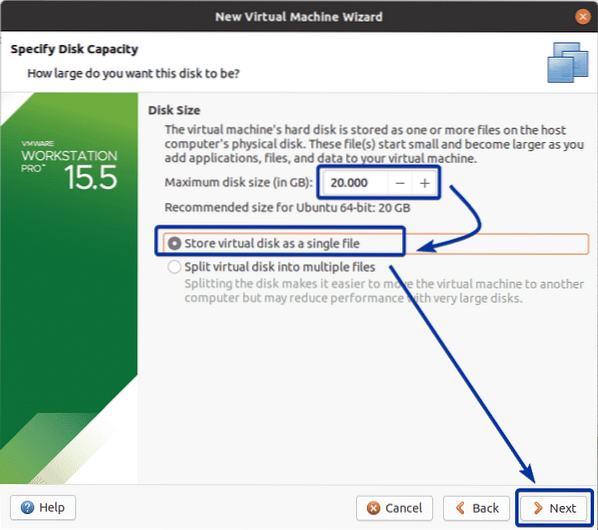
Type in how much storage you want to allocate for the VM (in gigabyte/GB). 20 GB is a good size for headless operating systems like Ubuntu Server 20.04 LTS.
Select Store virtual disk as a single file and click on Next.
Click on Finish.
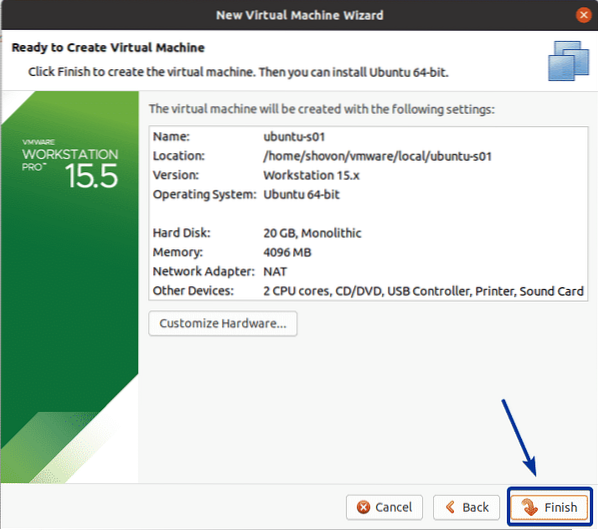
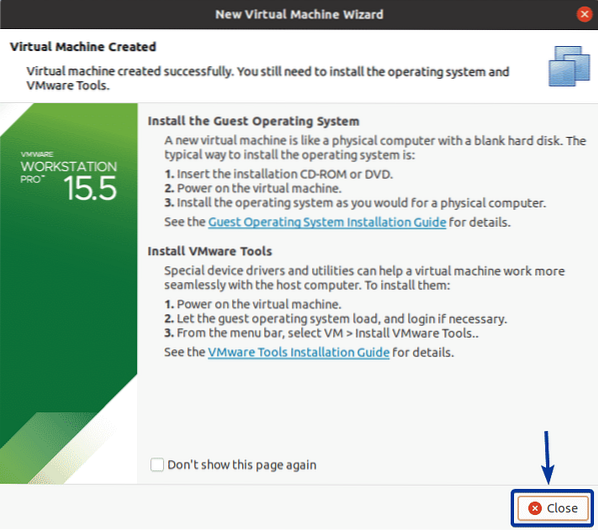
VMware Workstation Pro will instruct you on what to do next. You can read it. It's very important.
Once you're done, click on Close.
As you can see, a new VM is created.
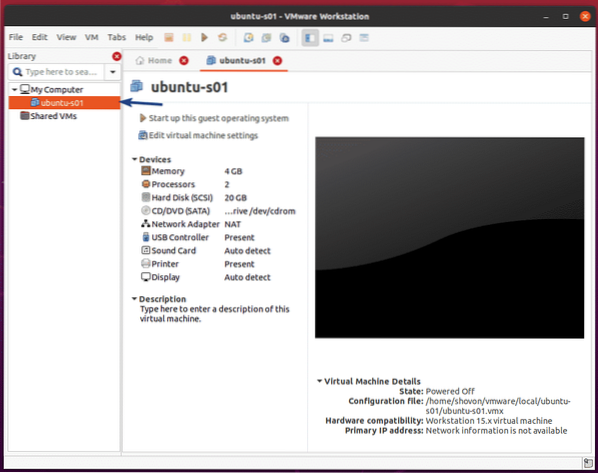
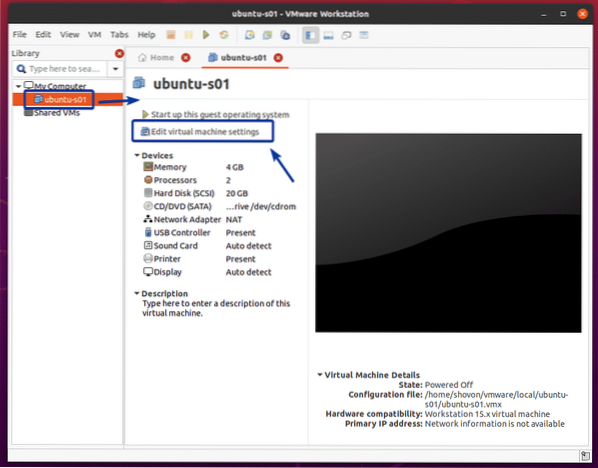
Now, open the VM from the library section and click on Edit virtual machine settings.
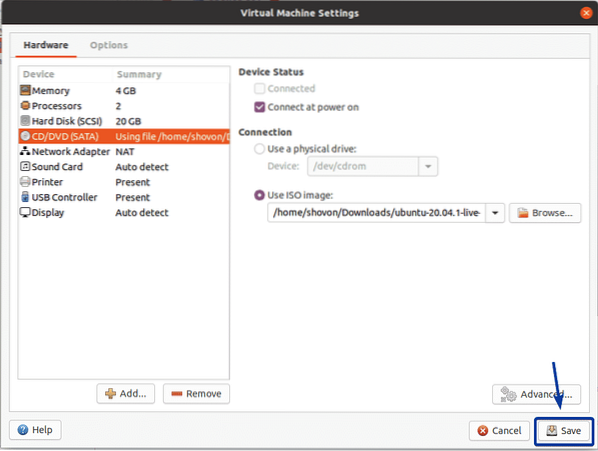
Go to the CD/DVD(SATA) section, select Use ISO image and click on Browse… as marked in the screenshot below.
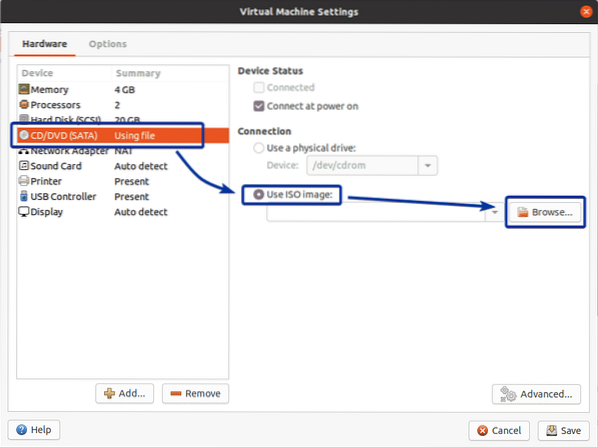
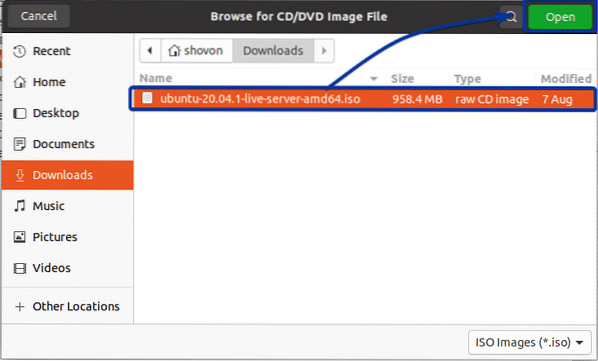
Select the ISO image of Ubuntu Server 20.04 LTS and click on Open.
NOTE: I have already downloaded the Ubuntu Server 20.04 LTS ISO image on my computer. You can download it from https://ubuntu.com if you don't have it already.
Click on Save.
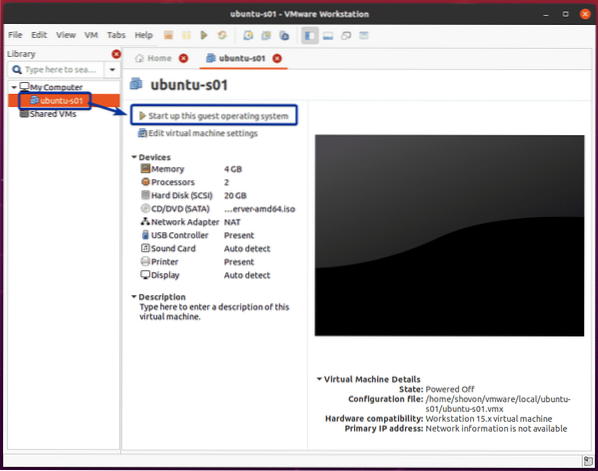
To start the VM, open the VM from the Library section and click on Start up this guest operating system.
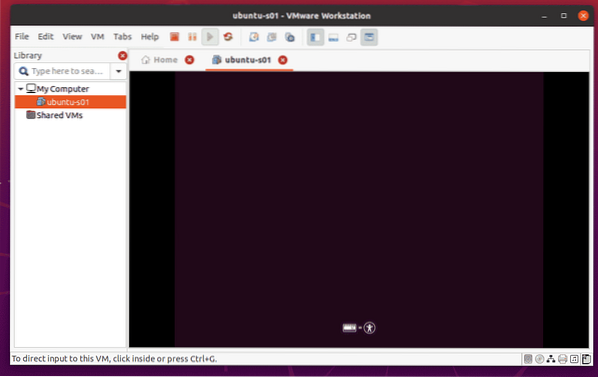
As you can see, Ubuntu Server 20.04 LTS installer is being booted.
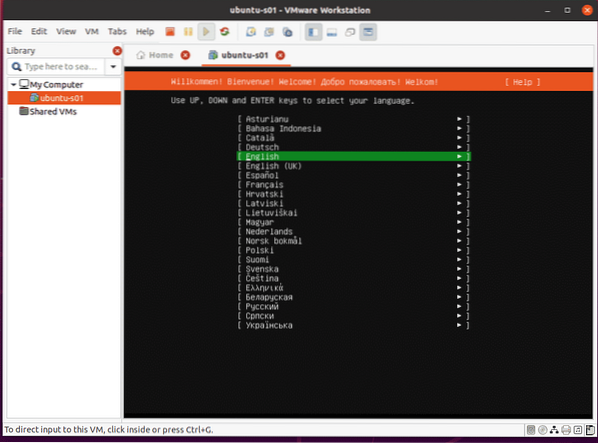
Now, select your language and press
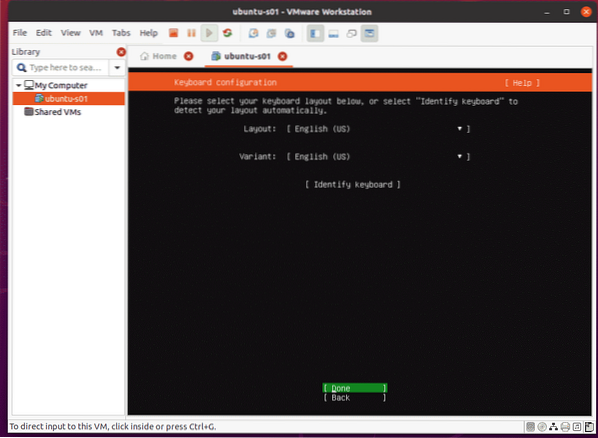
Select your keyboard layout.
Once you're done, press
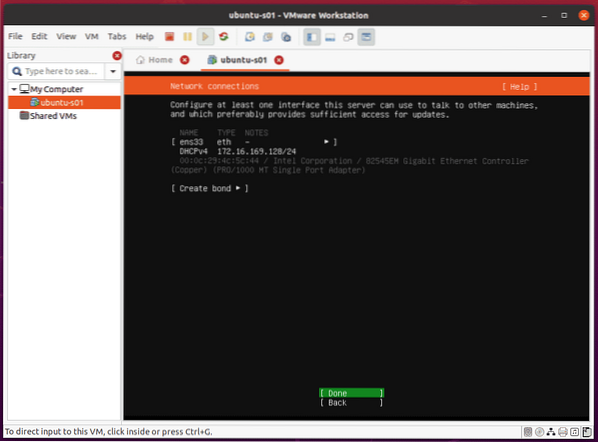
Ubuntu Server 20.04 LTS installer should automatically configure its network interface via DHCP. Then, press
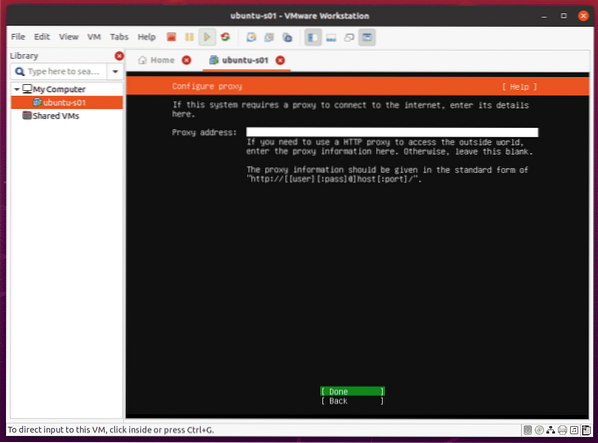
Press
Press
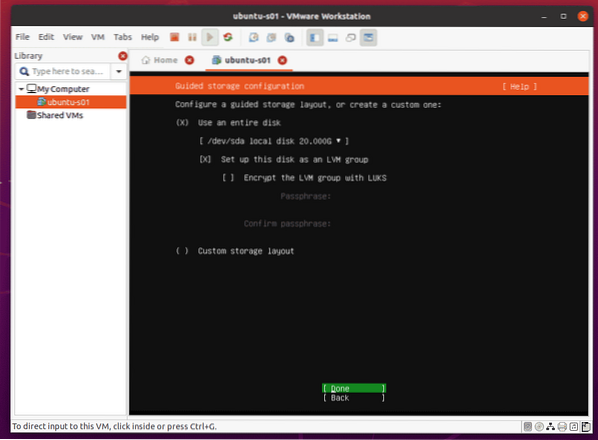
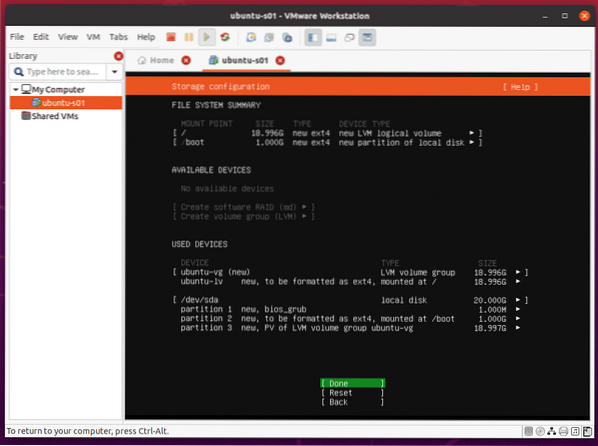
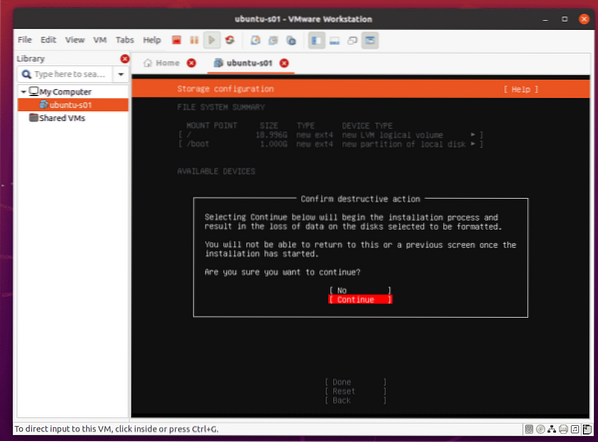
Now, you have to partition the disk. You can partition the disk automatically or manually. As it is a VM, I am going for automatic partitioning. So, I will leave the defaults.
Press
Press
Select [ Continue ] and press
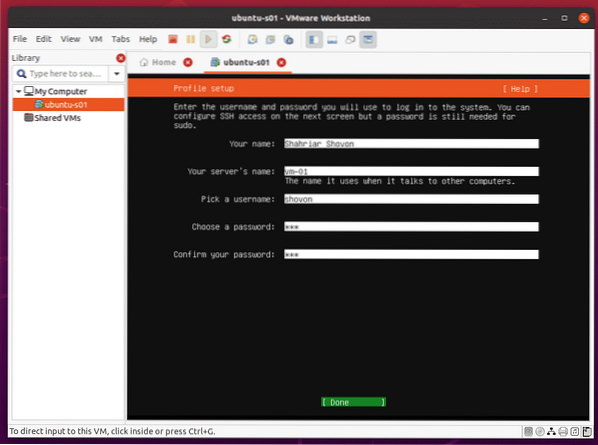
Type in your personal details and login information, press
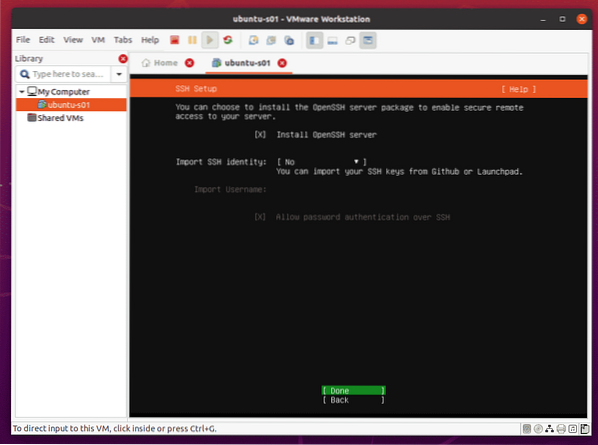
If you want to access the VM via SSH, select the Install OpenSSH server checkbox and press the
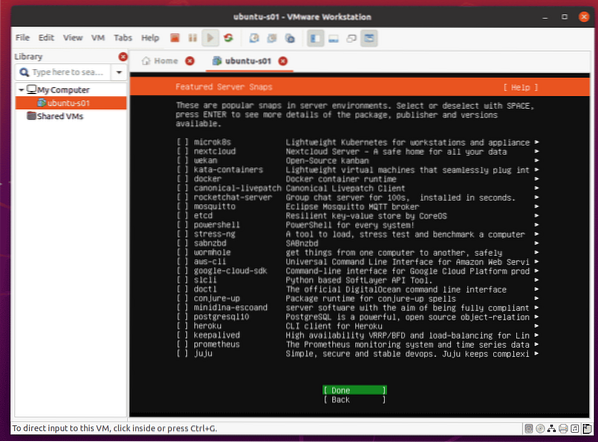
If you want to install some other software, you can select them from the list. Once you're done, press
NOTE: To install software from the list, select it using the arrow keys and press
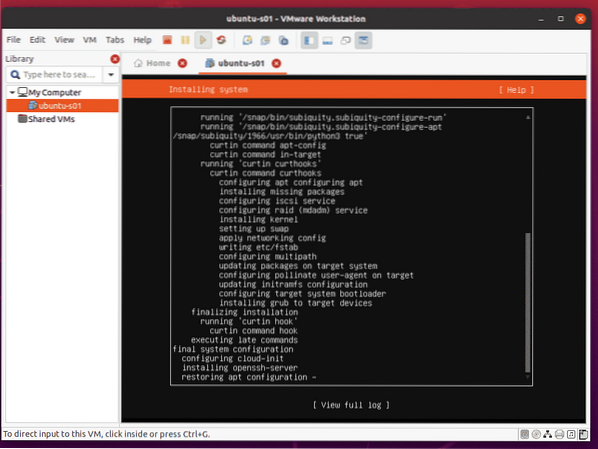
Ubuntu Server 20.04 LTS is being installed on the VM. It may take a while to complete.
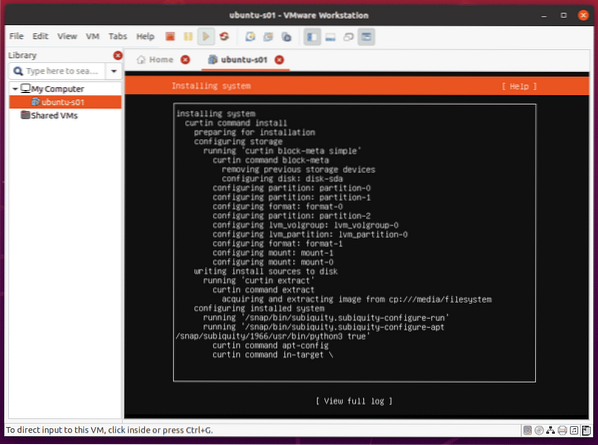
Ubuntu Server 20.04 LTS is being installed on the VM.
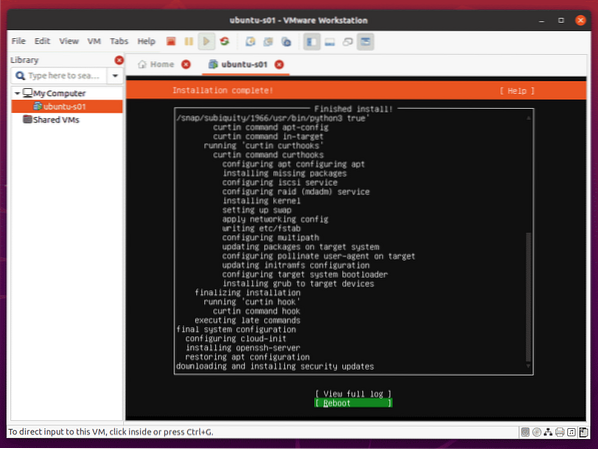
At this point, Ubuntu Server 20.04 LTS should be installed on the VM.
Select [ Reboot ] and press
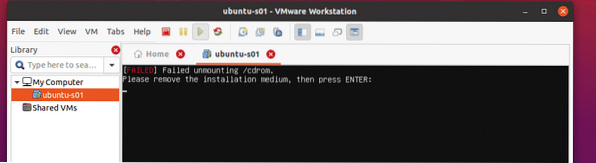
Press
Ubuntu Server 20.04 LTS should boot in the VM.

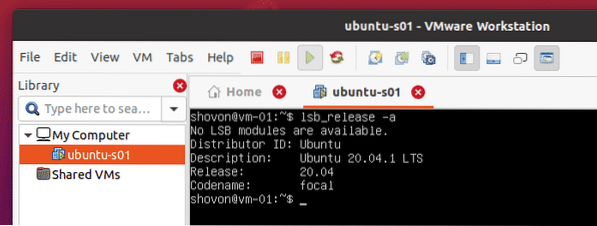
Now, you can login to your Ubuntu Server 20.04 LTS as usual.
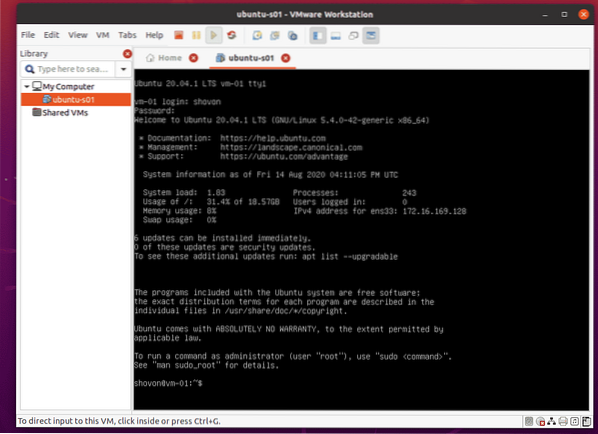
You can run any command you want on the VM as well.
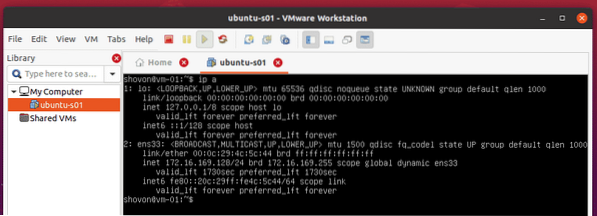
The VM should also get an IP address automatically via DHCP.
Conclusion:
In this article, I have shown you how to download VMware Workstation Pro 15.5.6, install it on Ubuntu 20.04 LTS, and create a VMware Workstation Pro 15 VM. I have also shown you how to change the VM and shared VM path of VMware Workstation Pro 15 and activate it using a license key. After reading this article, you should be comfortable using VMware Workstation Pro 15. There are many useful features of VMware Workstation Pro 15. I advise you to learn about them as they might come in handy in various situations.


