Configuring DNS for Postfix:
To have a working configuration of Postfix, you must have a MX record added to your DNS server. I am setting up a DNS server using BIND 9 here just to demonstrate how everything works.
My Ubuntu 18.04 LTS machine has the IP address 192.168.199.170. This is going to be my DNS server and Mail server. So replace it with your IP address. I've chosen mail.linuxhint.com as the FQDN of my mail server. Replace it with yours.
First update the APT package repository cache with the following command:
$ sudo apt update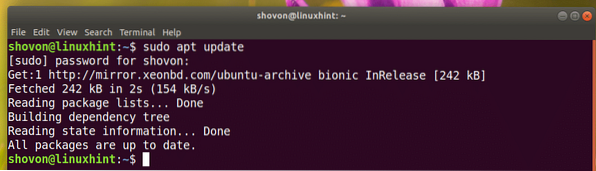
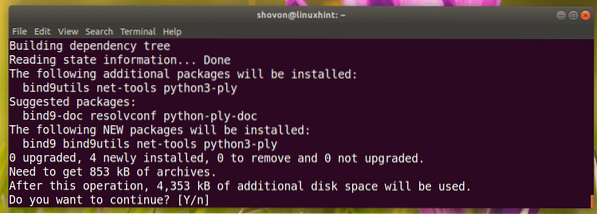
Install BIND 9 DNS server with the following command:
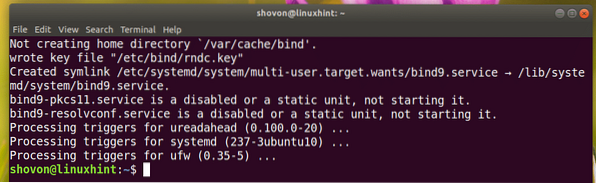
$ sudo apt install bind9
Now press y and then press
BIND 9 should be installed.
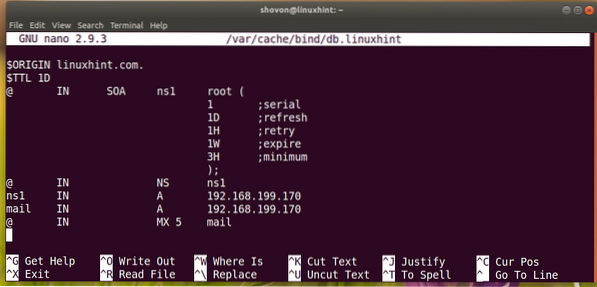
Now create a zone file with the following command:
$ sudo nano /var/cache/bind/db.linuxhint
Now add the following lines and save the file. Replace 192.168.199.170 with the IP address of your computer. Also replace linuxhint.com with your domain name.
Now check whether the configuration file is okay with the following command:
$ sudo named-checkzone linuxhint.com. /var/cache/bind/db.linuxhint
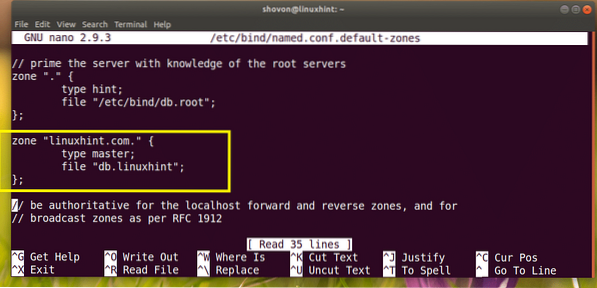
Now run the following command to edit /etc/bind/named.conf.default-zones file:
$ sudo nano /etc/bind/named.conf.default-zonesNow add the following lines to configure your DNS zone. Adjust where necessary.
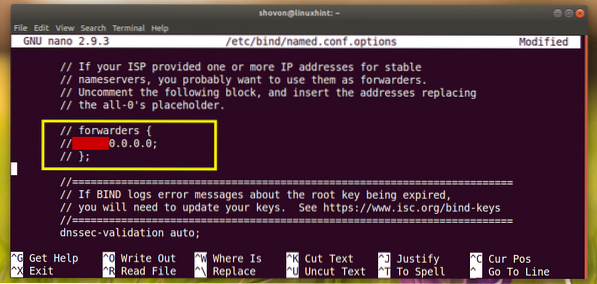
Now edit /etc/bind/named.conf.options file with the following command:
$ sudo nano /etc/bind/named.conf.options
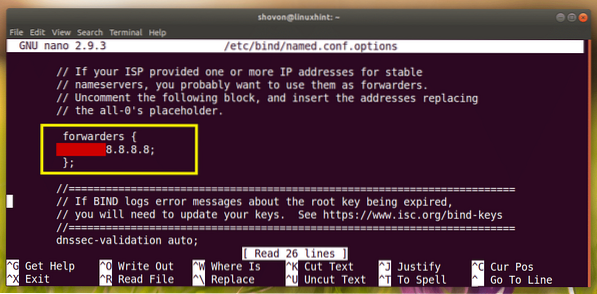
Now uncomment forwarders (by removing // from the beginning of each line) and change 0.0.0.0 to Google's DNS server 8.8.8.8
Before:
After:
Now restart BIND 9 with the following command:
$ sudo systemctl reload bind9
Now you have to change your DNS server. I used Network Manager to do that.
If you don't have network manager installed, install it with the following command:
$ sudo apt install network-managerList your network manager connection with the following command:
$ sudo nmcli connection showAs you can see, the name of my active connection is Wired connection 1

Now edit your connection with the following command:
$ sudo nmcli connection edit "Wired connection 1"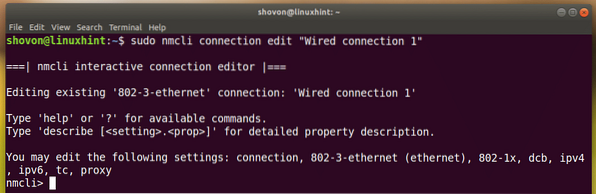
Remove the current DNS server:
nmcli> remove ipv4.dns
Now run the following nmcli command to change your DNS server for the connection.
nmcli> set ipv4.dns 192.168.199.170
Save the changes.
nmcli> save
Finally exit out of nmcli prompt:
nmcli> quit
Now restart the connection with the following commands:
$ sudo nmcli connection down "Wired connection 1"

Now set your hostname to mail.linuxhint.com with the following command:
$ sudo hostnamectl set-hostname mail.linuxhint.com
Now reboot your computer for the changes to take effect.
$ sudo rebootInstalling Postfix:
Now install Postfix with the following command:
$ sudo apt install postfix
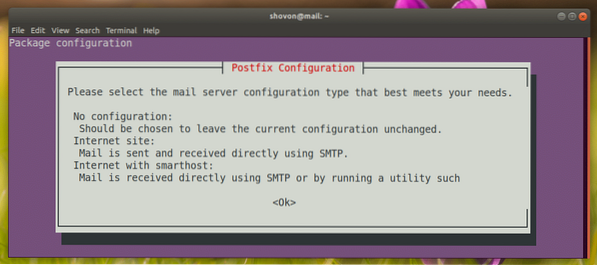
Press
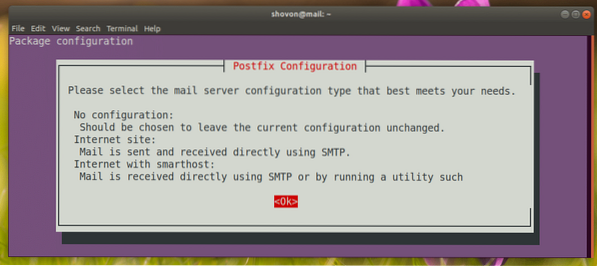
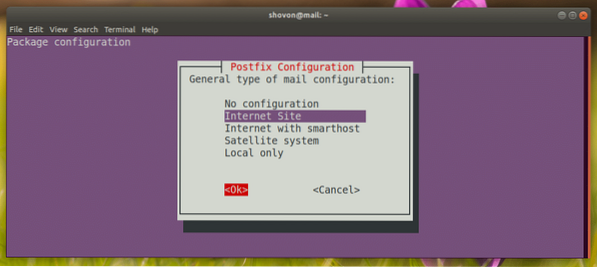
Select Internet Site. Then press
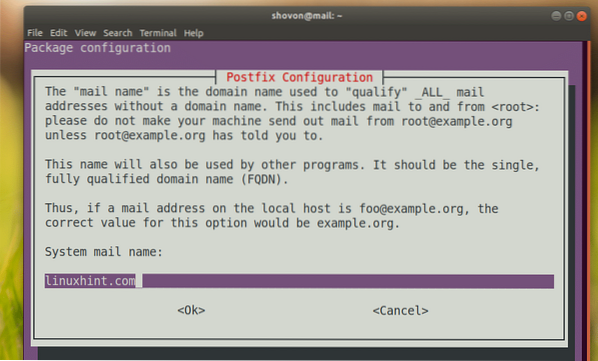
Type in your domain name. Then press
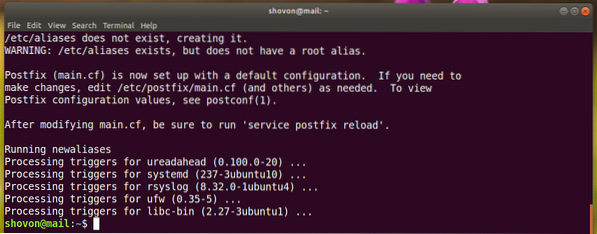
Postfix should be installed and configured
Reconfiguring Postfix:
If you need to re-configure the Postfix server in future, run the following command:
$ sudo dpkg-reconfigure postfix
Terminal based Postfix configuration wizard should show up. Just answer the questions and you're done.
Configuring Users for Sending and Receiving E-Mails:
On Ubuntu 18.04 LTS, only users added to the mail group can send and receive E-Mails. By default, none of the users are added to the mail group.
You can add the user you're logged in as to the mail group with the following command:
$ sudo usermod -aG mail $(whoami)
If the user you're logged in as don't have sudo or super user privileges, you can add user, let's say linda to the mail group with the following command:
$ sudo usermod -aG mail linda
If you want to create new users for sending and receiving E-Mails, run the following command:
$ sudo useradd -m -G mail USERNAMEHere, USERNAME is the username of your new user.
In my case, let's say the USERNAME is Kelly:
$ sudo useradd -m -G mail -s /bin/bash kelly
Now run the following command to set a login password for the USERNAME kelly:
$ sudo passwd Kelly
Now enter the password for the user kelly and press

You will have to re-type the password again. Once you're done, the password should be set.

Now the user kelly can send and receive E-Mails.
Sending and Reading E-Mails from the Command Line:
Ubuntu 18.04 LTS has many command line tools for sending emails such as Sendmail, mail, mutt etc.
In this section, I am going to show you how to use the mail command to send and read E-mails.
The mail program may not be installed by default on Ubuntu 18.04 LTS. Run the following command to install it:
$ sudo apt install mailutils
Now press y and then press

It should be installed.
Now you can send an E-Mail with the following command:
$ mail EMAIL_ADDRESSLet's send an E-Mail to kelly,
$ mail [email protected]
You should be asked to provide Carbon Copy (CC). If you want to forward it to many mail addresses, type in the email addresses here. Otherwise leave it empty and press

Now type in the subject of your E-Mail. Once you're done, press

Now type in your email.

Once you're done, press
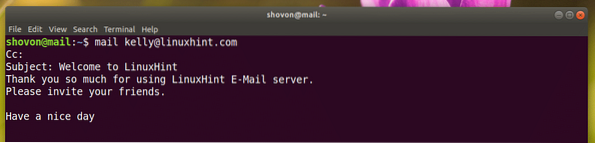
The mail should be sent.
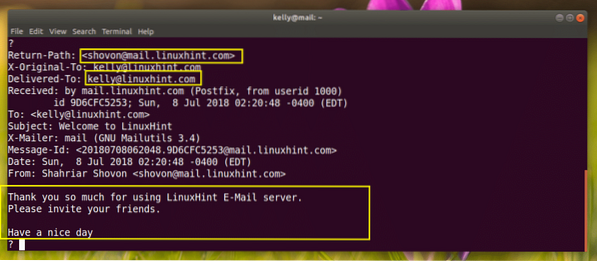
Now kelly can read the E-Mail with the following command:
$ mailAs you can see, kelly received my E-Mail.

Now type in the number as marked below and press

This is the E-Mail I sent kelly.
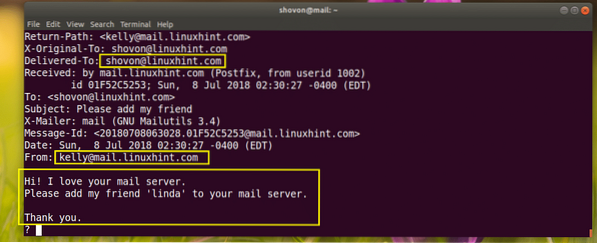
Now kelly can send an E-Mail to me as well.
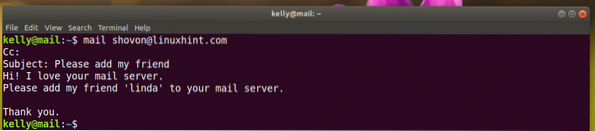
I can see kelly's email.

This is kelly's email.
That's how you install and configure Postfix on Ubuntu 18.04 LTS. Thanks for reading this article.


