Many users who own a netbook or notebook with a relatively small screen size always prefer to watch their favorite YouTube HD videos and movies on a large display by connecting their laptop or tablet to a larger external monitor.

There are a couple of ways out there to connect a laptop to an external monitor depending on the type of port(s) present on your laptop and the external monitor. Most of the notebooks that were manufactured in the past two-three years come with a HDMI port along with the old VGA port to connect your computer to an external display.
And if your laptop has a HDMI port but your external monitor lacks a HDMI port, you need to get a HDMI to VGA converter and vice versa.
The best thing is that connecting and activating an external display on a Windows 7 machine is relatively simple. You don't need to configure advanced settings to get it working. Complete the below mentioned instructions successfully connect your laptop, netbook or tablet to an external display.
Here is how to connect your Windows 7 installed notebook to an external display:
Step 1: Connect your Windows 7 laptop to the external display using VGA or HDMI cable.
Step 2: Then, switch on your Windows 7 laptop and also the external display.
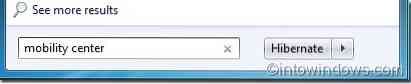
Step 3: Once Windows 7 is up and running, type Mobility Center in Start menu search area and hit enter to open the same.
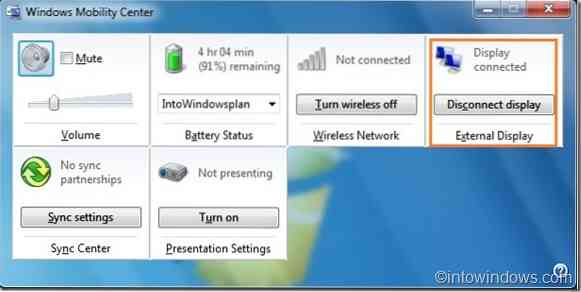
Step 4: If you have connected your Windows 7 machine to the external display properly, you should now see Display connected text under External display section of Windows Mobility Center. To use the connected external display, click Connect Display button. You should now see your Windows 7 desktop in the external display as well.
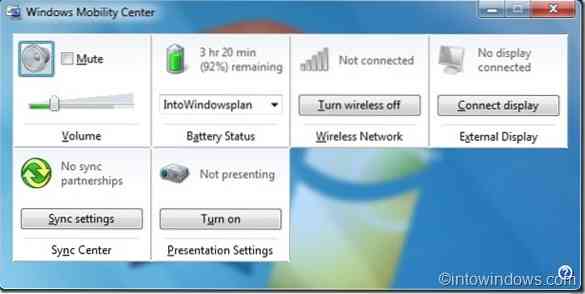
Step 5: Use disconnect button in the Windows Mobility Center to disconnect the external display. When the display is connected and active, use Windows + P keys to quickly switch between these displays.
How to install Windows 7 on a netbook using a bootable USB guide might also interest you.


