If it ever happened to you, do not freak out! It is really very easy to solve. The GRUB 2 bootloader has special tools for scanning the hard drives installed on your computer for bootable operating systems installed on your hard drives.
In this article, I will show you how to solve the problems stated above and use grub2-mkconfig tool to solve it. I will be using Debian 9 Stretch for the demonstration, but it should work on any modern Linux distribution with GRUB 2 installed. Let's get started.
What grub2-mkconfig Does:
grub2-mkconfig is a really simple tool. All it does is scan the hard drives of your computer for installed bootable operating systems (including Window, Mac OS and any Linux distributions) and generates a GRUB 2 configuration file. That's it.
Difference Between grub2-mkconfig and grub-mkconfig:
Even though GRUB 2 is installed on your computer, the grub2-mkconfig command may not be available in your favorite Linux distribution. But the grub-mkconfig command may be available in your Linux distribution. There is no difference between grub-mkconfig and grub2-mkconfig if GRUB 2 is installed.
Note that, if you have GRUB legacy installed, then grub-mkconfig and grub2-mkconfig commands will not be the same.
You can check which version of GRUB is installed on your Linux machine with the following command:
$ sudo grub2-mkconfig --versionOr
$ sudo grub-mkconfig --version
As you can see, on my Debian 9 Stretch machine, GRUB 2.02 is installed. I also don't have grub2-mkconfig command available on Debian 9 Stretch. It is renamed to grub-mkconfig. So grub-mkconfig and grub2-mkconfig is the same in my case.

Using grub2-mkconfig:
The grub2-mkconfig or the grub-mkconfig command only has one important option. The -o or long format the -output option. It is used to tell GRUB 2 where the generated GRUB configuration file should be saved.
By default, grub2-mkconfig or the grub-mkconfig command prints the generated configuration file to STDOUT, which is the terminal of your Linux operating system.
If this is what you want, then run grub2-mkconfig or the grub-mkconfig command as follows:
$ sudo grub2-mkconfigOr
$ sudo grub-mkconfig

As you can see, the generated GRUB 2 configuration is printed on the terminal screen. This may not be very helpful.
If you want, you can export the generated GRUB 2 configuration to a file. The format of the command is given below:
$ sudo grub2-mkconfig -o FILE_PATHOr
$ sudo grub-mkconfig -o FILE_PATH
If you prefer the long format, then
$ sudo grub2-mkconfig --output FILE_PATHOr
$ sudo grub-mkconfig --output FILE_PATH
NOTE: Here, FILE_PATH is the path to the file where you want the generated GRUB 2 configuration to be saved.
Let's say, you want to save the generated GRUB 2 configuration to a file grub.cfg in your user's HOME directory.
To do that, run the following command:
$ sudo grub2-mkconfig -o ~/grub.cfgOr
$ sudo grub-mkconfig -o ~/grub.cfg

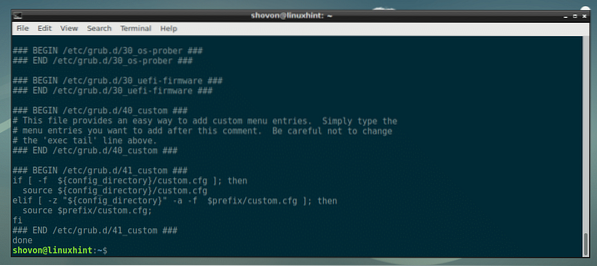
As you can see, a new GRUB 2 configuration file is generated.

As you can see, grub.cfg file is generated on my user's HOME directory.

As you can see, the contents of the generated grub.cfg file is the same as earlier when I printed the output in the terminal.

Updating GRUB 2 Configuration File (BIOS):
If you're using old BIOS based motherboards, then the GRUB 2 bootloader configuration file should be in the /boot/grub/grub.cfg file as you can see in the screenshot below.

NOTE: On some Linux distributions such as CentOS 7 or RHEL 7, the GRUB 2 configuration file can be found at /boot/grub2/grub.cfg. If it is the case for you, then make sure you adjust the path before you run the grub2-mkconfig or grub-mkconfig command in the article below.
To update the GRUB 2 configuration file on BIOS based Linux installation, run the following command:
$ sudo grub2-mkconfig -o /boot/grub/grub.cfgOr
$ sudo grub-mkconfig -o /boot/grub/grub.cfg

The GRUB 2 configuration file should be updated.

If you're expecting any changes, restart your computer with the following command:
$ sudo rebootYou should see what you're expecting in the GRUB menu just after you press the power button.
Updating GRUB 2 Configuration File (UEFI):
On UEFI based motherboards, updating the GRUB 2 configuration is a little bit trickier.
On EFI based Linux installs, the GRUB 2 configuration file is in the /boot/efi/EFI/<YOUR_OS>/grub.cfg
Here,
Run the following command to list all the available directories in the /boot/efi/EFI directory:
$ sudo ls /boot/efi/EFIAs you can see, on my CentOS 7 machine, I have only one directory centos/

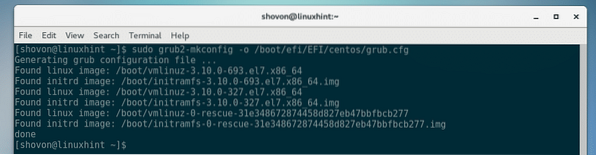
Now to update the GRUB 2 configuration file, run the following command:
$ sudo grub2-mkconfig -o /boot/efi/EFI/centos/grub.cfgOr
$ sudo grub-mkconfig -o /boot/efi/EFI/centos/grub.cfg

The GRUB 2 configuration file should be updated.
Now reboot your computer and you should see your expected entries in the GRUB menu.
Other Usage of grub2-mkconfig and grub-mkconfig:
Suppose you updated the kernel of your favorite Linux distribution. After the installation, you checked the version of your kernel and you're surprised that it was not updated! Oh no!
Well, don't get upset. The grub2-mkconfig or the grub-mkconfig command can also scan the /boot directory to check for installed Linux kernels and generate a GRUB 2 boot entry for each of them.
The commands and the processes are the same as given in the Updating GRUB 2 Configuration File (BIOS) and Updating GRUB 2 Configuration File (UEFI) sections of this article above.
So that's how you use grub2-mkconfig or grub-mkconfig command to solve many boot problems on Linux. Thanks for reading this article.


