Prerequisites
Before we move onto the main step of saving our session, we first need to make sure if the utility. The screen is installed on your systems or not. Screen often comes preinstalled with many Linux distributions today, which you can easily check by running the following command in the terminal:
$ screen --version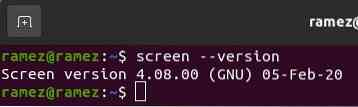
However, if your system does not appear to have Screen installed on your computer systems, then you can simply do so by running the following command in the terminal:
$ sudo apt install screenSaving Screen Session on Rebooting
It is almost impossible to get a screen session that is entirely up to the mark of what you were doing. However, there is still a way to get it as close as possible to its initial state. This can be done by using the .screenrc file and adding some commands inside of it.
What is the .screenrc file?
The .screenrc file, which we will be using to save our screen session, is the user-specific configuration file for your GNU Screen utility. It is similar to the .emacs file of Emacs and is similarly known as the initialization file. Meaning, whenever you start Screen, it will first execute all the commands present in this file and then move to the rest of the stuff. Over here, you can store all the configurations of your screen utility that you want, and it is precisely these configurations that will allow you to save your Screen session.
Let us now look at what the configurations should be.
Configuration for .screenrc file
You can add several different configurations over here that meet your interests, such as turning off the starting welcome page or setting key bindings for easy shortcuts. For saving our Screen session, I mostly use the following configuration file.
# huge scrollback bufferdefscrollback 5000
# no welcome message
startup_message off
# default windows
screen -t Shell 1 bash
screen -t Python 2 python
# layouts
layout autosave on
layout new one
select 1
layout attach one
layout select one
In the above configuration, the scrollback buffer is the amount of text you want to be displayed on your screen. It is always good to keep this large as you will see the text more clearly and do your work easily. The following command is, as mentioned above, to turn your welcome message off.
The default windows are where the main crux of the screen session saving appears. These are the default windows that will be opened on startup. You can specify your important folders where you might be working over here as they will automatically open. In the layouts section, the first command, layout autosave on, is the most important one as it saves your screen sessions. It does this by turning the autosave mode on, and so, with each step you do, it automatically saves your work.
It is important to note that the layout autosave on command only works for explicitly named layouts in your .screenrc, so if you want to save a new layout, you have to either specifically mention it in your .screenrc file or use the following command to save your layout:
$ layout save your_layout_nameAfter adding your configurations in your .screenrc file, once you restart or login again into your Linux system, you will see your screen sessions saved.
3) Third Party Applications
An alternative to using configurations in your .screenrc file is to use third-party applications that provide you with additional tools along with your screen commands to make you do your work more efficiently. One such tool is screen-session, a program with a variety of utilities that you can as it makes working with GNU Screen easier. You can easily save your screen sessions using the save command of this program. It provides several different options for saving your Screen sessions. These include either saving your current session or saving any session of yours.
Saving Current session:
$ scs save -forceSaving any session:
$ screen-session save -S sessionname savedsessionnameIn the command above, the sessionname refers to the name of the session you want to save and the savedsessionname refers to the name which you want to save your session with.
Conclusion:
The Screen utility is extremely useful as it comes to our aid in crucial moments when, by chance, our internet connection gets lost, or our network fails, which, in turn, results in us losing our work. Screen easily lets you run your processes in the background, and as seen above, in case of any mishaps, you can start directly from where it got left off. A tool is definitely worth using.


