In this article, I am going to show you how to configure PXE boot server on Ubuntu 18.04 LTS and boot into Ubuntu 18.04 LTS Desktop Live installer and install it on a computer over the network. So, let's get started.
Network Topology:
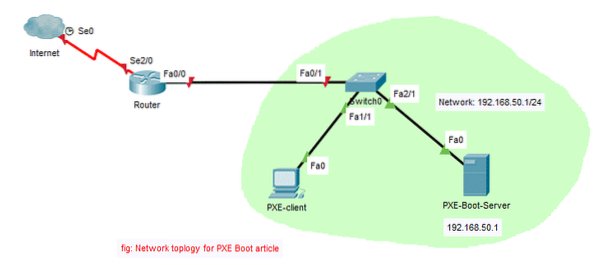
Here, I will configure a PXE boot server in the network. The boot server will also work as a DHCP server. Then, I will boot a Linux Live OS (Ubuntu 18.04 LTS Desktop) on the PXE-client and install Ubuntu 18.04 LTS Desktop there over the network.
Configuring the Network:
I've configured the PXE boot server with a fixed IP address 192.168.50.1 using netplan. I've configured netplan as follows:
$ sudo nano /etc/netplan/50-cloud-init.yaml
As you can see, the fixed IP address 192.168.50.1 is configured on ens38 interface.

Installing and Configuring dnsmasq:
In this article, dnsmasq will act as a DHCP server and TFTP server of the network.
dnsmasq is not installed on Ubuntu 18.04 by default. So, install dnsmasq with the following command:
$ sudo apt update && sudo apt install -y dnsmasq
dnsmasq should be installed.

Now, rename the original /etc/dnsmasq.conf file to /etc/dnsmasq.conf.backup as follows:
$ sudo mv -v /etc/dnsmasq.conf /etc/dnsmasq.conf.backup
Now, create an empty dnsmasq.conf file with the following command:
$ sudo nano /etc/dnsmasq.conf
Now, type in the following lines:
interface=ens38bind-interfaces
domain=linuxhint.local
dhcp-range=ens38,192.168.50.100,192.168.50.240,255.255.255.0,8h
dhcp-option=option:router,192.168.50.1
dhcp-option=option:dns-server,192.168.50.1
dhcp-option=option:dns-server,8.8.8.8
enable-tftp
tftp-root=/netboot/tftp
dhcp-boot=pxelinux.0,linuxhint-s20,192.168.50.1
pxe-prompt="Press F8 for PXE Network boot.", 2
pxe-service=x86PC, "Install OS via PXE",pxelinux
The final configuration file should look as follows. Once you're done typing in everything, save the configuration file by pressing

Now, create the tftp-root directory /netboot/tftp with the following command:
$ sudo mkdir -p /netboot/tftp
Now, restart the dnsmasq server as follows:
$ sudo systemctl restart dnsmasq
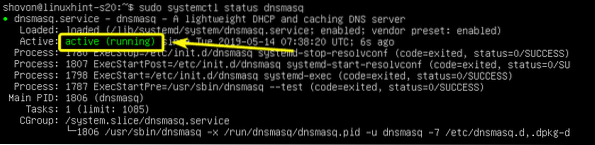
Now, check whether dnsmasq service is running as follows:
$ sudo systemctl status dnsmasqAs you can see, dnsmasq service is running. So, it's configured correctly.
Installing and Configuring NFS Server:
Ubuntu 18.04 LTS Desktop uses casper to boot into Live DVD mode. casper supports network boot via NFS only. So, in order to boot Ubuntu 18.04 LTS and any Ubuntu derivatives via PXE, you need to have a fully functional NFS server accessible over the network.
To install NFS server, run the following command:
$ sudo apt install -y nfs-kernel-server
NFS server should be installed.

Now, create a new directory /netboot/nfs to share via NFS as follows:
$ sudo mkdir /netboot/nfs
Now, open the /etc/exports configuration file as follows:
$ sudo nano /etc/exports
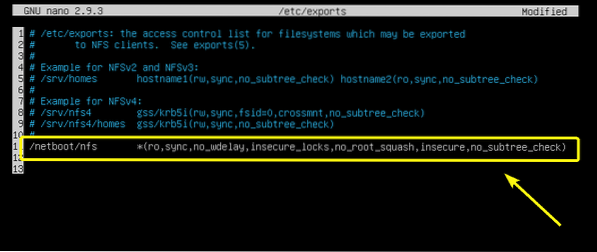
Now, add the following line at the end of the file:
/netboot/nfs *(ro,sync,no_wdelay,insecure_locks,no_root_squash,insecure,no_subtree_check)The final configuration file should look as follows. Once you're done, save the file.
Now, make the share available with the following command:
$ sudo exportfs -a
Installing Required PXE Boot Files:
Now, you have to install all the required bootloader files for PXE booting. To do that, run the following command:
$ sudo apt install -y syslinux pxelinux
Now, you have to copy all the required files to the /netboot/tftp/ directory.
Copy the pxelinux.0 file to the /netboot/tftp directory as follows:
$ sudo cp -v /usr/lib/PXELINUX/pxelinux.0 /netboot/tftp/
Now, copy ldlinux.c32, libcom32.c32, libutil.c32, vesamenu.c32 files to the /netboot/tftp directory as follows:
$ sudo cp -v /usr/lib/syslinux/modules/bios/ldlinux.c32,libcom32.c32,libutil.c32,vesamenu.c32 /netboot/tftp

Now, create PXE bootloader configuration directory /netboot/tftp/pxelinux.cfg/ as follows:
$ sudo mkdir /netboot/tftp/pxelinux.cfg
Now, create PXE bootloader's default configuration file /netboot/tftp/pxelinux.cfg/default as follows:
$ sudo touch /netboot/tftp/pxelinux.cfg/default
TFTP server is now able to serve all the required bootloader files over the network.
Preparing Ubuntu 18.04 LTS Desktop for PXE Boot:
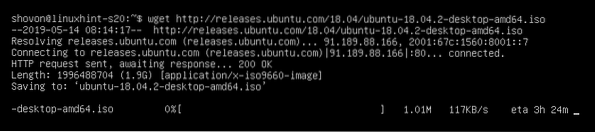
Now, download the Ubuntu 18.04 LTS Live Desktop ISO image with the following command:
$ wget http://releases.ubuntu.com/18.04/ubuntu-18.04.2-desktop-amd64.iso
It will take a while to complete.
Once the ISO image file is downloaded, mount the ISO file on the /mnt directory as follows:
$ sudo mount -o loop ubuntu-18.04.2-desktop-amd64.iso /mnt
Now, create dedicated directories for Ubuntu 18.04 LTS /netboot/nfs/ubuntu1804/ and /netboot/tftp/ubuntu1804/ as follows:
$ sudo mkdir -v /netboot/nfs,tftp/ubuntu1804
Now, copy the contents of the ISO file to the NFS directory /netboot/nfs/ubuntu1804/ as follows:
$ sudo cp -Rfv /mnt/* /netboot/nfs/ubuntu1804/
The contents of the ISO file should be copied.

Now, copy the vmlinuz and initrd files to the /netboot/tftp/ubuntu1804/ directory as follows:

Now, change the permission of the /netboot directory as follows:
$ sudo chmod -Rfv 777 /netboot
Now, you can unmount the Ubuntu 18.04 LTS ISO image and delete it if you want.
$ sudo umount /mnt$ rm ubuntu-18.04.2-desktop-amd64.iso
Adding PXE Boot Entry for Ubuntu 18.04 LTS:
Now, you have to add a boot entry for Ubuntu 18.04 LTS on the /netboot/tftp/pxelinux.cfg/default file.
Open the PXE boot menu configuration file /netboot/tftp/pxelinux.cfg/default for editing as follows:
$ sudo nano /netboot/tftp/pxelinux.cfg/default
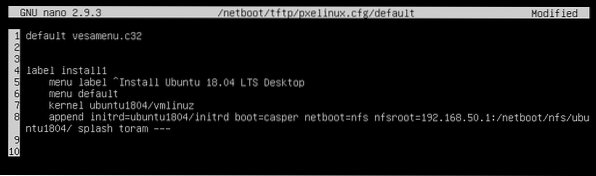
Now, add the following lines to the file.
default vesamenu.c32label install1
menu label ^Install Ubuntu 18.04 LTS Desktop
menu default
kernel ubuntu1804/vmlinuz
append initrd=ubuntu1804/initrd boot=casper netboot=nfs nfsroot=192.168.50.1:/
netboot/nfs/ubuntu1804/ splash toram ---
The final configuration file should look as follows. Now, save the configuration file.
Installing Ubuntu 18.04 LTS via PXE:
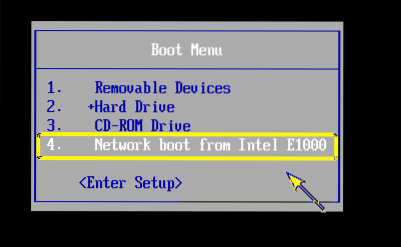
Now, on the PXE client where you want to install Ubuntu 18.04 LTS over the network via PXE, go to the BIOS and network Network Boot.
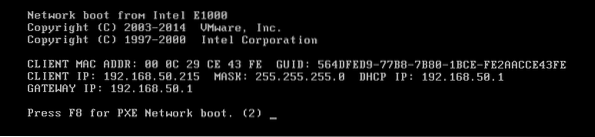
When you see the following message, press
Now, select Install OS via PXE and press
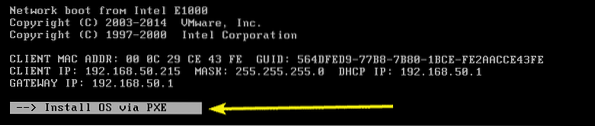
You will only have one option. So, just press
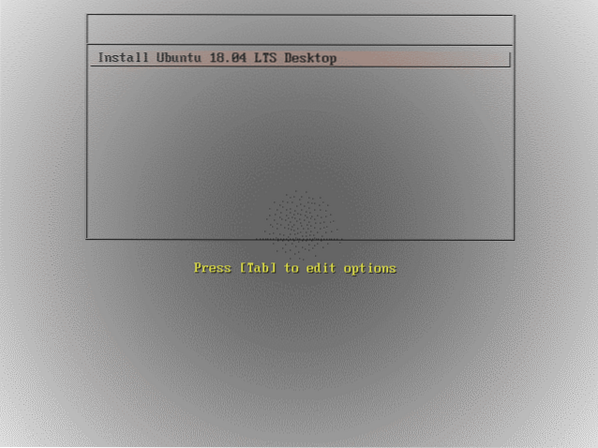
As you can see, Ubuntu 18.04 LTS splash screen is displayed. It's loading. It may take a while depending on the speed of your network connection.

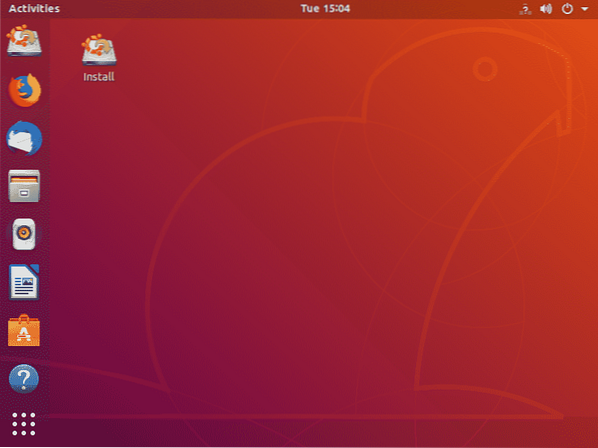
Ubuntu 18.04 LTS should be loaded. Now, you can install it on your client machine.
So, that's how you configure PXE network boot server on Ubuntu 18.04 LTS. Thanks for reading this article.


