

User Management becomes a critical consideration when you want to add multiple users to the system. If the user management on your system is not effective, you may have to compromise the security and access of the private and sensitive information residing on your system. This article provides you with simple techniques that you can utilize in order to have an effective user management control. It includes user and group management procedures, both through the UI and the command line that you can perform through very basic steps.
We are running the commands and processes described in this article on an Ubuntu 18.04 system. Please note that you need to have root privileges to perform any of the tasks mentioned here. So let us first understand what is root?
Understanding root user
Before starting with user management, it is important to have some understanding of the root user in Linux. Ubuntu, by default, does not allow the root user to login directly (other Linux distributions like Debian and CentOS allow direct root logins though); Ubuntu has hence created a functionality by the name of “sudo” which you can use to perform various administrative operations. You need to provide a password with the sudo command that helps in keeping an accountability for all actions of the user as an administrator. By default, the first user created when you install Ubuntu is given the sudo rights. It is given complete root privileges and is added to the list of sudoers in /etc/sudoers file.
It is important to note that you need to be an authorized sudoer to perform all the user management operations explained in this article.
Managing Users
You can add users to the Ubuntu system through the UI; however, advance user management needs to be done through the command line.
Adding a User through the GUI
Please follow these steps in order to add a user through Ubuntu's graphical interface:
Open the Account Settings dialog either through Ubuntu Dash or by clicking the down-arrow located at the top right corner of your Ubuntu screen. Click your username and then select Account Settings as follows:
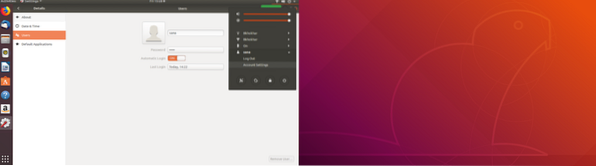
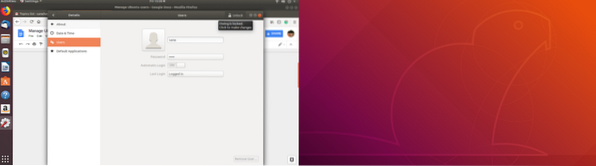
The following Users dialog will open. Please note that all the fields will be disabled by default. You will need to provide authentication in order to work further with this dialog. Click the Unlock button located in the top right corner of the Users dialog.
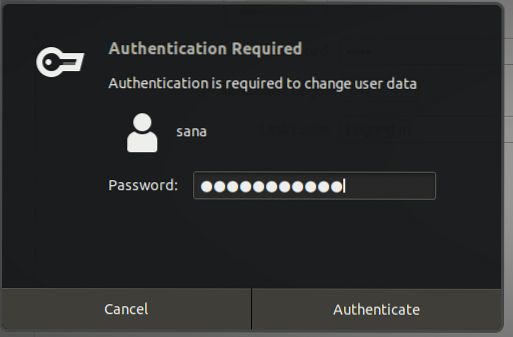
The following Authentication dialog will open for you to provide authentication information as an administrator because only this way you will be able to create or edit user accounts:
 Advertisement
Please provide your password and then click the Authenticate button. You will now be able to see that all the fields in the Users dialog are enabled for you to work on:

Click the Add User button. The following Add User dialog will open for you to enter details of the new user you want to create:
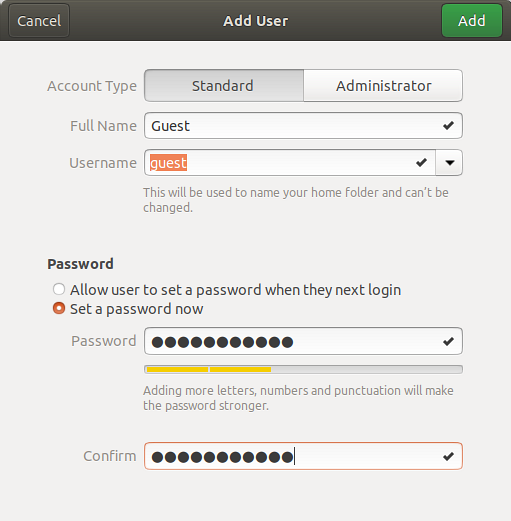
You can specify if you want to create a Standard or an Administrative user through this dialog. It is also important to know that it is not a good security practice to leave the password field empty for the new user. This way any user can log in and access private and secure data on your system.
Click the Add button which will only be enabled when you have provided all the valid information in the Add User dialog.
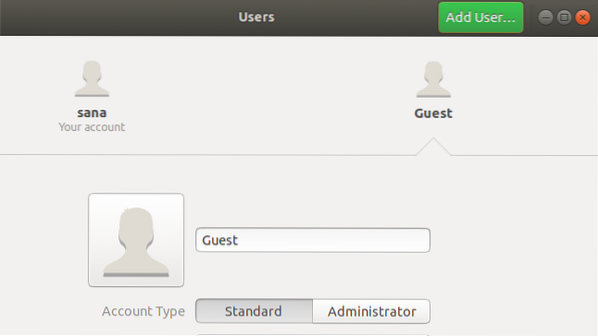
The new user will now be created and you will be able to see it in the Users dialog as follows:
Adding A User Through the Command Line
The Ubuntu command line gives more control to an administrator to perform user management operations. Please follow the following steps in order to add a user through the command line:
- Open the Terminal by pressing Ctrl+Alt+T or through the Ubuntu Dash.
- Enter the following command in order to add a new user:
$ sudo adduser [username]
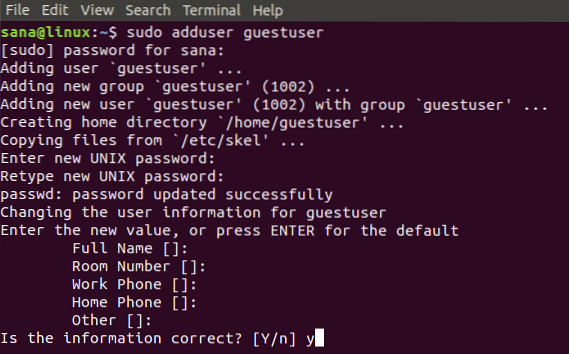
You will be required to enter a password for sudo. You will also be asked to type and retype password(for re-confirmation) for the new user. You can choose to provide or ignore entering biodata of the new user as it is optional.
Enter Y if the information you provided is correct and then hit the Enter key.
The new user will now be created on your Ubuntu system.
Listing All Users
As an Ubuntu administrator, you can view the list of users added to your system through the following command:
$ awk -F':"$2 ~ "\$" print $1' /etc/shadow

In this image, sana is the administrator, guest is the user we created through the UI and guest user is the user we created through the command line.
Locking/Unlocking User Accounts
Ubuntu lets you temporarily lock and unlock any user account through the following commands:
$ sudo passwd -l username $ sudo passwd -u username
The locked user will not be able to log on to the system until the time he/she is in the locked state.
Giving Root Privilege to a User
If you want to give root privilege to a user, you will need to edit the visudo file that contains the list of sudoers on your system.
Open the visudo file through the following command:
$ sudo nano visudo
This command will open the visudo file in the Nano editor.
Add the following lines in the file:
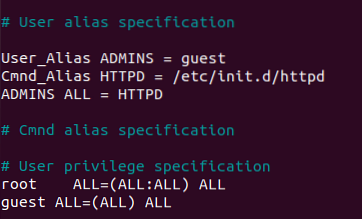
[username] ALL=(ALL) ALL
This line will give full root rights to the specified user.
User_Alias ADMINS = [username] Cmnd_Alias HTTPD = /etc/init.d/httpd ADMINS ALL = HTTPD
These lines will create a group of users that you can then assign command aliases to.
Exit the file through Ctrl+X, and then enter Y and Enter in order to save the changes you made to the visudo file.
The 'guest' user from our example will now be able to perform all the root operations.
Deleting a User Through the Command Line
You can delete a user through the command line by using the following command:
$ sudo deluser [username]

In this example, we have deleted the guest user. Please remember that if a user is deleted from a group which has no more members, that user group will also automatically be deleted.
Deleting a User Through the GUI
You can perform the simple task of deleting a user through the graphical interface as follows:
- Open the Account Settings dialog either through Ubuntu dash or by clicking the down-arrow located at the top right corner of your Ubuntu screen. Click your username and then select Account Settings.
- The Users dialog will open. Please note that all the fields will be disabled. You will need to provide authentication in order to work further with this dialog. Click the Unlock button located in the top right corner of the Users dialog.
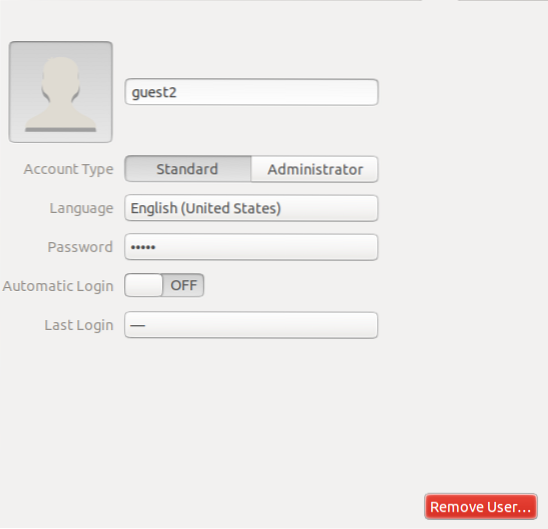
- Select the username of the user you want to delete and then click the Remove User button as follows:
You will be asked if you want to discard or keep the removed user's files from your system through the following dialog
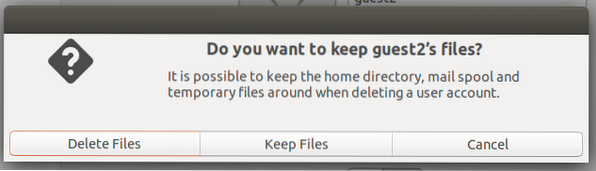
You can choose to delete or keep the files through the respective buttons. The user will then be deleted from your system
Deleting/archiving a Deleted User's Home Folder
When you delete a user from your system, its home folder may still reside on your computer depending on the choice you made while deleting the user. You can delete this folder manually or archive it. A new user that you create with the same user ID or group ID as that of the deleted user will now be able to access his/her folder. You may want to change these UID/GID values to something more appropriate, such as the root account, You can even choose to relocate the folder to avoid future conflicts through the following commands:
$ sudo chown -R root:root /home/username/ $ sudo mkdir /home/archived_users/ $ sudo mv /home/username /home/archived_users/
Managing Groups
Ubuntu lets you create groups for the users on your system. This way you can assign administrative rights and file access to an entire group rather than a single user at a time.
You can perform Group Management on Ubuntu 18 only through the command line.
Adding a Group
In order to add a new user group, please enter the following command:
$ sudo addgroup [groupname]
Example:
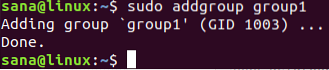
A new group will be created and a unique group ID(GID) will be assigned to it.
Adding Users to a Group
You can add an already existing user to a group through the following command:
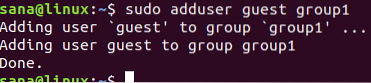
$ sudo adduser [username] [groupname]
Example:
Viewing Group Information
In order to view members of a group, use the following command:
$ groups username
You can use the following command to list the group members along with their GIDs
$ id username

The gid output represents the primary group assigned to a user. Please read further to know what is a primary and secondary group.
Changing Primary Group Of a User
A user can be a part of one or multiple groups; one of it being the primary group and the others are the secondary groups. In the output of the id command, the gid indicates the primary group of the user. In order to change the primary group of a user, use the following command:
$ sudo usermod -g [newPrimaryGroup] [username]
Example:

You can now see that the new gip fetched through the id command is that of the newly assigned primary group.
Assigning Group While Creating a User
You can assign a group to a user simultaneously while creating a new user as follows:
$ sudo useradd -G [groupname] [username]
Example:

Set or change the password for the user
Please note that this new user has not been assigned a password. It is not a good security practice, therefore you should assign the password to this new user as soon as possible through the following command:
$ sudo passwd [username]
Example:
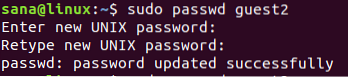
The new user will now have a password.
Please see in the following UI image how a user account has been disabled by the system before it is assigned a password.

Listing All Groups
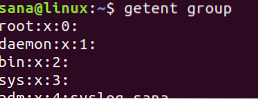
You can list all the groups residing on your system through the following command:
$ sudo getent group
Deleting a Group
In order to delete a user group from your system, you can use the following command:
$ sudo delgroup [groupname]
This article explained how you can manage users and groups on your Ubuntu system for effective rights and privilege control. You can manage users as an administrator or give administrative rights to other users to perform these operations through the helpful steps described in this tutorial.


