LXD Basics: What is it? And how to use it?
LXD containerization has not gotten the limelight that Docker did, but it is in fact much closer to the core idea of operating system virtualization. But before we get there, let's talk about the contemporary hardware level virtualization.
Hardware virtualization
The traditional way with which VMware, VirtualBox, KVM and similar technologies work is this - You have a server grade computer, say a high-end Xeon processor with 512 GB of RAM, known as the bare metal. You install an operating system on this, which would then run either VMware, Virtualbox or KVM.
These are various hypervisors, and the operating system that runs them is the host operating system.
Now, what the hypervisor offers is this - It emulates CPU, networking interfaces, storage disks, memory, I/O and other resources such that a new operating system can be installed on top of this set of virtual hardware. This new operating system is the guest operating system and it runs on virtual hardware, as it would if it were installed on a physical machine, but there's a catch.
If you are thinking, “But emulating various hardware devices using the actual hardware sounds inefficient and slow.” You are absolutely correct. Hardware level virtualization is slow and inefficient.
Moreover, operating systems themselves are control freaks. If you allocate a guest OS 1GB of RAM and 2 CPU cores, it will happily take all of the resources even if the applications running inside it are only using a fraction of it. These resources will be unavailable for the hypervisor to use elsewhere.
This severely limits the number of VMs that can run on top of a hypervisor. If you are a cloud hosting provider, this means your bottom-line is going to be hit badly.
The container way of doing things
The idea of virtualized hardware gets thrown out of the window when we start talking about containers and specifically LXD. Instead of emulating individual hardware resources what we try to do is virtualize the operating system.
When an LX container is spun up, the OS offers itself (that is the kernel, the libraries all all the resources available to it) to the applications running inside the container. Users and apps inside this container will not be aware of applications and packages running outside it, and vice versa.
As far as the resource allocation is concerned, you can simply make a note to not allow a particular container to use more than, say, 2GB of RAM and 2 CPUs. This way, when the apps running inside a container don't do anything intensive the resources can be allocated elsewhere on the host environment.
However, when the apps are running under heavy load they get the bare metal performance!
The obvious short-coming of this is that you can't run any arbitrary operating system as guest. Because different operating systems have different architectures altogether. Luckily for GNU/Linux users, the Linux kernel offers such a tight ABI compatibility that you can emulate different distributions on top of same kernel. So you can run CentOS binaries and Ubuntu applications on the same metal just in different containers.
LXD init
LX containerization is a well-tested and robust technology for Linux-based operating systems. It has two major components, one is LXC which is what manages container configurations, image files, etc and then there is LXD which is the daemon running on your host ensuring that all the policies set for containerization are being followed.
It comes installed by default on Ubuntu Server 16.04 LTS, if you are using the desktop distro, run:
$ apt install lxd lxd-client
Once that is done, you are required to initialize various parameters. The following command would run you through them:
$ lxd init

You can select default options from here on. The most involved thing would be setting up network interfaces. When asked for the LXD networking setup, select the default option yes.

1 Answer yes, again, when prompted for setting network
Next window will ask for network interface name (as seen on the host), leave it at the default value lxdbr0.
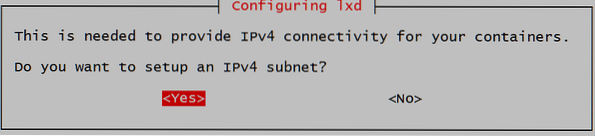
The IPv4 subnet setting would come after this. It would allow different LX containers to talk to each other as if they are different computers on a local network. Select yes for this.
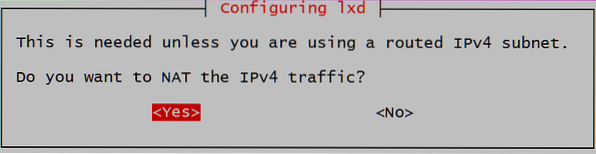
Next there will be several 10.202.X.X addresses shown each with a different role on this subnet. You can hit enter without any need to tweak the options. When asked for NAT configuration, select yes.
This enables your containers to get connectivity to the internet, using the public IP of the host, much the same way your laptop and other devices do through the home router (with port forwarding).
The last option about IPv6 subnet is completely optional and I would recommend you omit it for now. Say no, when prompted for IPv6 options.
Spinning up the containers
To run a new instance of, say, Ubuntu 16.04, run the following command:
$lxc launch ubuntu:16.04 name_of_your_container
Since this is the first time you are running a Ubuntu server, it will take time to retrieve the container image from the remote repositories. Once that is done, you can see the details about the launched container, by running the command:
$lxc list

In this example the name of the container is cont1.
If you want to get inside the container, run the command;
$lxc exec name_of_your_container bash
This will drop you into the bash shell running inside that container. It would smell and feel like a fresh installation of Ubuntu 16.04 and you can freely install packages inside it and do various experiments which you would not risk your main installation.
Now that you have the image file locally stored on your host system, you can spin up Ubuntu containers very quickly and use them as disposable systems.
To stop and delete an LX container, run;
$lxc stop Container_name $lxc delete container_name
Use lxc launch command, as you did the first time to spin up new containers.
Where to go from here
Now that you know what the architecture of LXD is you may want to start exploring topics like networking and storage for containers and how to configure them to suite your workload.
You may also want to learn about the main differences between Docker and LXD and what might actually fit your needs better. If you want to use ZFS as your storage backend (as you should!) you may want to check out this tutorial on ZFS basics.


