In this article, I will show you how to install Ubuntu MATE on Raspberry Pi. I am using Raspberry Pi 3 Model B for the demonstration. But the procedures are the same for any model of Raspberry Pi 2 and Raspberry Pi 3 single board computers. So, let's get started.
Things You Need:
To follow this article, you need,
- A Raspberry Pi 2 or Raspberry Pi 3 single board computer.
- A microSD card (16GB or more).
- Internet connectivity.
- A computer for downloading and flashing Ubuntu MATE on the microSD card.
- A HDMI cable and a monitor.
- A good quality Android phone charger for powering up Raspberry Pi.
- A USB keyboard and a USB mouse.
Downloading Ubuntu MATE for Raspberry Pi:
At the time of this writing, Ubuntu MATE has support for Raspberry Pi 2 and Raspberry Pi 3.
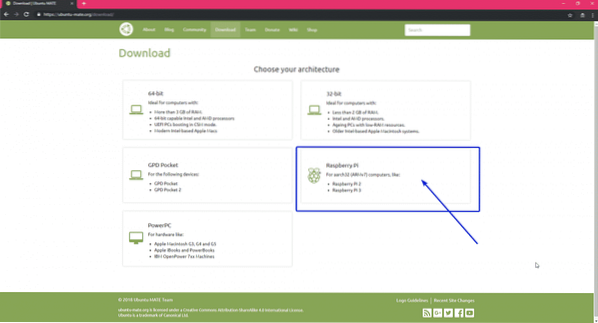
To download the Ubuntu MATE image for Raspberry Pi 2 or Raspberry Pi 3, go to the official website of Ubuntu MATE at https://ubuntu-mate.org/download/
When the page loads, click on Raspberry Pi architecture as marked in the screenshot below.
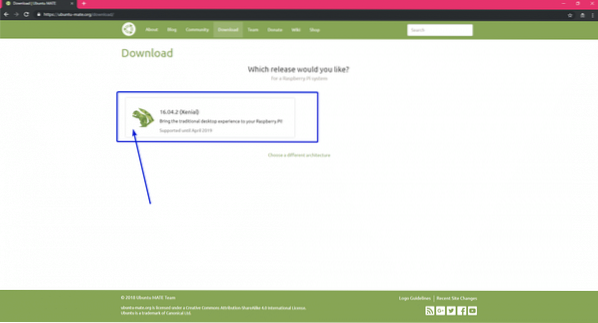
At the time of this writing, you can only install Ubuntu MATE 16.04 (Xenial Xerus) on Raspberry Pi 2 and Raspberry Pi 3. Click on the Ubuntu MATE 16.04.2 (Xenial) icon as marked in the screenshot below.
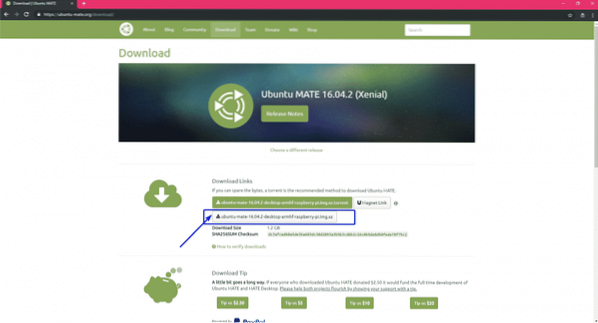
Now, click on the download link as marked in the screenshot below.
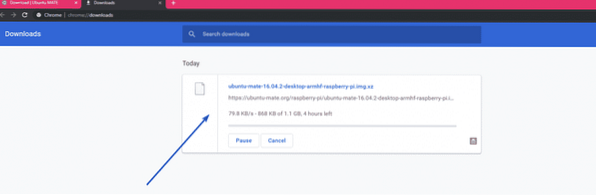
As you can see, the download has started. It should take a while to finish.
Flashing Ubuntu MATE to microSD Card:
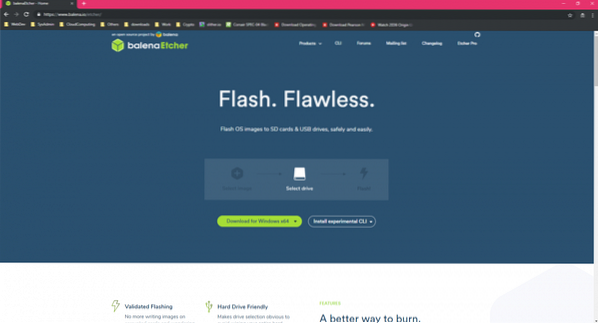
You can flash Ubuntu MATE image to the microSD card very easily using Etcher. Etcher is available for Windows, Mac and Linux. It is free to download and use. You can download Etcher from the official website of Etcher at https://www.balena.io/etcher/
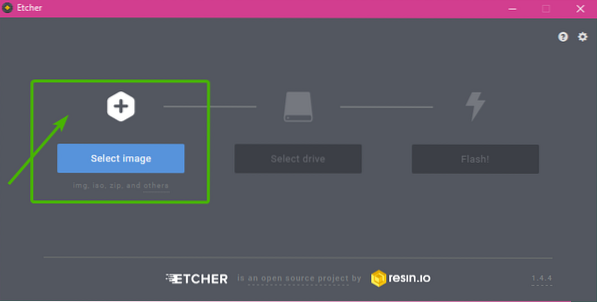
Once you download and install Etcher, you're good to go.
First, insert the microSD card on your computer and open Etcher. Now, click on Select image.
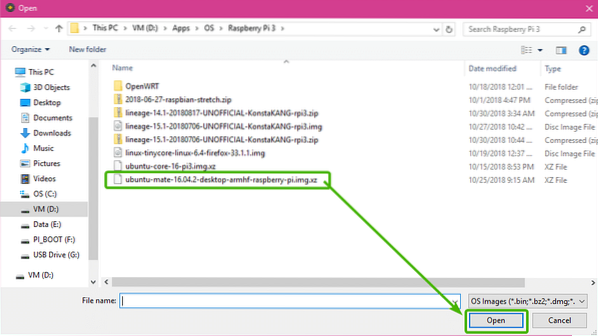
A file picker should be opened. Now, select the Ubuntu MATE image that you just downloaded and click on Open.
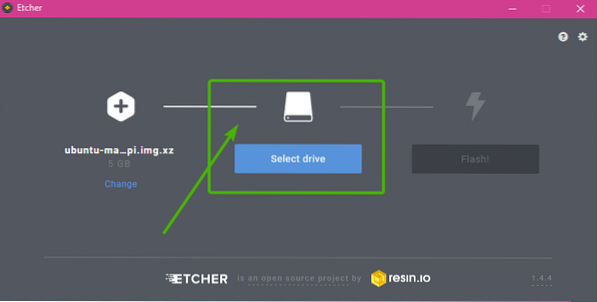
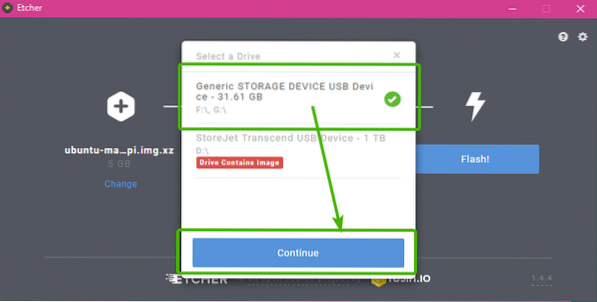
Now, click on Select drive.
Now, select the microSD card from the list and click on Continue.
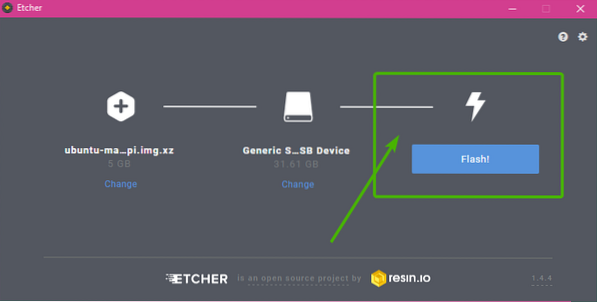
Now, click on Flash!.
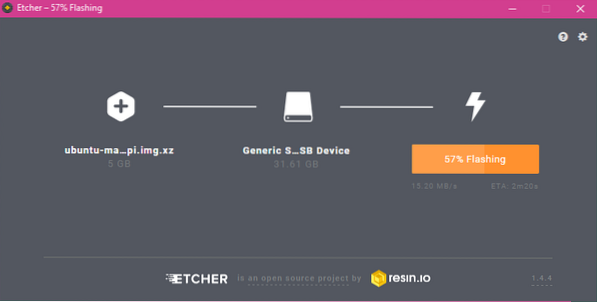
Etcher should start copying all the necessary data on your microSD card. It may take a while to complete.
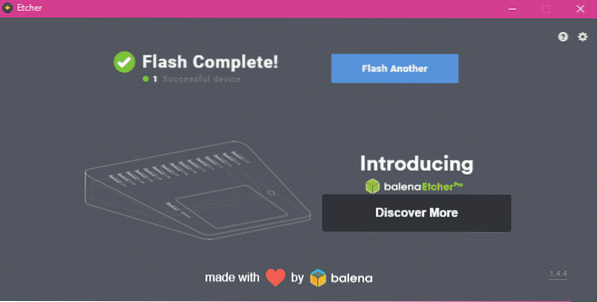
Once your microSD card is flashed, you will see the following window. Just close it and eject the microSD card from your computer.
Setting Up the Raspberry Pi and Booting into Ubuntu MATE:
Now you have to connect all the necessary components to your Raspberry Pi before you turn it on.
- First, insert the microSD card on your Raspberry Pi.
- Now, connect the HDMI cable to your Raspberry Pi.
- Then, connect the USB keyboard and mouse to your Raspberry Pi.
Finally, connect the micro USB cable of your Android phone charger to you Raspberry Pi and power it on.
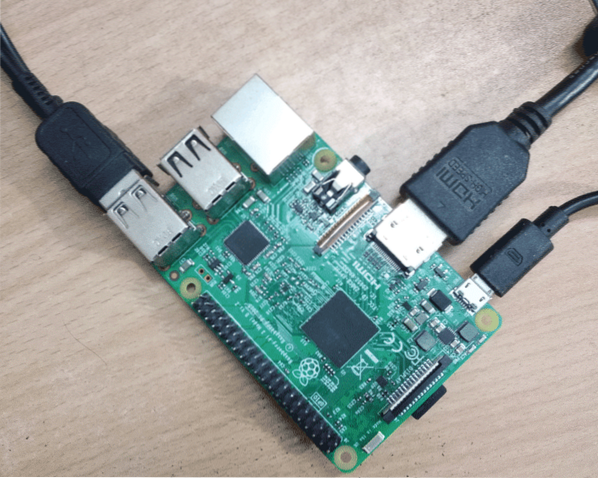
Fig: My Raspberry Pi 3 Model B after connecting all the components.
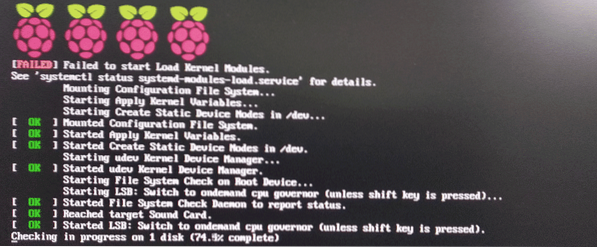
Your Raspberry Pi should boot as you can see in the screenshot below.
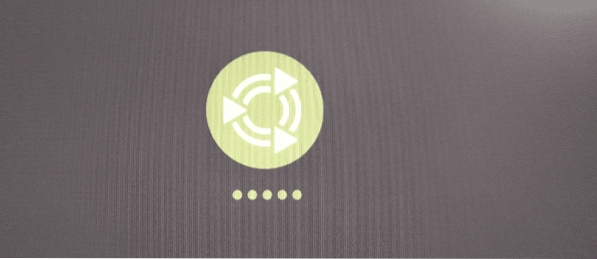
You should also see the Ubuntu MATE logo as follows.
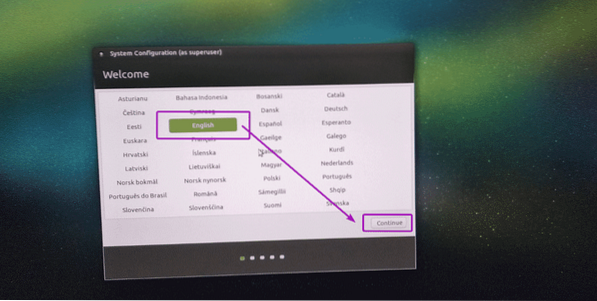
The first time you boot into Ubuntu MATE, you should be presented with the System Configuration window as you can see in the screenshot below.
First, select your language and click on Continue as marked in the screenshot below.
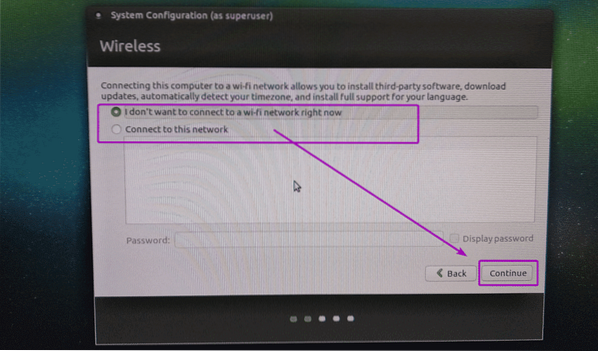
Now, you can connect to your Wireless network (Wi-Fi) from here. If you don't want to connect to your Wi-Fi network now, select I don't want to connect to a wi-fi network right now and click on Continue.
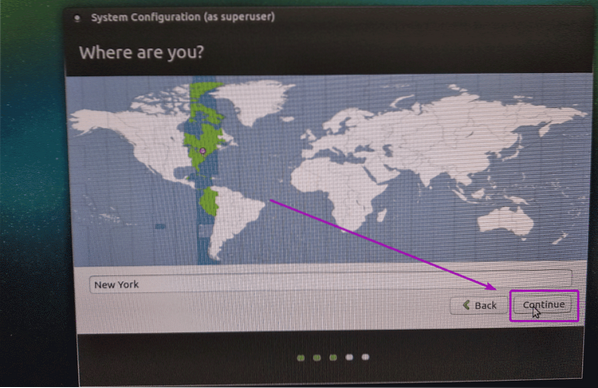
Now, select your location and click on Continue.
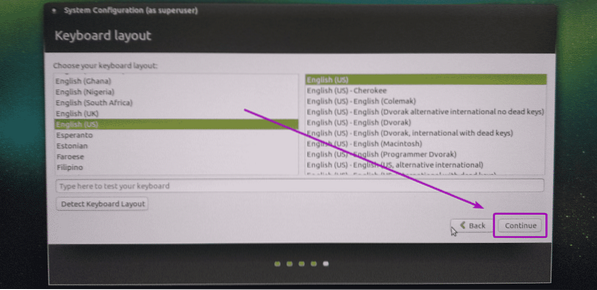
Now, select your keyboard layout and click on Continue.
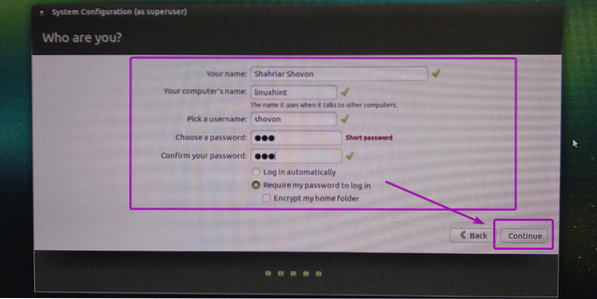
Now, type in your personal information and click on Continue.
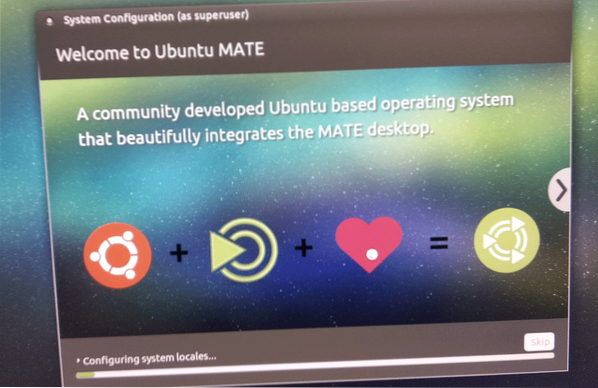
As you can see, Ubuntu MATE is being configured…
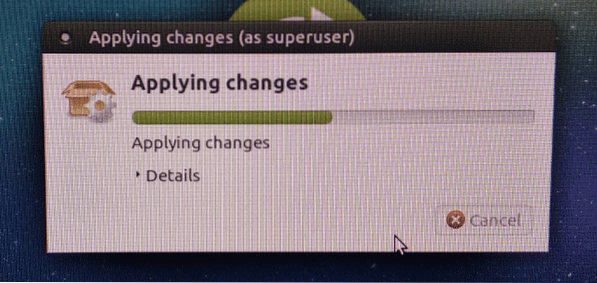
The changes are being saved…
Once the configuration is saved, your Raspberry Pi should reboot. After a while, a login window should show up as you can see in the screenshot below.
Just type in the credentials and click on Log In.

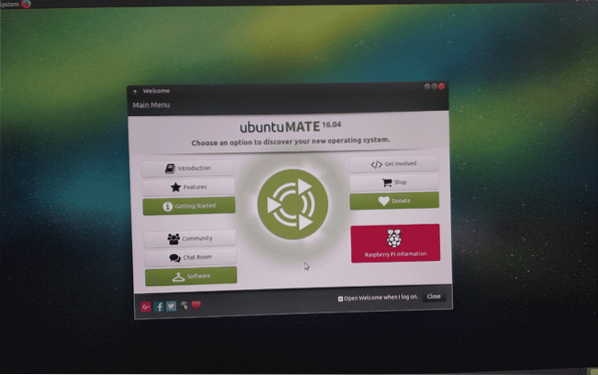
Once you're logged in, you should see the Ubuntu MATE welcome screen.
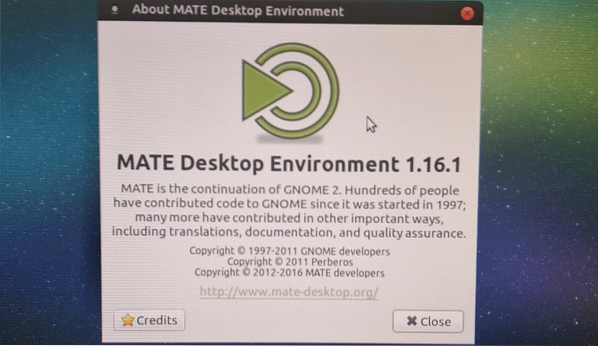
As you can see, I am running MATE desktop environment version 1.16.1.
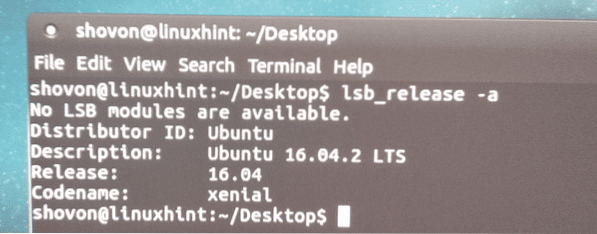
The output of the lsb_release command:
As you can see, Ubuntu MATE on my Raspberry Pi 3 Model B is using only 261.9MB of RAM.

My Thoughts on Ubuntu MATE on Raspberry Pi:
If you want to install Ubuntu on your Raspberry Pi devices, you can go with Ubuntu Core, which is Ubuntu made specially for IoT projects. But the problem is, on Ubuntu Core, you can only install SNAP packages. There are not too many SNAP packages available. For example, if you want to set up a basic graphical desktop environment, then you can't do it on Ubuntu Core.
So, if you like the traditional APT package manager and want to use a wide range of software available in the official Ubuntu package repository on your Raspberry Pi, then Ubuntu MATE is a great alternative. On Ubuntu MATE for Raspberry Pi, you get the APT package manager just like you have on your Ubuntu desktop. You don't have to learn anything new here if you've already used Ubuntu before.
On Ubuntu MATE for Raspberry Pi, the Wi-Fi, Bluetooth drivers are pre-installed and works out of the box. Most of the things you need for your Raspberry Pi projects are included on Ubuntu MATE by default.
The MATE desktop environment is very responsive on Raspberry Pi 3 Model B, the one I have. I really like it. I tried different operating systems on my Raspberry Pi 3 Model B, and among them I found Ubuntu MATE to be the best.
So, that's how you install Ubuntu MATE on your Raspberry Pi single board computer. Thanks for reading this article.


