After reading the title of the post you must be thinking “Creating Silhouettes”? Why would I need to create a silhouette ? Well the answer lies in its meaning, silhouettes means A drawing consisting of the outline of something, especially a human profile, filled in with a solid color.
Silhouettes can help you in creating really professional presentations. You must be thinking HOW? Well, let's take an example. Suppose you want to present the demographics of a particular city in your presentation. To represent two genders male and female, what will you like to choose? Real pictures or just representations? Real pictures won't work in professional presentation as generally you are not presenting for particular sex, creed, race or religion. So we just representations or commonly known as Silhouettes.
Create Silhouette in PowerPoint
Let us understand how we can do this.
- Open Microsoft PowerPoint 2010
- Add the image which you want to represent as Silhouette.

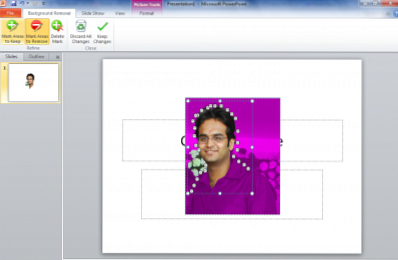
- Now Remove the background of the image. When you click on Remove Background you see a window having various options like Mark Areas to Keep, Mark Areas to Remove etc.
- When you are doing with marking areas to remove and keep then click on Keep Changes. Now right-click on the image which is left after the removing background.
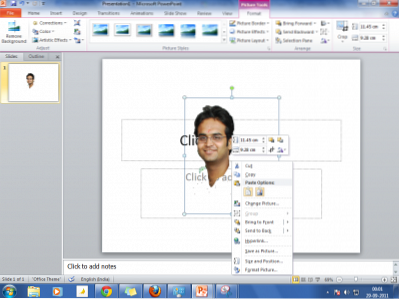
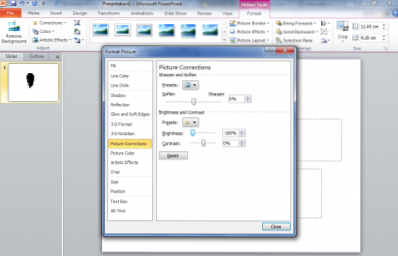
- Click on Format Picture and change the brightness level to -100%.
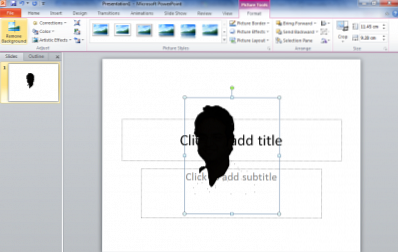
- Your silhouette is ready for use. I understand that it might not look exactly a silhouette as I am not good at the creative aspect you if you wisely mark areas then you will get perfect silhouette.
 I hope you like this article. Do share your comments and suggestions.


