There are 2 types of network bridges, a private network bridge, and a public network bridge.
Private Network Bridge: A private network bridge is like a virtual router. It assigns itself a private IP address and creates a DHCP server. The KVM virtual machines that are connected to this network bridge get IP addresses via the DHCP server of the bridge. The network bridge uses NAT (Network Address Translation) to provide internet connectivity to the KVM virtual machines. The KVM virtual machines that are connected to the private network bridge can communicate between themselves. The KVM host (where the virtual machines are running) can directly access the virtual machines as well. But the virtual machines are not accessible from the outside network.
Public Network Bridge: A public network bridge is like a virtual switch. You can connect one physical network interface to the bridge, and the KVM virtual machines that use the network bridge will assign themselves IP addresses using the DHCP server running on the router on which the physical network interface is connected to. If a public network bridge is used, the KVM virtual machines connected to it will get IP addresses from your physical router or network devices. The KVM virtual machines will be accessible from each other, the KVM host as well as the outside network.
In this article, I am going to show you how to create private and public KVM network bridges on CentOS 8. So, let's get started.
Prerequisites:
If you want to try out the examples from this article, you must have KVM installed on your CentOS 8 machine. If you don't have KVM installed on your CentOS 8 machine, you can read my article Install KVM on CentOS 8 at LinuxHint.com for assistance on installing KVM on CentOS 8.
You should also have a KVM virtual machine created on your CentOS 8 KVM host. This way, you can practice changing the network interface of the virtual machine as well.
Creating a KVM Private Network Bridge:
By default, KVM creates a default private network bridge. The network bridge uses a class C private IP subnet by default. In my case, it uses 192.168.122.0/24 subnet.
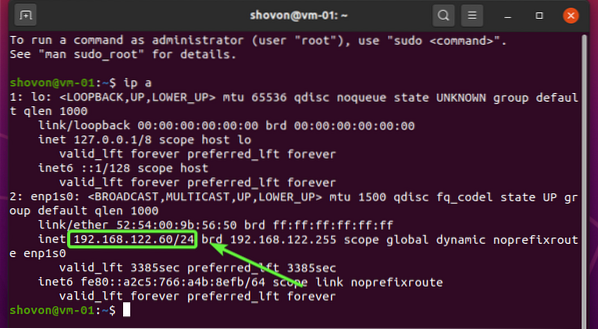
As you can see, my KVM virtual machine that uses the default private network bridge got the IP address 192.168.122.60 which is an IP address from the 192.168.122.0/24 subnet.
In this section, I am going to show you how to create a new KVM private bridge network interface.
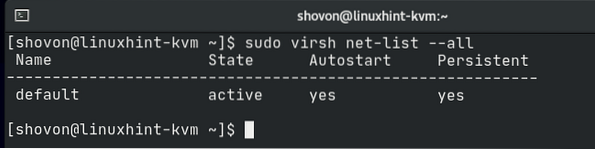
You can list all the available network interfaces of KVM with the following command:
$ sudo virsh net-list --allAs you can see, the default network interface is listed.
KVM uses XML extensively for its configuration.
To see how the default network bridge is configured in XML, run the following command:
$ sudo virsh net-edit default
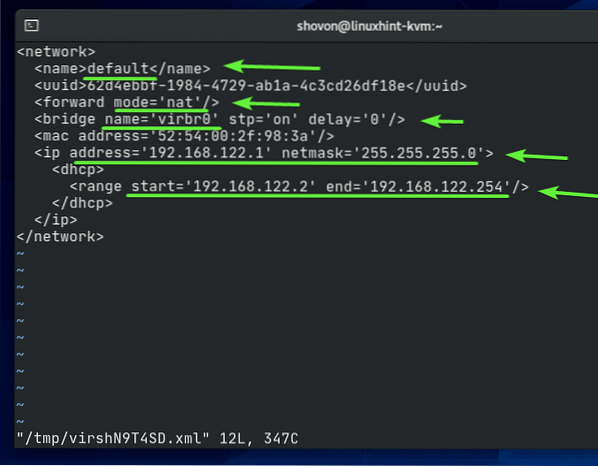
The XML configuration file of the default network bridge is shown in the screenshot below. As you can see, the network bridge name is the default. The forward mode is nat or Network Address Translation. The network bridge interface name is virbr0. The ip address of the bridge is 192.168.122.1 and the subnet mask is 255.255.255.0. The DHCP server of the network bridge is configured in the dhcp block. Here, the DHCP address range is 192.168.122.2 to 192.168.122.254. So, the virtual machines will get IP addresses starting from 192.168.122.2 to 192.168.122.254.
To create your own KVM private network bridge, create a new XML file private.xml with the following command:
$ nano private.xml
Type in the following lines in your private.xml file.
Once you're done, press

The KVM network name will be private.

The bridge will use Network Address Translation for the internet connectivity of KVM virtual machines.

The network bridge interface name will be virbr1.

The network bridge will use the 192.168.150.0/24 private network subnet and will assign the IP address 192.168.150.1 for the bridge interface virbr1.

KVM will run a DHCP server for the network bridge. It will supply IP addresses to the virtual machines using this network bridge. The KVM virtual machines will be assigned IP addresses within the range 192.168.150.100 to 192.168.150.254.

To create the private network bridge using the private.xml XML configuration file, run the following command:
$ sudo virsh net-define private.xml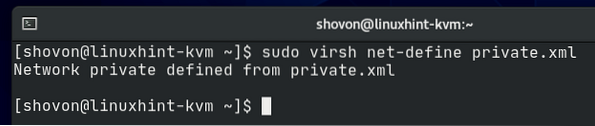
As you can see, the private network bridge is created. It is inactive at the moment.
$ sudo virsh net-list --all
You can activate the private network bridge with the following command:
$ sudo virsh net-start private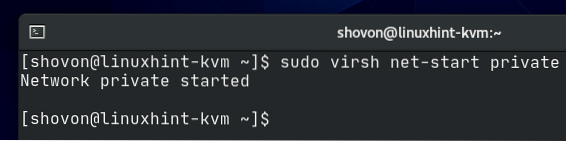
As you can see, the private bridge network is activated.
$ sudo virsh net-list --all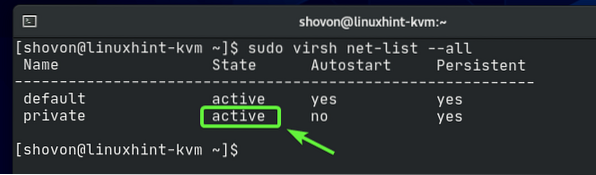
As you can see, a network bridge interface virbr1 is created and it is assigned an IP address 192.168.150.1.
$ ip a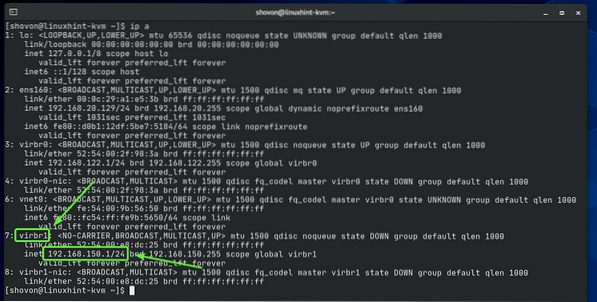
As you can see, the network bridge private won't automatically start on boot. As everything is working, it's a good idea to automatically start the network bridge on boot.
$ sudo virsh net-list --all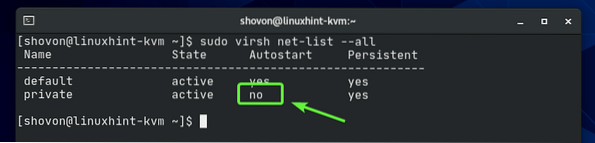
To allow the private network bridge to automatically start on boot, run the following command:
$ sudo virsh net-autostart private
The network bridge private should automatically start on boot from now on.
$ sudo virsh net-list --all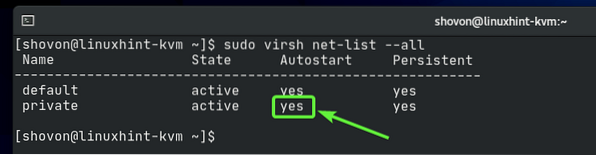
Now, let's configure a KVM virtual machine to use the newly created private network bridge.
As you can see, I already have a KVM virtual machine udesktop20_04-01 running on my CentOS 8 KVM host.
$ sudo virsh list --all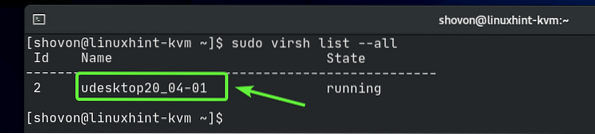
Before you change the configuration of your KVM virtual machine, make sure that it's powered off. If your KVM virtual machine is running, you can shut it down with the following command:
$ sudo virsh shutdown udesktop20_04-01
Your KVM virtual machine should be powered off.
$ sudo virsh list --all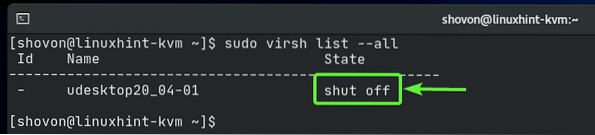
To edit the configuration of your KVM virtual machine, run the following command:
$ sudo virsh edit udesktop20_04-01
All the KVM configuration files are in XML format. The KVM virtual machine configuration files are no exception.
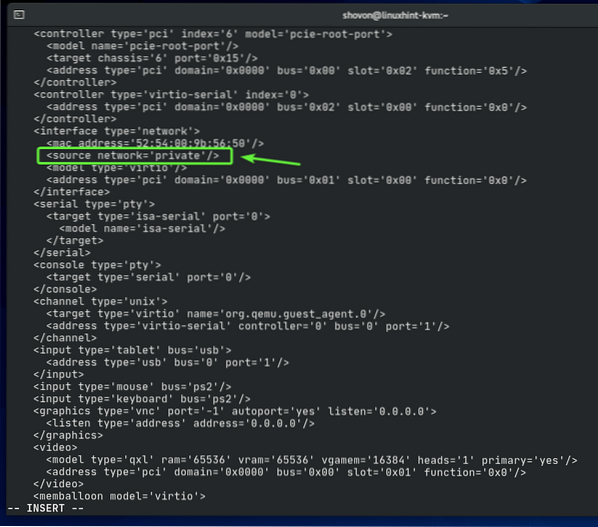
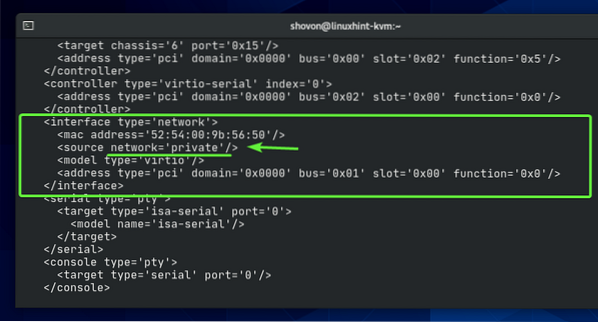
Find the interface section as marked in the screenshot below. By default, the default network bridge is used.
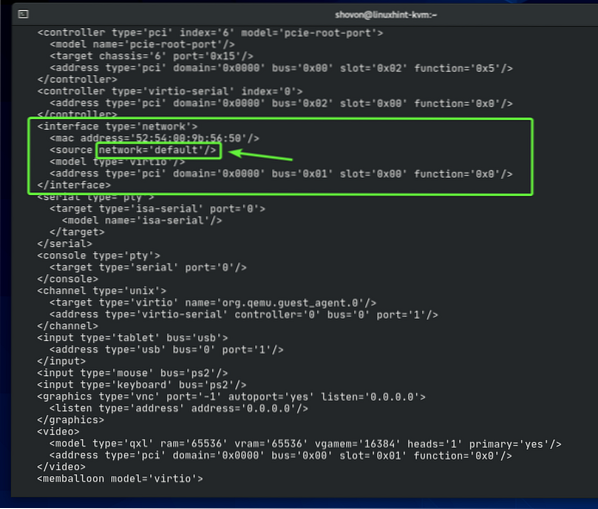
Change the network bridge from default to private as marked in the screenshot below.
NOTE: The configuration file opens with the Vi text editor by default. To edit the configuration file in Vi, press i to go to INSERT mode. To save the configuration file, press
The virtual machine configuration should be changed.

Start the KVM virtual machine with the following command:
$ sudo virsh start udesktop20_04-01
The virtual machine should be running.
$ sudo virsh list --all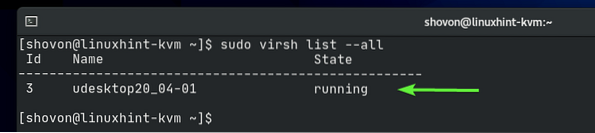
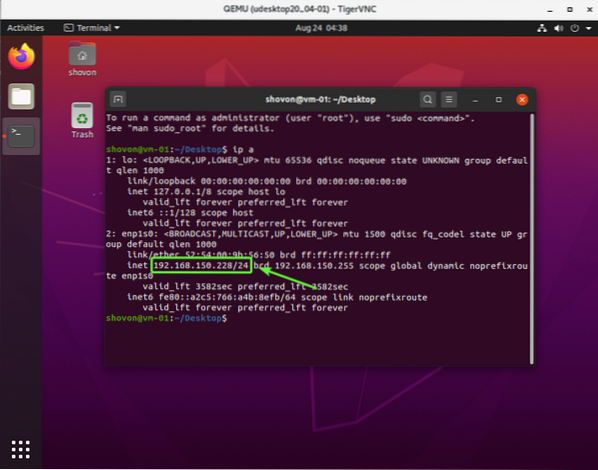
Now, connect to your virtual machine using a VNC client and check the IP address of the virtual machine with the following command:
$ ip aAs you can see, the IP address is 192.168.150.228 which is an IP address from the 192.168.150.0/24 subnet. This is the subnet we have configured for the private network bridge. So, the private network bridge is working.
Creating a KVM Public Network Bridge:
If you want to access your KVM virtual machines from your home network, then you can configure a KVM public network bridge and configure the virtual machines that you want to connect from your home network to use the public network bridge.
Before you create a KVM public network bridge, you have to create a network bridge manually using the Network Manager of CentOS 8.
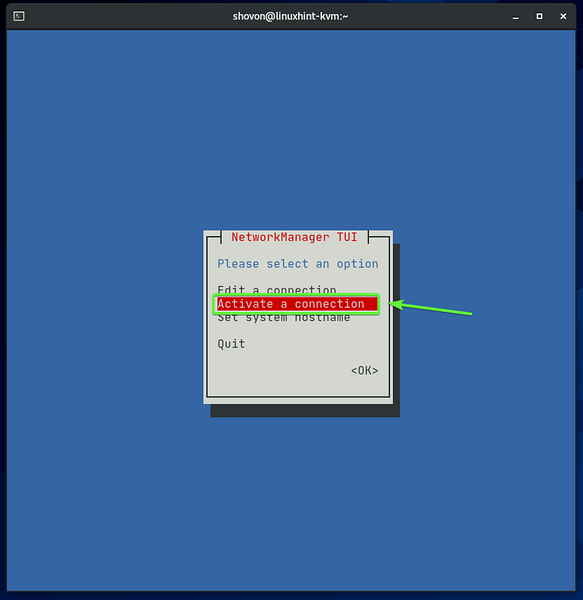
You can start the Network Manager command-line interface with the following command:
$ sudo nmtui
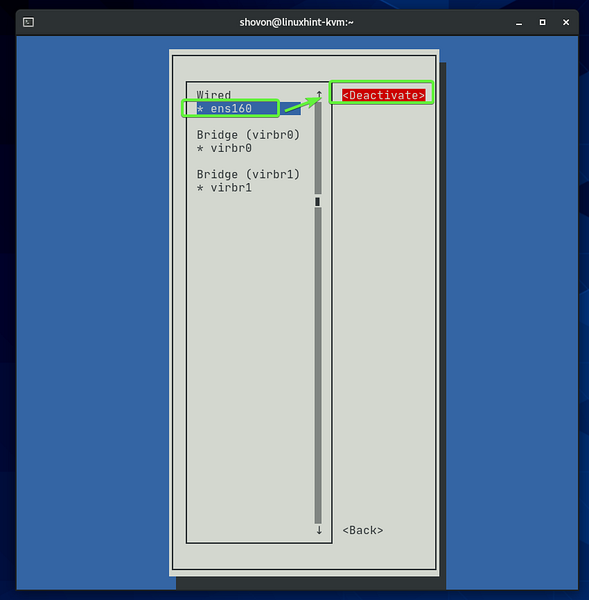
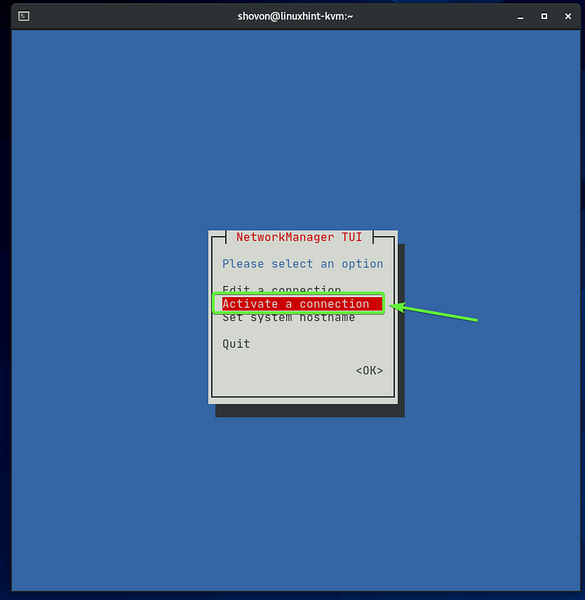
Select Activate a connection and press
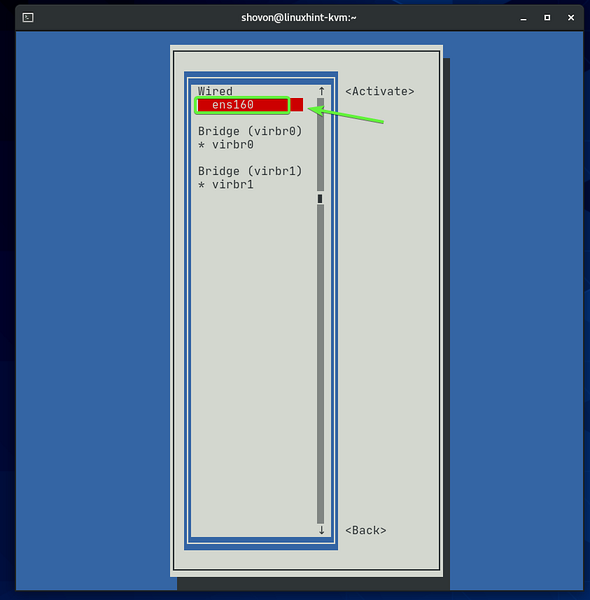
Your wired network interface (ens160 in my case) should be active. Select it and Deactivate it.
Your wired network interface should be deactivated. Press
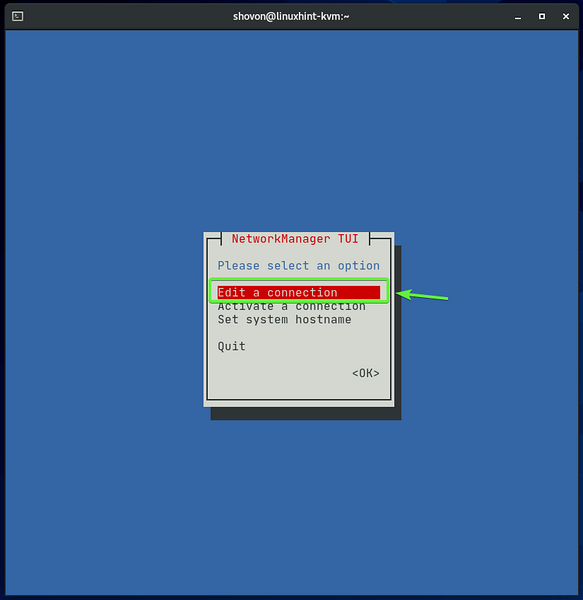
Select Edit a connection and press
Select the network interface that you have just deactivated (ens160 in my case), navigate to
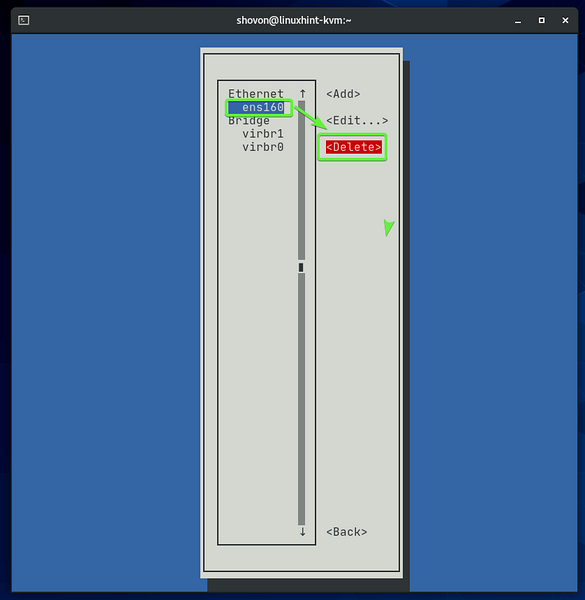
Select Delete and press
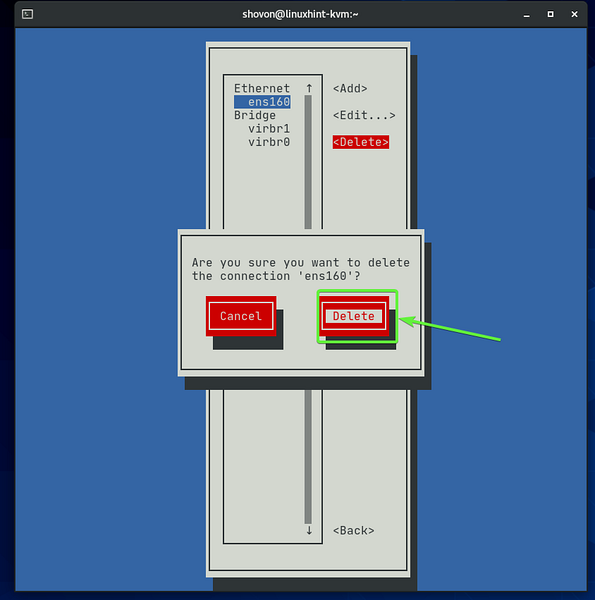
I have removed the physical network interface ens160 because I want to add it to a port of the network bridge I will be creating later. Think of it as a network switch. You connect an ethernet cable coming from your home router to the switch, and then you can connect other network devices to the switch. These network devices will get IP addresses from the router. The same analogy also applies here. It's just all virtual.
To create a network bridge, navigate to
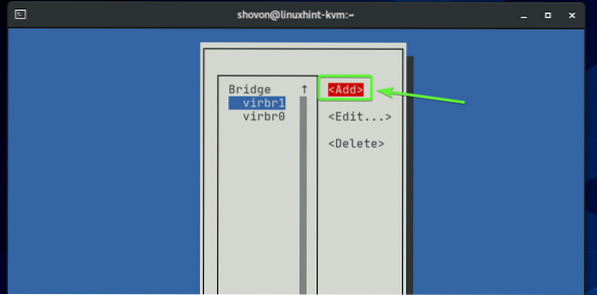
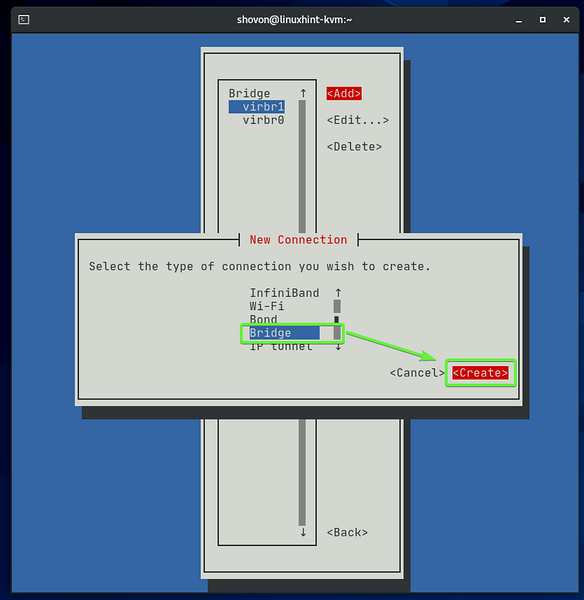
Select Bridge from the list, navigate to
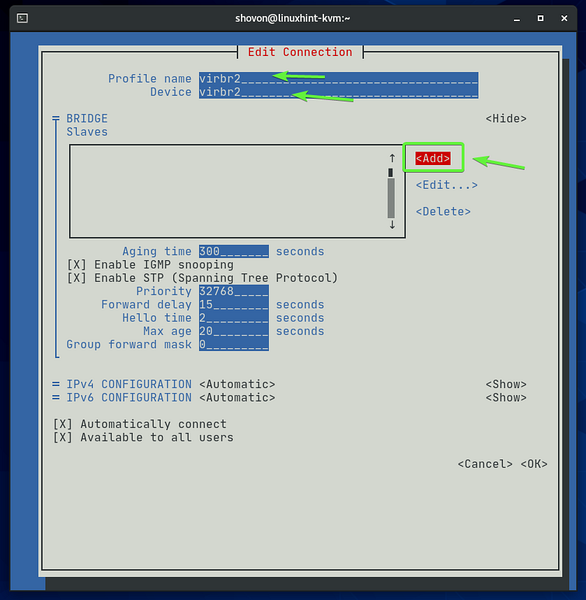
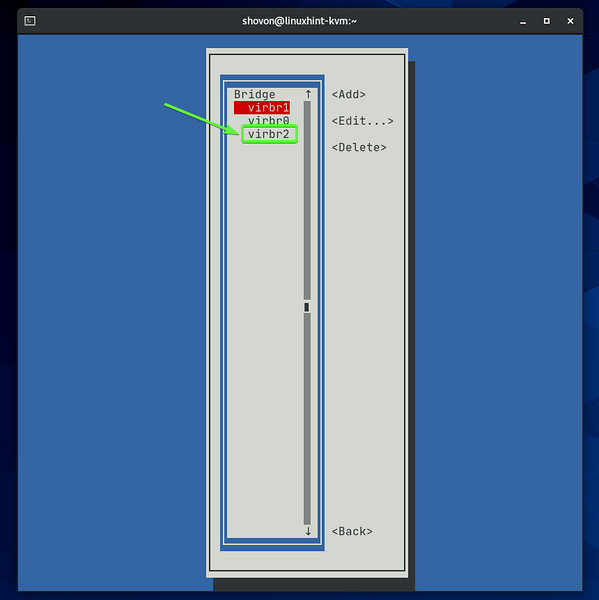
Type in a Profile name and a Device name. The network bridge virbr0 and virbr1 already exists on my CentOS 8 KVM host. So, I have used virbr2 as the Device name. You can use anything descriptive as the Profile name. It does not have to be the same as the Device name.
To add a network interface to the bridge, select
Select Ethernet from the list, navigate to
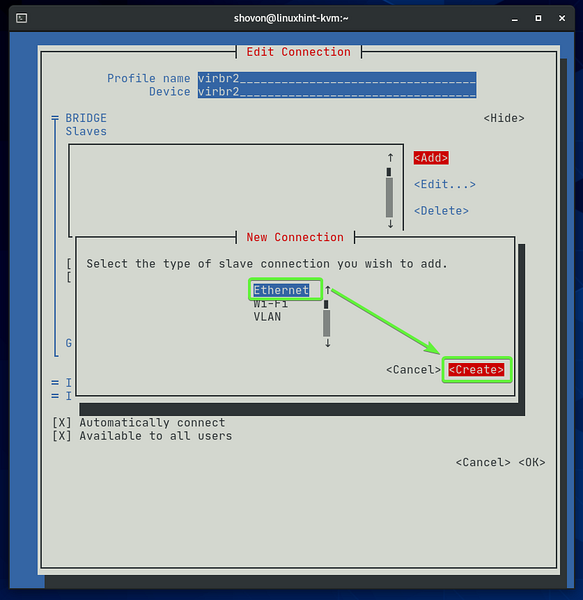
Type in the network interface name which you want to add to the bridge in the Device section. The Profile name can be anything descriptive.
I will add my network interface ens160 (which I have removed earlier) to the bridge.
Once you're done, navigate to
NOTE: You can find the name of all the available network interfaces of your CentOS 8 KVM host with the following command:
$ ip a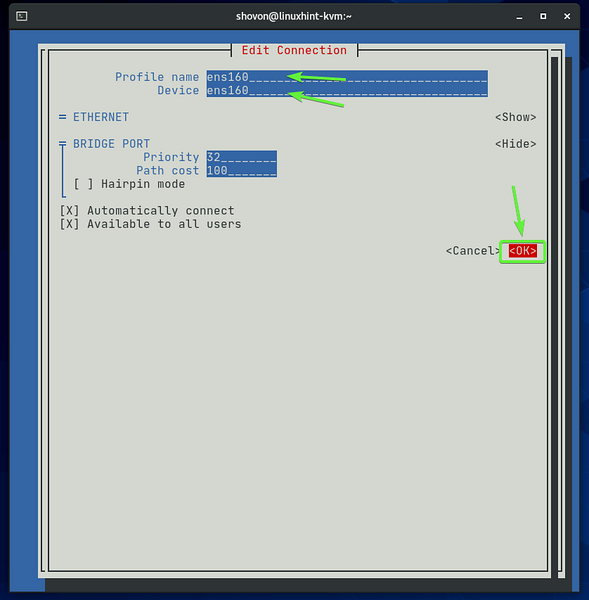
The network interface (ens160 in my case) should be added to the bridge.
Once you're done, navigate to
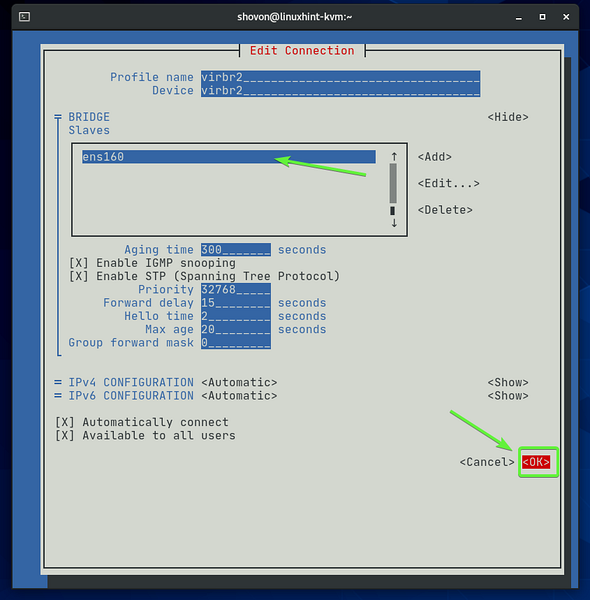
A new bridge virbr2 should be created as you can see in the screenshot below. Press
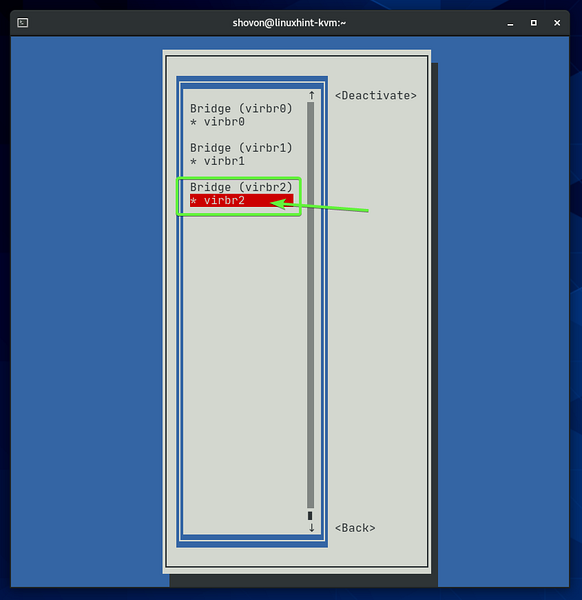
Select Activate a connection and press
As you can see, the bridge virbr2 is activated. If it is not activated, you can activate it from here.
Press
As you can see, the newly created bridge virbr2 got an IP address via DHCP from my home router. So, the newly created bridge virbr2 is working just fine.
$ ip a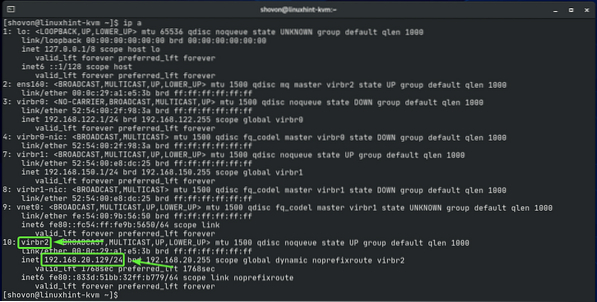
Now that we have a working network bridge virbr2, we can add it to KVM.
Create a new XML file public.xml with the following command:
$ nano public.xml
Type in the following lines of codes in the public.xml file.
Once you're done, press
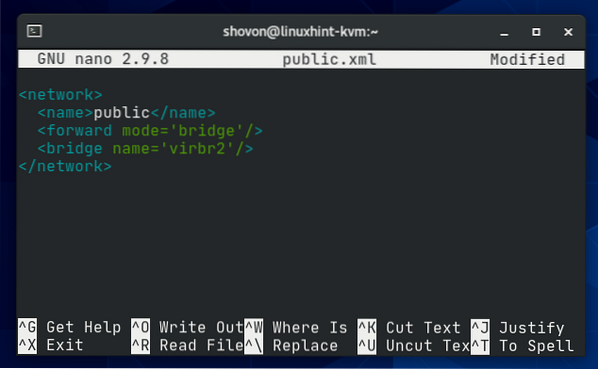
Here, the KVM network bridge name will be public.

The network bridge will work in bridge mode.

The network bridge will use the bridge interface virbr2 (this is the one we have just created using the nmtui program).

To create a KVM network bridge using the public.xml configuration file, run the following command:
$ sudo virsh net-define public.xml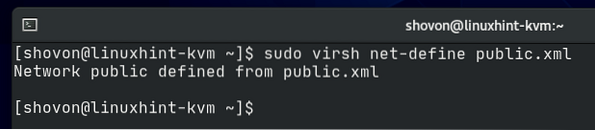
As you can see, the public network bridge is created. It is inactive at the moment.
$ sudo virsh net-list --all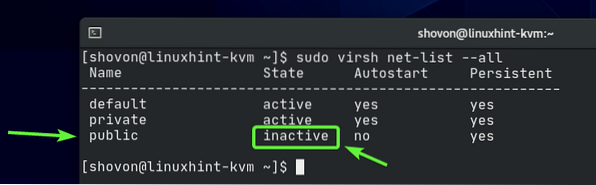
You can activate the public network bridge with the following command:
$ sudo virsh net-start public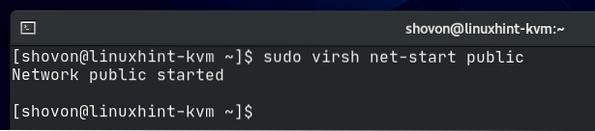
As you can see, the public bridge network is activated.
$ sudo virsh net-list --all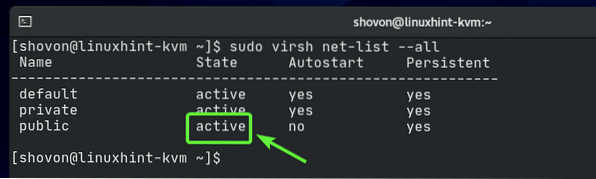
The network bridge public won't automatically start on boot. As everything is working, it's a good idea to automatically start the network bridge on boot.
$ sudo virsh net-list --all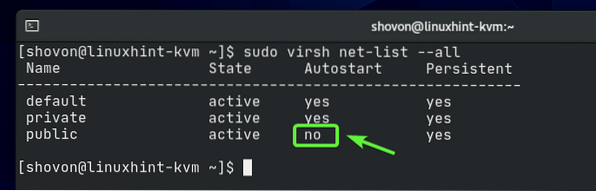
To allow the public network bridge to automatically start on boot, run the following command:
$ sudo virsh net-autostart public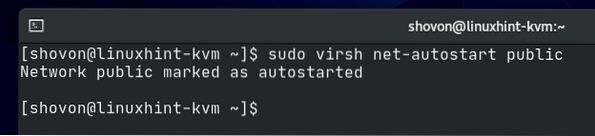
The network bridge public should automatically start on boot from now on.
$ sudo virsh net-list --all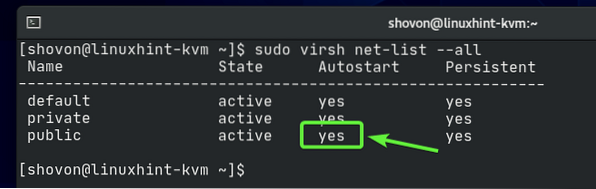
Now, let's configure a KVM virtual machine to use the newly created public network bridge.
As you can see, I already have a KVM virtual machine udesktop20_04-01 running on my CentOS 8 KVM host.
$ sudo virsh list --all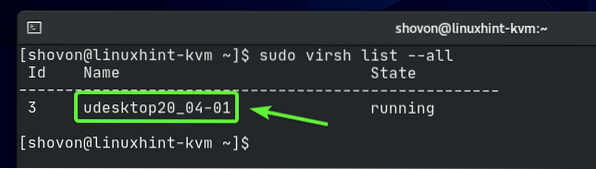
Before you change the configuration of your KVM virtual machine, make sure that it's powered off. If your KVM virtual machine is running, you can shut it down with the following command:
$ sudo virsh shutdown udesktop20_04-01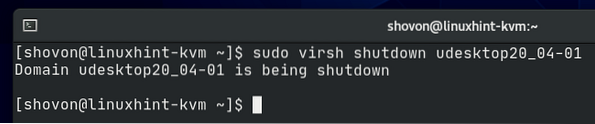
Your KVM virtual machine should be powered off.
$ sudo virsh list --all
To edit the configuration of your KVM virtual machine, run the following command:
$ sudo virsh edit udesktop20_04-01
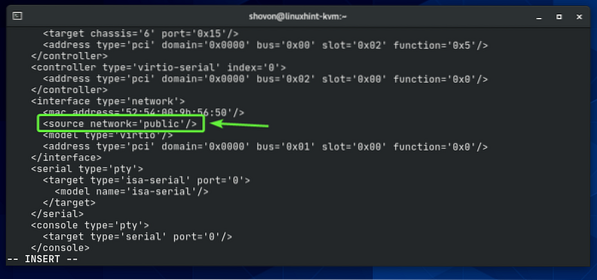
Find the interface section as marked in the screenshot below. We have changed the network bridge to private in the earlier section of this article.
Change the network bridge from private to public as marked in the screenshot below.
NOTE: The configuration file opens with the Vi text editor by default. To edit the configuration file in Vi, press i to go to INSERT mode. To save the configuration file, press
The virtual machine configuration should be changed.

Start the KVM virtual machine with the following command:
$ sudo virsh start udesktop20_04-01
The virtual machine should be running.
$ sudo virsh list --all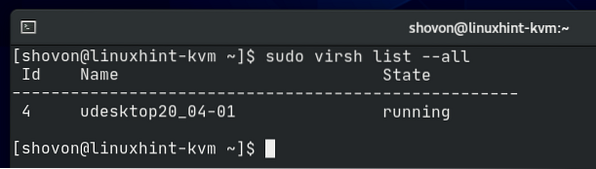
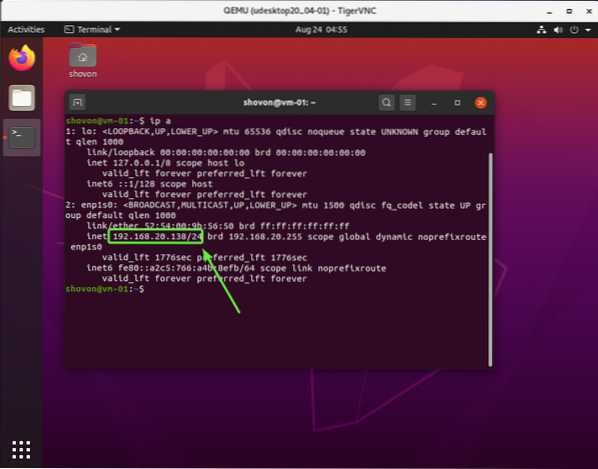
Now, connect to your virtual machine using a VNC client and check the IP address of the virtual machine with the following command:
$ ip aAs you can see, the IP address is 192.168.20.138 which is an IP address from the 192.168.20.0/24 subnet. This is the network subnet that my home router is using right now. So, the public bridge is working.
Conclusion:
In this article, I have explained the KVM private and public network bridge. I have also shown you how to configure KVM private network bridges as well as KVM public network bridges. This article should help you get started with configuring KVM network bridges.

