In this article, I am going to show you how to configure NFS server and clients on CentOS 8. So, let's get started.
Network Topology:
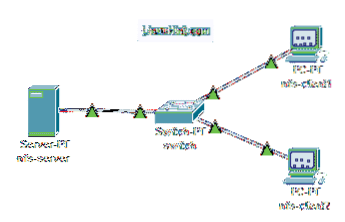
Figure 1: Network topology used in this article
In this article, 3 CentOS 8 machines are used. They are connected as in figure 1.
nfs-server will be configured as an NFS file server.
nfs-client1 and nfs-client2 will be configured as NFS client. They will mount the shared filesystem path from the NFS server nfs-server.
nfs-server network configuration:
IP address: 192.168.20.178/24nfs-client1 network configuration:
IP address: 192.168.20.176/24nfs-client2 network configuration:
IP address: 192.168.20.177/24Configuring the Server:
First, you have to set up a static IP address on the nfs-server CentOS 8 machine. If you need any help on that, check the article Configuring Static IP on CentOS 8.
Now, SSH into your nfs-server machine.
$ ssh [email protected]
Update the DNF package repository cache with the following command:
$ sudo dnf makecache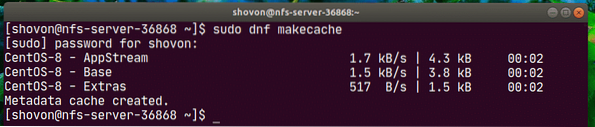
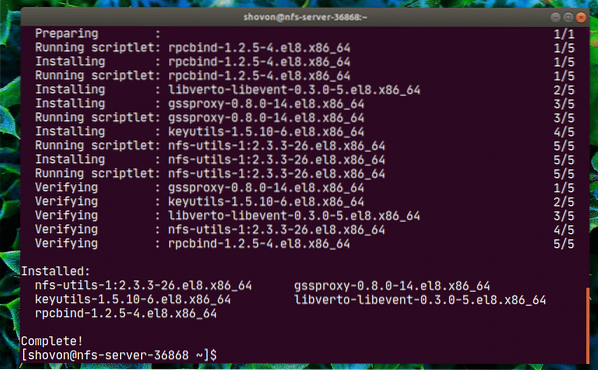
Install the nfs-utils package with the following command:
$ sudo dnf install nfs-utils
To confirm the installation, press Y and then press

nfs-utils package should be installed.
Now, add the nfs-server and rpcbind services to the system startup with the following command:
$ sudo systemctl enable nfs-server rpcbind
Now, start the nfs-server and rpcbind services with the following command:
$ sudo systemctl start nfs-server rpcbind
The nfs-server and rpcbind services should be active (running).
$ sudo systemctl status nfs-server rpcbind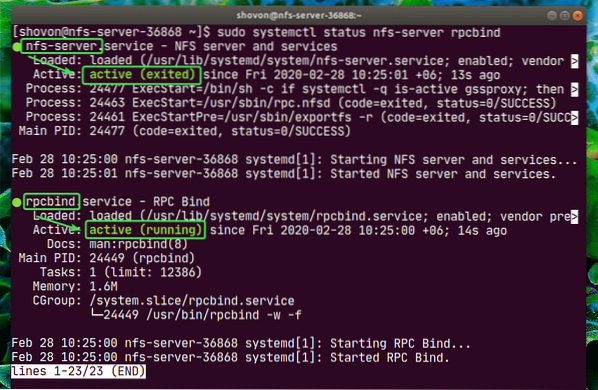
Now, you can share any directory path on your server using NFS.
In this article, I am going to show you how to make partitions, format the partition, mount them to specific directory path and share it using NFS. If the directory path you want to share is ready, you can skip ahead.
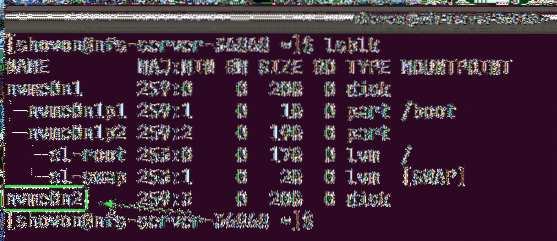
First, find the storage device name using the following command:
$ lsblkIn my case, the name of the SSD I will use is nvme0n2. It will be different for you. So, make sure to replace it with yours from now on.
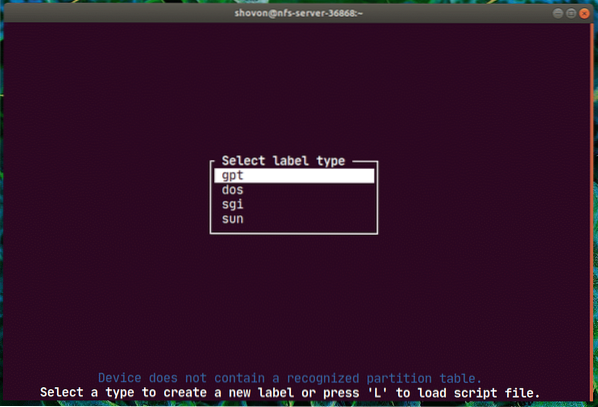
Now, run cfdisk as follows:
$ sudo cfdisk /dev/nvme0n2
If you don't have a partition table already, cfdisk will show you this window. Select gpt and press
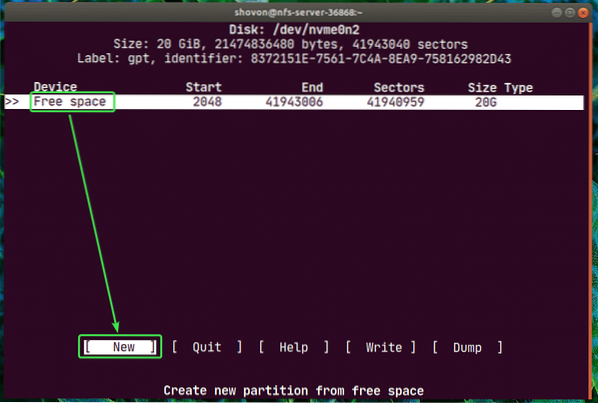
Now, select the Free space, navigate to [ New ] and press
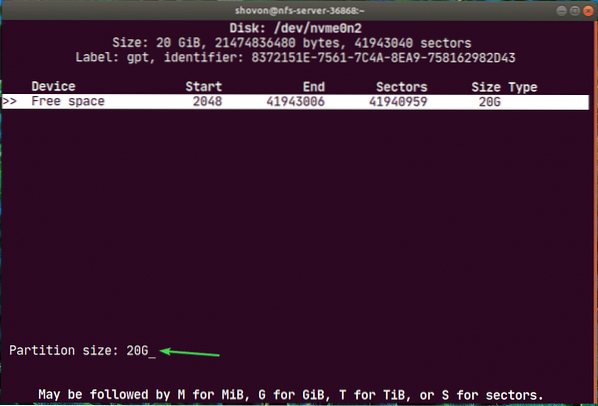
Type in the partition size and press
NOTE: Use M for MiB, G for GiB and T for TiB disk size unit.
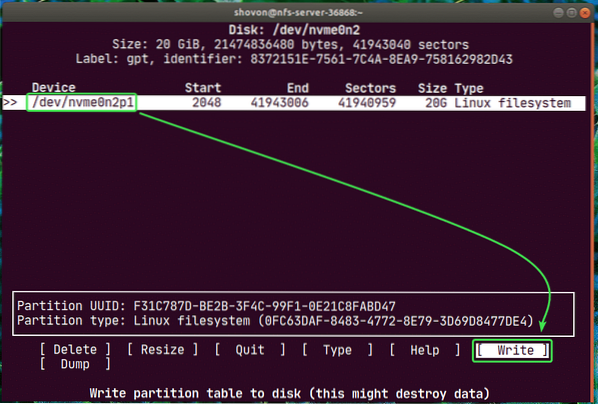
A new partition /dev/nvme0n2p1 should be created. Now, select [ Write ] and press
Now, type in yes and press
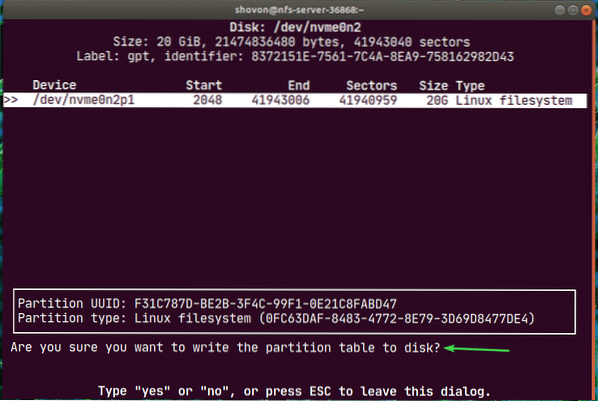
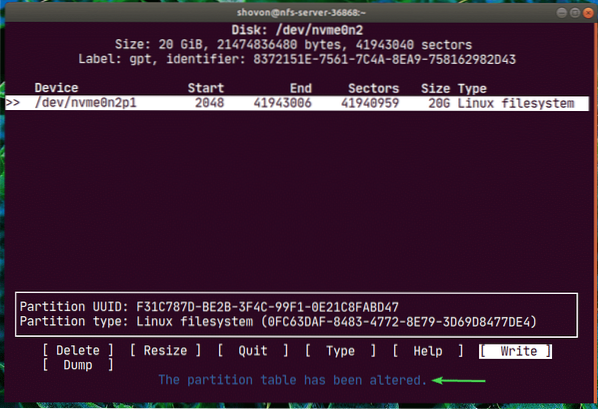
The changes should be written to the partition table.
Now, select [ Quit ] and press
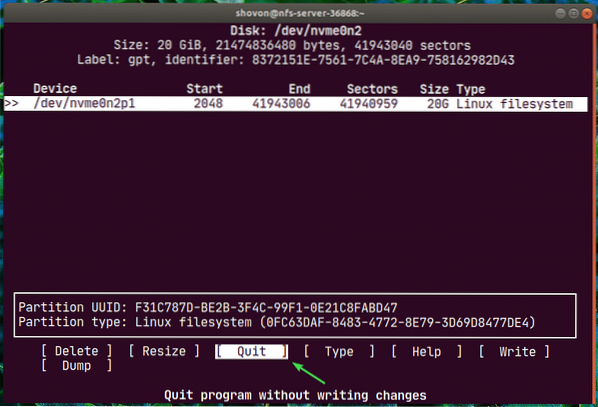
As you can see, a new partition nvme0n2p1 is created.

Now, create a filesystem on the nvme0n2p1 partition with the following command:
$ sudo mkfs.ext4 -L nfs-share /dev/nvme0n2p1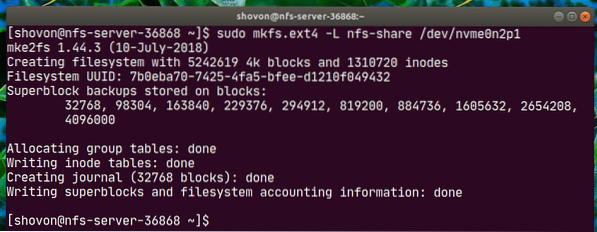
Now, make a directory (in my case /nfs-share) where you want to mount the newly created partition with the following command:
$ sudo mkdir /nfs-share
Now, to automatically mount the partition when your nfs-server boots, you have to add an entry to the /etc/fstab file.
To edit the /etc/fstab file, run one of the following commands:
$ sudo nano /etc/fstabOR
$ sudo vi /etc/fstab
Now, add the following line to the file and save the file.
/dev/nvme0n2p1 /nfs-share ext4 defaults 0 0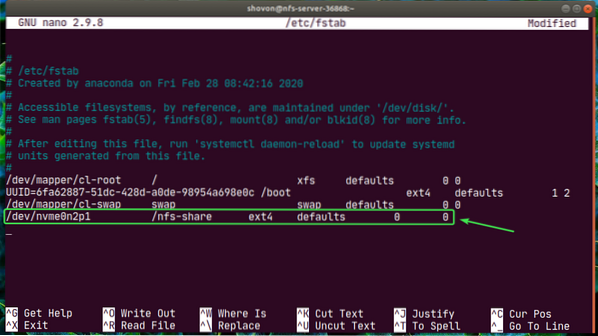
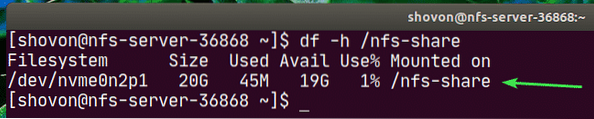
Now, you can easily mount the newly created partition to the /nfs-share directory as follows:
$ sudo mount /nfs-share
As you can see, the partition is mounted to the /nfs-share directory.
Now, to share the /nfs-share directory with NFS, edit the /etc/exports configuration file with one of the following commands:
$ sudo nano /etc/exportsOR
$ sudo vi /etc/exports
Now, you have to add the following line to the /etc/exports file.
/nfs-share 192.168.20.0/24(rw,no_root_squash)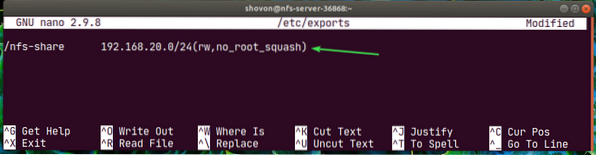
The format of the line is:
share_directory_path host1(host1_options) host2(host2_options_)…In this article, the share_directory_path is /nfs-share
After specifying the share directory, you can add one or more hosts and access options for each host.
Here, the host is 192.168.20.0/24. So, everyone on the subnet, 192.168.20.1 to 192.168.20.254 will be able to access this share.
The options are rw and no_root_squash.
Here,
rw - allows read and write to the share
no_root_squash - does not allow NFS server to map any user or group id to anonymous user or group id.
There are many more options which you can use. To learn more about it, check the manpage of exports.
$ man exports
Now, to enable the share without restarting the server, run the following command:
$ sudo exportfs -var
If you have SELinux enabled, run the following command:
$ sudo setsebool -P nfs_export_all_rw 1
Now, to allow access to the NFS ports from the NFS clients, configure the firewall with the following command:
$ sudo firewall-cmd --add-service=nfs,nfs3,mountd,rpc-bind --permanent
Now, for the firewall changes to take effect, run the following command:
$ sudo firewall-cmd --reload
Configuring the Client:
Now, to mount the NFS share /nfs-share from the nfs-server to nfs-client1 machine, you need to install the nfs-utils package on nfs-client1 machine as well.
First, update the DNF package repository cache as follows:
$ sudo dnf makecache
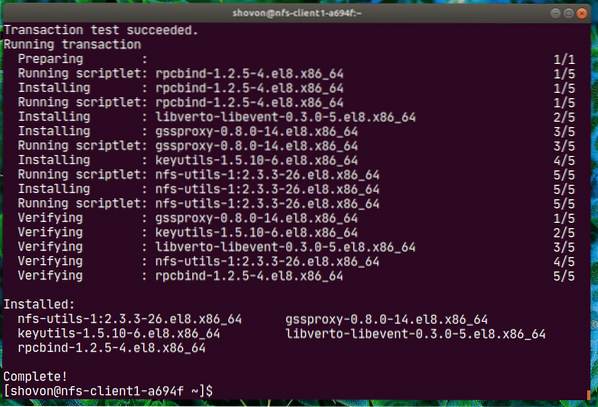
Now, install the nfs-utils package as follows:
$ sudo dnf install nfs-utils
Now, press Y and then press

nfs-utils should be installed.
Now, to confirm whether the NFS share is accessible from the client machine, run the following command:
$ sudo showmount --exports 192.168.20.178Here, 192.168.20.178 is the IP address of nfs-server machine.
As you can see, /nfs-share is accessible from the nfs-client1 machine.

Now, make a mount point for the NFS share as follows:
$ sudo mkdir /mnt/nfs-share
Now, you can mount the NFS share /nfs-share from the nfs-server machine to the /mnt/nfs-share directory of the nfs-client1 machine with the following command:
$ sudo mount -t nfs 192.168.20.178:/nfs-share /mnt/nfs-share
The NFS share should be mounted.

If you want to mount the NFS share when your nfs-client1 machine boots, you have to add an entry to the /etc/fstab file.
Edit the /etc/fstab file with one of the following commands:
$ sudo nano /etc/fstabOR
$ sudo vi /etc/fstab
Now, add the following line to the file.
192.168.20.178:/nfs-share /mnt/nfs-share nfs defaults 0 0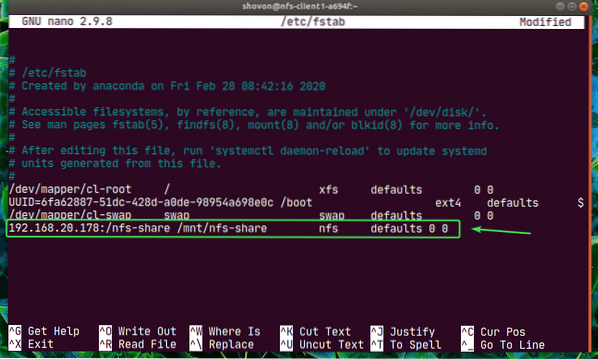
nfs has a lot of mount options. I've used the defaults mount option here. But, if you have specific requirements, you may check the manpage of nfs.
$ man nfs
Now, let's create a new file hello.txt to the NFS share from the nfs-client1 machine.
$ echo "Hello NFS share" | sudo tee /mnt/nfs-share/hello.txt
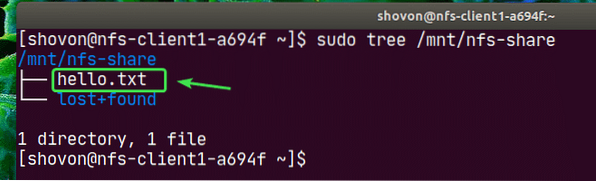
As you can see, the file hello.txt is also created in the nfs-server.
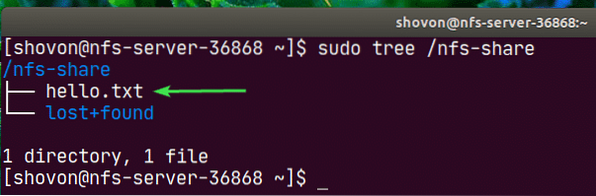
The contents of the hello.txt file read from the nfs-server machine.

The same way you can configure nfs-client2 and access the NFS share from there.
Install nfs-utils package on nfs-client2.
$ sudo dnf install nfs-utils
Edit /etc/fstab file.
$ sudo nano /etc/fstabOR
$ sudo vi /etc/fstab
Add the following line to it.
192.168.20.178:/nfs-share /mnt/nfs-share nfs defaults 0 0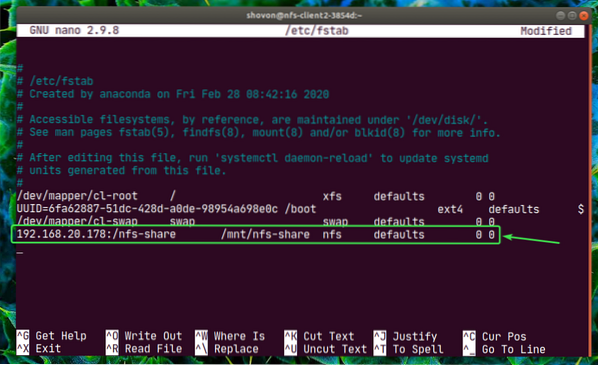
Create a mount point.
$ sudo mkdir /mnt/nfs-share
Mount the share.
$ sudo mount /mnt/nfs-share
Access the files from the share. Very simple.
$ sudo cat /mnt/nfs-share/hello.txt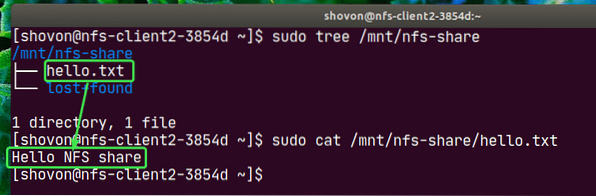
This is how you configure NFS server and client on CentOS 8. Thanks for reading this article.


