Install Vim
Remove Preferences
First of all, you have to remove the preferences for the smooth installation of Vim using the rm command:
$ sudo rm /etc/apt/preferences.d/nosnap.pref
Update Linux System
Update your Linux system using the apt command:
$ sudo apt update
Install Vim
You can install Vim on your Linux system using two methods. The first one is the direct installation using the apt-get command, and the other is using the Snap store utility. If you want to install Vim using the Snap store, you have to install the Snap utility first using the apt command:
$ sudo apt install snapd
After that, install Vim editor beta using the snap command:

If you want to install Vim editor using the direct command, you can also do that using the apt-get command, as follows:

You will be asked to confirm this action to install Vim on your Linux system. To complete the installation, tap y or Y to continue.

After some time, your Vim editor will be installed and ready to use. You can check the Vim version and other information regarding Vim by using the version command:

Launch Vim
To start Vim on Linux, try the following command:
$ vim
You will see a screen that will be popped up, similar to the screen shown in the below image.

Vim Modes
Vim comprises two modes: Normal mode and Insert mode. Eventually, it has another three different modes as well. Every mode has a lot of supported commands, which we will discuss later. Now, have a look at all modes of Vim, as listed below:
Normal Mode
Your very first Vim screen is your normal mode when you first launch Vim. You cannot do any insertion but can move around using some cursor keys from alphabets. You can switch to normal mode by hitting the Esc key while you are in another mode.
Insert Mode
You can add any text, same as any text editor in insert mode. You can switch to insert mode by tapping the “I” alphabet from the keyboard while you are in normal mode.
Visual Mode
Visual mode is a little appealing and attractive as compared to other modes of Vim. Any action performed in this mode is a little highlighted. You can move to Visual mode by pressing the v alphabet when you are currently in normal mode.
Command Mode
This mode of Vim is more functional than other modes. To take yourself to command mode press “:” when you are in normal mode. You can add any command after “:” sign.
Replace Mode
The Replace mode enables you to replace or overwrite the original text by typing over it. To move in Replace mode, press capital R while you are in normal mode.
Editing a File
Create a new file with the name Test.html in your home directory and open it using the following command via Vim:
$ vim Test.html
You will see the below screen after executing the command. This is your normal mode in Vim.

You should be in the Insert mode if you want to edit your file Test.html. Press “I” from your keyboard, and you will be in your Insert mode. Add some text to your file, as shown in the image below.

Saving your Work
Now, if you want to save your edited file, you have to be in Normal mode. So, tap Esc to jump into the Normal mode. Then, add “:w” or “:wq” in command mode, and press Enter. Your file has been saved. Single “:w” represents that the text is saved. On the other hand, “:wq” means that the text has been saved, and the editor has quitted as well.

Exiting the Editor
By simply using the “:wq” command, you can save and quit at the same time.

Use the “:x” command after saving the file with the “:w” command to exit the editor.

The command “q!” will quit the editor without saving the changes.

Page Up, Page Down
Make sure to be in the Normal mode to perform up and down operations. You can move the file page up and down using the simple keys as follows:
- Press k to move up on the page
- Press j to move down on the page
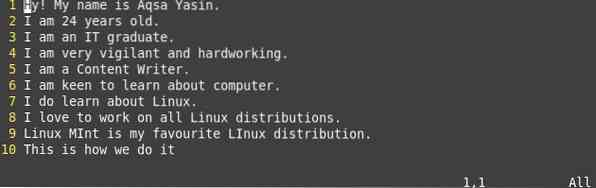
The image shows that the cursor is at the first line and on the first word as “1,1” by using key k.

This image shows that the cursor is at the last line and on the first word as “5,1” by using key j.

Go to the Beginning, Go to the End of the File
You can directly go to the beginning of the file, as well as the end of the file, using very simple keys. Firstly, make sure to be in Normal mode using the Esc key.
- Press gg to go at beginning of the file
- Press capital G to go at end of the file
In the below image, it is clear that the cursor is at top of the file at line 1 using the gg command.

You can see that the cursor is on the 10th line, which is the end of the file using the G key.

Show Line Numbers
Line numbers can make your work easy and your Vim appealing. If you want your Vim to show line numbers at the start of every line, you can do that very simply. Go to the normal mode or command mode by hitting the Esc key. Add any of the following commands there and tap Enter:
$ :set number$ :set number!
$ :set nu!

Now, you can see we have line numbers exposed at the beginning of each line.

Word Count
You can also count the number of total words in the file. Press Esc to move into command mode. If you want to check the columns, lines, word count, and byte count, do:
Press g then Ctrl+g

You can also use another command to only show the word count of the file, as shown below:
You have to press Enter to jump into normal mode again.

Selecting Text
There are two ways to select text in Vim, as listed below:
Character-wise selection: small v
Line-wise selection: capital V
If you want a character-wise selection of the text, you have to Press a small v from your keyboard. It will bring you to regular Visual mode. You can select the text using your mouse cursor or using h, j, k, l keys for the expansion of selection.

You can also do a line-wise selection of the text by only pressing the capital V key when you are in the normal mode. It will bring you to Visual Line mode. You can select the text by just moving line-wise up and down using k and j keys, respectively.

Delete Text
You can delete text from the file using the visual mode.
Delete Single Line
To delete a single line from the file, go to Visual Line mode by pressing capital V. Before deleting the text, you can see the text line selected.

Now, press d from the keyboard. The lines selected have been deleted from the text.

Delete Single Word
You can easily delete a word by using a simple command. Move to the normal mode by hitting the Esc key. Take your mouse cursor at the word you want to delete. Then, press dw from the keyboard. You can see I have deleted a word I from the fourth line using this command.

Delete Multiple Lines
You can delete multiple lines using a single command. Press Esc to jump on Normal mode. Then, move your cursor to the line you wish to remove.
Press [#]dd or d[#]d to remove the lines
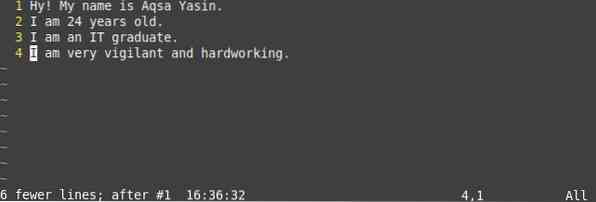
[#] signifies the total number of lines you wish to delete from the particular line. For example, I put my cursor on the first line, as shown in the image below.
When I pressed 2dd from the keyboard, the first two lines have been deleted, as shown in the illustration.

Delete Specified Range Lines
You can also delete lines from the indicated range. For this determination, you have to put the starting line and the ending line in command mode. You can see I have chosen the first line to be deleted as line 2 and the last line to be deleted as the 4th line:

You can see the lines 2, 3, and 4 have been deleted from the text file. Total 3 lines have been deleted and left 2 lines.

Delete all Lines
You can delete all lines by simply using one command in command mode:
You can see we have a total of five lines before the execution of the command.

When I execute the command “:%d”, all the lines have been deleted, as shown in the image.

Delete to End of Line, Delete to End of File
You can delete text from the start to the end of the line and the end of the file when you are in Normal mode. Press Esc to move into normal mode.
- Press d$: delete to the end of the line
- Press :.,$d : delete to end of the file
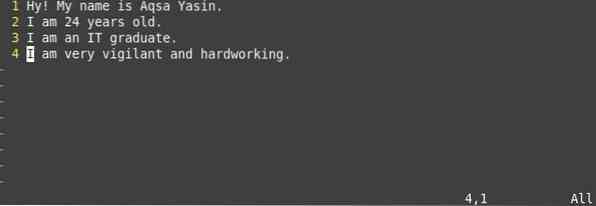
Initially, we have 10 lines in your file. The cursor is one first word of the first line.
When I tap d$ from the keyboard, you can see the first line text has been deleted to the end of the line.
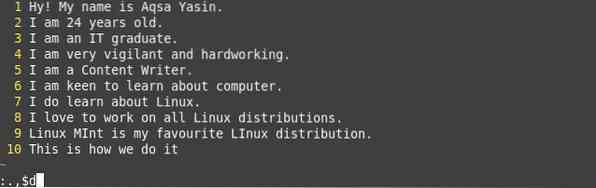
Now, press “:” to move into command mode while cursor on line 5. Type the “:.,$d” command in this mode, as shown in the following illustration.
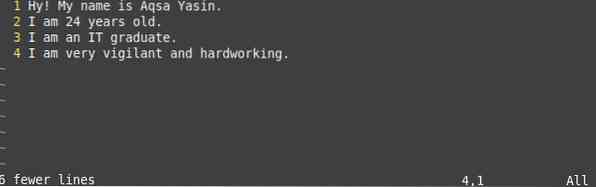
Press Enter, and you will see all the text to the end of the file from line 6 has been deleted.
Undo, Redo
Undo and Redo are different operations that can act a little differently. You can use Undo and Redo in Vim using simple keys as follows:
- u : can undo your last modification
- Ctrl-r : Redo can undo the undo
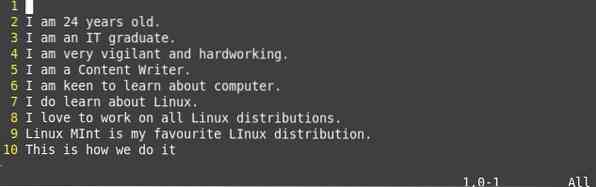
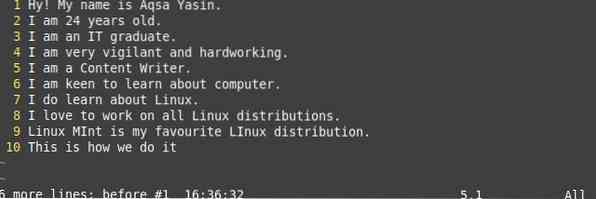
In the previous phase, we have deleted the text to the end of the file. Now, we will use Undo and Redo commands to undo our actions. Below is the last modification we have just done.
Now, when I used the key u in the mode, all the changes have been undone. 6 lines have been added again, which were deleted, as shown in this image.
And when I pressed Ctrl+r, the entire last undo has been discarded, and you can see the old output of the text file in the image.
Searching
To perform the search operation, you must be in normal mode. So, press the Esc key from the keyboard to move into normal mode. You can search a single alphabet, word, or string in the text lines. Use the following keys to perform a search in the text files in Vim:
- Press / : to perform a forward search
- Press ? : to perform a backward search
- Press n : to search next occurrence in forwarding direction
- Press N : to search next occurrence in the backward direction
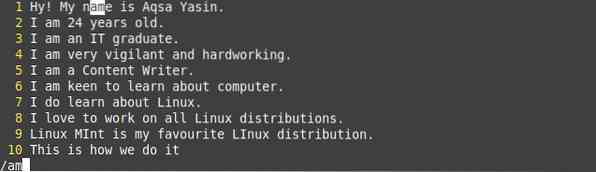
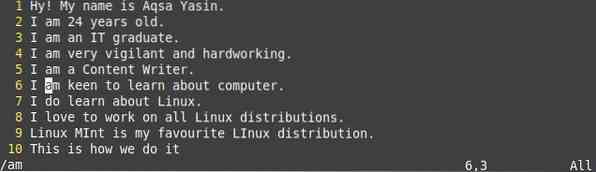
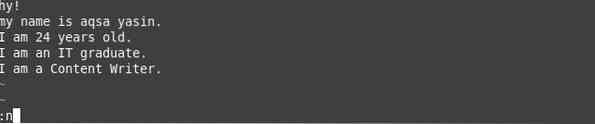
Move your cursor on the first line at the first word. Now, press / and the pattern, word, or alphabet you want to search, e.g., I have added /am, and press Enter. It will highlight the pattern I have been searching for, as shown below.
Now, press small n to search the same pattern in the forwarding direction and capital N to search in the backward direction, as shown in the corresponding image.
I have used “?” to search in the opposite direction with another pattern, as shown in the illustration.

Press small n to move in a forwarding direction, which is its opposite direction, and capital N to move in a backward direction, which is basically our forward direction.

Find and Replace (with or without confirmation)
You can search for the pattern or word and can replace with another pattern using the simple command as follows:
- :%s/search-string/replace-string/g to search+replace in the current line without confirmation
- :%s/search-string/replace-string/g to search+replace globally in the file without confirmation
- :%s/search-string/replace-string/gc to search+replace globally with a confirmation
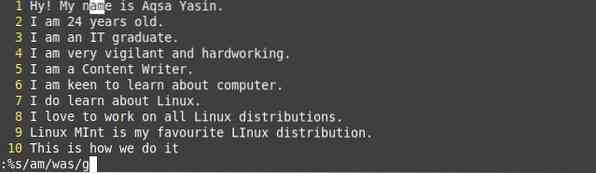
You can see the text before the change or use of the search and replace command without confirmation. Press Enter to continue.
Here, you can see, the pattern “am” is replaced by “was” without taking confirmation from the user.

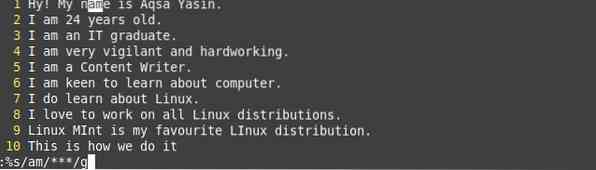
The text file before using the search and replace command with the confirmation of the user.

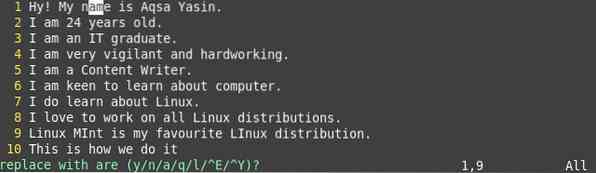
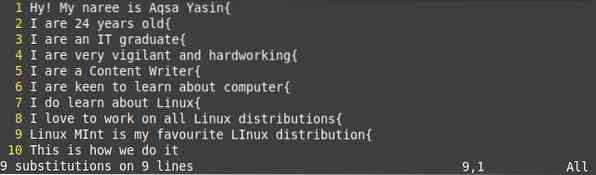
When you press Enter, it will ask you to confirm the replacement of patterns. I have answered every question to y, as shown in the image.
You can see every word “am” is replaced by the word “are”.

Regex Substitution
You can perform regular expression substitution using the same simple command below:
:%s/word-to-be-replaced/expression/g
You can replace any word using this command with regular expressions, as shown below.
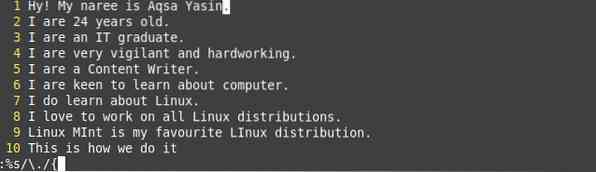
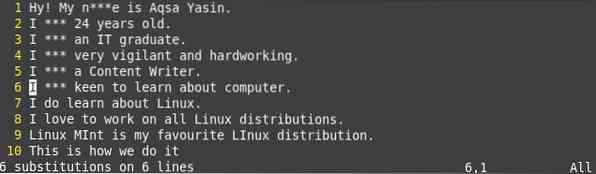
You can see the regular expression has been substituted at the end of every line.
You can also replace any word with any regular expression.
You can see a change has been made.
Setting up .vimrc file
To open the configuration file in Vim, use any one of the following commands:
$ sudo vim /etc/vim/vimrc.local incase of Ubuntu/Debian

Use the appended command to create a .vimrc file:

Open the .vimrc file using the below command:

Syntax Highlighting
Open the .vimrc file using the vim command. Then, insert the cited text into the file.
syntax on
You can see the text highlight has been turned on in the image below.

vimdiff
To show differences between the two files, we will be using the vimdiff command:
$ vimdiff file1 file2
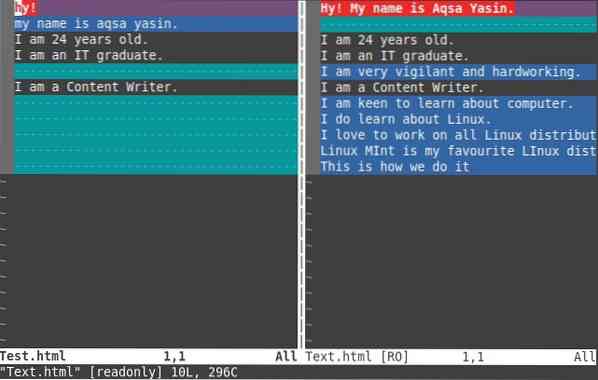
You can see the comparison between two files, Test.html and Text.html below.
Convert Tabs to Spaces
Open your .vimrc file, and then add the following lines to it. After that, add the retab command.
- set expandtab
- set tabstop=2
- set shiftwidth=3
- :retab
Whenever you press the tab from the keyboard, it will convert it into spaces as you have given in the commands.

Default Tab Space Configuration
Open your .vimrc file, then add the following lines to it. After that, add the retab command. This is the default tab space configuration.
- set expandtab
- set tabstop=4
- set shiftwidth=4
- :retab
Whenever you press the tab from the keyboard, it will shift the cursor to 4 spaces ahead.

Edit Multiple Files
To edit multiple files at the same, you have to open files using the vim command:
$ sudo file1 file2Now, I have opened the two files in Vim. It will open the first file that has been added in the terminal first, e.g., Test.html. The file can be amended using any mode.

Now to switch to another file, add the command below:
- :n to switch to the next file.
- :N to switch to the previous document.
Conclusion
In this guide, we elaborated on the basic features of Vim. Upon following all the above tutorial, you will be able to understand the basic functionality of Vim.


