The Recycle Bin in Windows! It's there, we need it, but we hardly ever notice it. Some of us don't even bother to empty it, letting Windows do the job once it starts overflowing. Well, let's change that and let's take a closer look at it today! Let's see how it works and how we can get the best out of it in Windows 10/8.1/7.
Windows Recycle Bin Tricks and Tips
The Recycle Bin is just that! It lets you recycle deleted items. Once you delete any file or folder from the Windows File Explorer, it is moved and placed into this bin. It is not deleted as such.
To delete an item, you right-click on it and select Delete. This will move the file or folder to the Recycle Bin. If you press the Shift key and Delete, then the item will not be moved into the Recycle Bin. It will be directly deleted permanently.
1] Restore deleted items
If you need to get back any item you may have deleted by mistake, you can open the Recycle Bin, search for the item, right-click on it and click Restore. The item will be moved back to the location from when it was deleted by you.
If you wish to permanently delete it, you can simply right-click the item in the Bin and click Delete.
To empty all the items in the Recycle Bin, you may right-click the Recycle Bin desktop icon and select Empty Recycle Bin. If you have the explorer ribbon showing, then under Manage, you can select Empty Recycle Bin or Restore item/s. This will empty the Bin only for that User. But if you wish, you can also empty the Recycle Bins of all users using the Command Line.
If by mistake you click Delete instead of Empty Recycle Bin - well the Recycle Bin icon will just disappear from your Desktop. In this case, you will have to restore the Recycle Bin icon.
2] Recycle Bin location
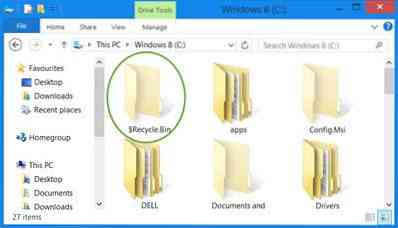
To see the location of the Recycle Bin on your Windows computer, you will have to first show protected operating system files via the Control Panel, Folder Options applet. Once you have done that, open your C Drive. You will see the $Recycle.Bin folder. Open it, and you will see the Recycle Bin. It is the same for other drives too.
3] Change Recycle Bin size

The Recycle Bin size calculations are based on the user's disk quota and not the disk size. In Windows XP, the default Recycle Bin was 10% of the user's quota on the volume. In later versions of Windows, the default size is 10% of the first 40GB of quota, and 5% of any quota above which is above 40GB.
To change its capacity, right-click on the Recycle Bin icon > Properties. Here, under the General tab, you can set the maximum size for your Recycle Bin.
If you wish, you can also change the size and settings on a per-folder basis.
4] Tweak Recycle Bin behavior
Right-Click on the Recycle Bin icon and select Properties. Here you will be able to changes a few of its settings. As I mentioned, each Drive has its own Recycle Bin. Select the Drive.
- You will then be able to decide the maximum size of the Bin. This means that if the items in the Bin exceed this number, then Windows will start deleting items on a First-In-First-Out (FIFO) basis. You can increase the size of Recycle Bin if you feel.
- If you do not wish to move files to the Bin, you can set it to directly remove files when deleted. But we would not advise you to set this option. What if you needed to restore some deleted items!?
- Most of us do not like the delete confirmation box. You can choose to have it displayed or not here. You can enable or disable this Delete Confirmation Box
5] Show Hide Recycle Bin from Desktop
Right-click on the Desktop > Personalization. From the left side click on the Change desktop icons link. Select the checkboxes for the icons you wish to show.
6] Rename Recycle Bin
Right-click the Bin icon and select Rename. It is so simple! But to rename it for all the users, you will have to tweak the Windows Registry.
7] Change Recycle Bin icons
You may have noticed that the Bin displays two different icons, one when it's empty and the other when it has some files or folders. You can change these icons if you wish, customize the appearance of the Recycle Bin by changing one or both of these icons, via the Control Panel > Personalization > Change desktop icons link.
But we have noticed that in many cases when you revert them back to defaults, the Recycle Bin icon does not refresh automatically. As such, I'd recommend you not do this.
8] Count the number of items in the Recycle Bin
To see how many items are there in the Recycle Bin:
- Open Recycle Bin
- Select one item
- Press Ctrl+A
- Look in the bottom left corner.
- You will see the number there.
You can also use PowerShell to count the number of items in the folder.
9] Recycle Bin recovery software
If you need to recover or undelete files that you permanently deleted even from the Bin, then you will need to use some good free data recovery software like Recuva. As soon as you realize you have deleted some files and wish to recover them, stop using the computer and install and run a file undelete software.
Did I miss any? Oh yes - you can do the following too!
- Display Recycle Bin in This PC or Computer folder
- Create a Recycle Bin for USB Drive & Removable Media
- Add Recycle Bin To Taskbar
And what if your Bin does not function the way it should? See this post, if your Recycle Bin were to ever get corrupted.


