In this article, I will show you how to install Docker on Raspberry Pi 3 Model B. I will be using Ubuntu Core operating system on my Raspberry Pi 3 Model B for the demonstration.
What You Need:
You need:
- A Raspberry Pi 3 Model B or Raspberry Pi 3 Model B+ Single Board Computer device.
- At least 16GB of microSD Card for installing Ubuntu Core.
- An Ethernet Cable for internet connection. You can also use the built-in Wi-Fi for the internet. But I prefer wired connection as I think it's more reliable.
- HDMI Cable.
- A Monitor with HDMI port.
- An USB Keyboard for configuring Ubuntu Core for the first time.
- A Power Adapter for the Raspberry Pi.
Install Ubuntu Core on Raspberry Pi 3:
I showed you how to install and configure Ubuntu Core on Raspberry Pi 2 and Raspberry Pi 3 in another Raspberry Pi article I wrote on LinuxHint. You can check it at (Link to the Install Ubuntu on Raspberry Pi article)
Powering on Raspberry Pi 3:
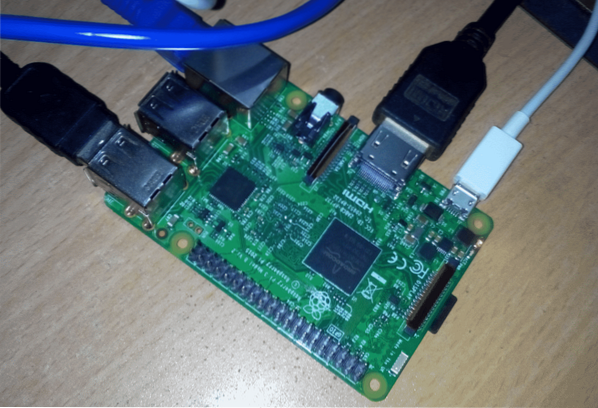
Once you have everything set up, connect all the required devices and connectors to your Raspberry Pi and turn it on.
Connecting to Raspberry Pi 3 via SSH:
Once you have Ubuntu Core OS configured, you should be able to connect to your Raspberry Pi 3 via SSH. The required information to connect to your Raspberry Pi via SSH should be displayed on the Monitor connected to your Raspberry Pi as you can see in the marked section of the screenshot below.
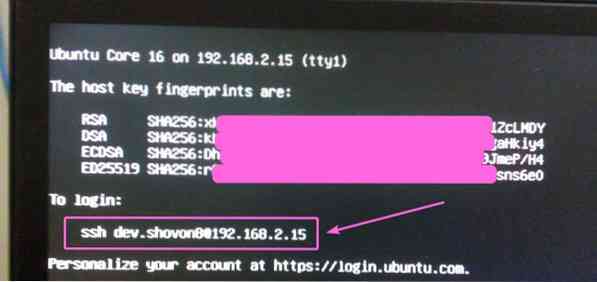
Now, from any of the computer that you have SSH key added to your Ubuntu One account, run the following command to connect to the Raspberry Pi via SSH:
$ ssh [email protected]NOTE: Replace the username and the IP address of the command with yours.

You may see an error while connecting to your Raspberry Pi via SSH, in that case, just run the following command:
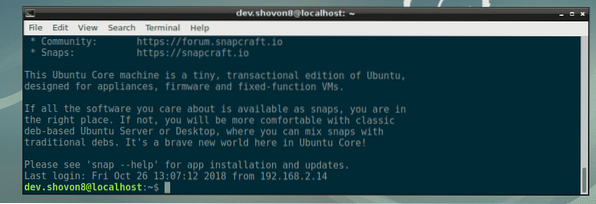
$ ssh-keygen -f ~/.ssh/known_hosts -R 192.168.2.15Now, you should be able to connect to your Raspberry Pi via SSH again. If it's the first time you're connecting to your Raspberry Pi via SSH, then you should see the following message. Just type in yes and then press

You should be connected.
Installing Docker on Raspberry Pi 3:
On Ubuntu Core, you can only install snap packages. Luckily, Ubuntu Core has Docker snap package in the official snap package repository. So, you won't have any trouble installing Docker on Raspberry Pi 3. To install Docker on Raspberry Pi 3, run the following command:
$ sudo snap install docker
As you can see, Docker is being installed. It will take a while to complete.

At this point Docker is installed. As you can see, the version of Docker is 18.06.1. It is Docker Community Edition.

Now, run the following command to connect Docker to the system:
$ sudo snap connect docker:homeUsing Docker on Raspberry Pi 3:
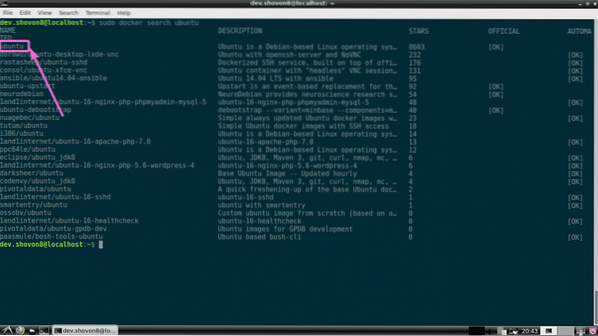
In this section, I will show you how to run Docker containers on Raspberry Pi 3. Let's get started. You can search for Docker images with the following command:
$ sudo docker search KEYWORDFor example, to search for Ubuntu docker images, run the following command:
$ sudo docker search ubuntuAs you can see, the search result is displayed. You can download and use any Docker image from here. The first Docker image in the search result is ubuntu. Let's download and install it.
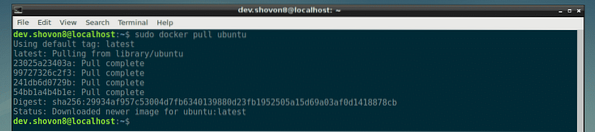
To download (in Docker term pull) the ubuntu image, run the following command:
$ sudo docker pull ubuntu
As you can see, the Docker ubuntu image is being pulled.

The Docker ubuntu image is pulled.
You can list all the Docker images that you've pulled with the following command:
$ sudo docker images
Now, you can create a Docker container using the ubuntu image with the following command:
$ sudo docker run -it ubuntu
As you can see, a Docker container is created and you're logged into the shell of the new container.

Now, you can run any command you want here as you can see in the screenshot below.

To exit out of the shell of the container, run the following command:
$ exit
You can list all the containers you've created with the following command:
$ sudo docker ps -aAs you can see, the container I've created earlier has the Container ID 0f097e568547. The container is not running anymore.

You can start the container 0f097e568547 again, with the following command:
$ sudo docker start 0f097e568547
As you can see, the container 0f097e568547 is running again.

To log in to the shell of the container, run the following command:
$ sudo docker attach 0f097e568547As you can see, I am logged into the shell of the container 0f097e568547 again.

You can check how much memory, CPU, disk I/O, network I/O etc the running containers are using with the following command:
$ sudo docker stats
As you can see, I have two containers running and their ID, name, CPU usage, memory usage, network usage, disk usage, pid etc are displayed in a nicely formatted way.

I am running Docker and 2 containers on my Raspberry Pi 3 and I still have about 786 MB of memory available/free. Docker on Raspberry Pi 3 is amazing.

So, that's how you install and use Docker on Raspberry Pi 3. Thanks for reading this article.


