For example, let's say you've configured a Linux router. You know everything is configured correctly, but when you try to access the internet, it does not work at all. Your DNS server is working perfectly. So where is the problem? How would you find it? How would you fix it?
Let's try to answer the first question. The DNS name resolution is working, but the host is unreachable. Hmm… Let's see which path the request to the outside world is taking. We can use traceroute for that. Well, the requests are not going the right direction. The default gateway is not correct. So how do you fix it? well, by setting the correct default gateway, simple!
That's how traceroute helps in debugging network connectivity problems. It is a very important tool for network administrators.
In this article, I will show you how to use traceroute on Debian 9. Let's get started.
Installing traceroute on Debian 9:
traceroute is a part of net-tools package on Debian 9 Stretch. It may not be installed by default on Debian 9 Stretch. But it is available in the official package repository of Debian 9 Stretch. So it is very easy to install.
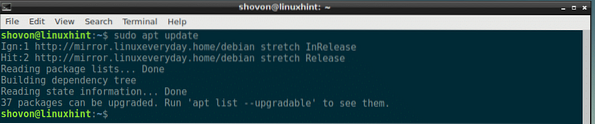
First update the APT package repository cache of your Debian 9 machine with the following command:
$ sudo apt update
The APT package repository cache of your Debian 9 machine should be updated.
Now install net-tools package on your Debian 8 machine with the following command:
$ sudo apt install net-tools
net-tools package should be installed.

Now verify whether traceroute works or not with the following command:
$ traceroute --versionAs you can see from the screenshot below, traceroute is working correctly.

Basic Usage of traceroute:
The most basic usage of traceroute is tracing the routes of a host or IP address.
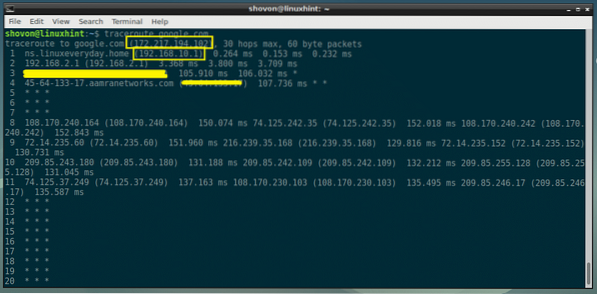
For example, to tracing the routes of google.com, you run the following command:
$ traceroute google.com
A long output is printed. Here, the marked section of the screenshot, 172.217.194.102 is the destination IP address for google.com and 192.168.10.1 is the IP address of the first route, which is my Linux Virtual Router and the second IP address 192.168.2.1 is the IP address of the second route, my home router.
The packet has to go through that many routers to reach google.com at destination IP 172.217.194.102 from my computer.
Disable DNS Name Resolution on traceroute:
By default, traceroute tries to do DNS name resolution of the routers in the path. If you only want to see the IP address of the routes, you can pass the -n flag to traceroute command. traceroute won't do DNS name resolution anymore.
$ traceroute -n google.com
As you can see from the output of the traceroute command, only the IP addresses of the routes to google.com are shown.

Changing traceroute Gateway:
traceroute uses the default gateway of your Debian 9 machine by default. If you don't have a default gateway configured, then traceroute won't work. In that case, you must tell traceroute to use the correct gateway. You use the -g flag to specify gateway on traceroute.
Let's say you want to use 192.168.10.1 as the gateway for the traceroute command, run the following command:
$ traceroute -g 192.168.10.1 google.com
Using Specific Source Interface for traceroute:
If you have multiple network interface available on your Debian 9 machine, then traceroute may choose to use a network interface randomly. If you want to trace the routes to a destination host using a specific network interface, then use -i flag to specify which network interface you want to use.
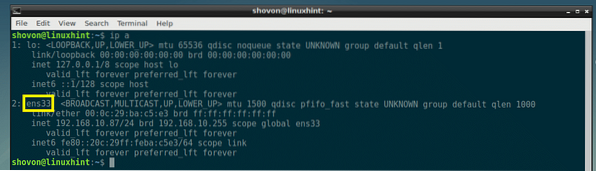
To find out what network interfaces are available on your Debian 9 machine, run the following command:
$ ip aAs you can see, my network interface name is ens33.
Now use ens33 interface to trace the routes to google.com using traceroute with the following command:
$ sudo traceroute -i ens33 google.com
ens33 interface should be used for tracing the routes.

Changing TTL on traceroute:
The TTL or Time To Live specifies how many routers traceroute command will trace on the way to its destination. The default TTL value is 30, which means, only 30 routes are traced by default.
To change TTL value, -m flag is used.
For example, if you want the first 4 routes on the way to the destination of google.com, run the following command:
$ traceroute -m 4 google.com
As you can see, the first 4 routes are displayed.

Getting Help with traceroute:
There are many more things you can do with traceroute. Go to the man page of traceroute with the following command to find out.
$ man traceroute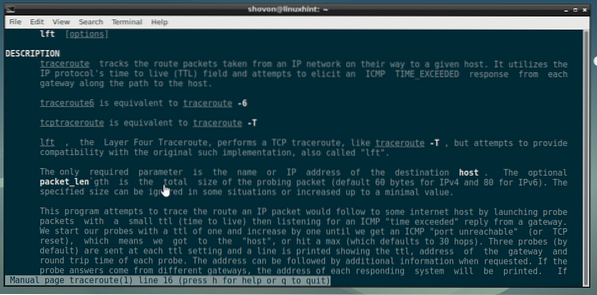
That's how you use traceroute on Debian 9 Stretch. Thanks for reading this article.


