In this article, I am going to show you how to set up Odyssey x86 Mini-computer from SeeedStudio and install Ubuntu 20.04 LTS on it. So, let's get started.
Technical Specification:
The Odyssey X86J4105 Mini-Computer technical specification is given below:
Processor:
Intel Celeron J4105 (1.5 GHz - 2.5 GHz)
Graphics:
Intel UHD 610 (200 MHz - 700 MHz)
Memory:
onboard 8 GB LPDDR4
2 GB x 4 configuration
Storage 1:
64GB Sandisk eMMC
optional, only available on v5.1 eMMC version
Storage 2:
microSD Card supported socket available
Storage 3:
M.2 NVME PCIE 2.0×4 SSD
M Key, 2242 and 2280 size
Storage 4:
M.2 SATA III (6 Gb/s) SSD
B Key, 2242 and 2280
Also supports USB2.0 and UIM modules
Storage 5:
SATA III 6 Gb/s port for connecting 2.5/3.5 inch SATA hard disk or SSDs.
Wireless:
Wi-Fi 802.11 a/b/g/n/ac (2.4 GHz and 5 GHz)
Bluetooth 5.0
Networking:
2x Gigabit LAN (Intel I211AT)
Cellular Connectivity:
SIM Card Slot
NOTE: You must install a Cellular Module for SIM Card to work.
I/O Ports:
2x USB 2.0 Type-A
1x USB 3.1 Type-A
1x USB 3.1 Type-C
Video Interfaces:
1x HDMI (Max supported resolution 4k @30Hz)
Display Port through the USB 3.1 Type-C port (Max supported resolution 4k @60Hz)
Audio:
3.5mm audio jack (microphone and headphone combo)
Arduino Microcontroller:
ATSAMD21G18 Microchip
32-bit ARM Cortex M0+
28-pin headers
Headers:
40-pin Raspberry Pi compatible headers
RTC (Real-time Clock):
JST1.0 CR2032 3V
TPM (Trusted Platform Module):
Built-in TPM 2.0
Power:
Supported Methods: 5.5mm or 2.1mm DC Jack, and Type-C power delivery
DC Jack Input: 12-19V DC
Type-C Power Delivery Input: 12V DC
Dimensions of the Board:
110x110mm
What's in the Box?
Seeed Studio has sent me the Odyssey-X86J4105 Mini-Computer (non eMMC version). Let's see what's in the box.
The front of the box looks like fig 1.
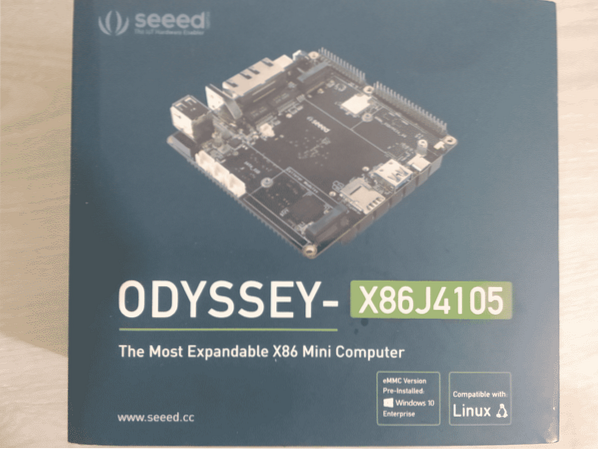
Figure 1: Front of the box
In the box, you have another black box with the Seeed Studio logo on top.

Figure 2: The main box
If you open the box, you should find the Mini-Computer first. The Odyssey X86J4105 Mini-Computer looks as in fig 3.
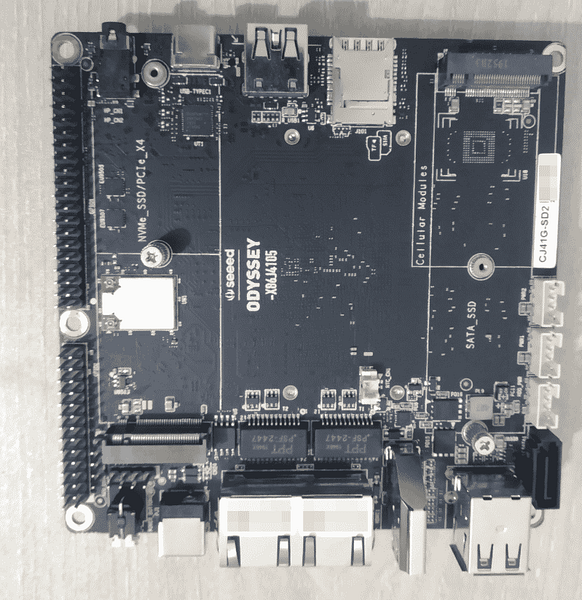
Figure 3: Seeed Studio Odyssey X86J4105 Mini-Computer
The next thing you should see is the user manual, as in fig 4.
Figure 4: Odyssey X86J4105 user manual
Then, you should find another black box. Inside the black box, you have some important stuff.
You should find a universal power adapter, as in fig 5.
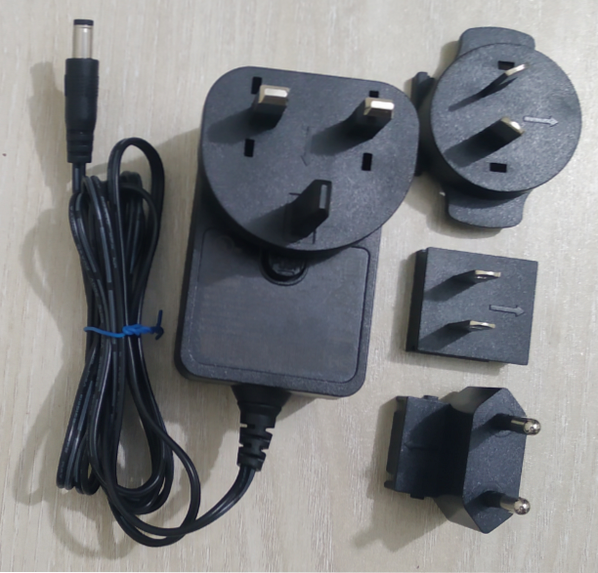
Figure 5: Odyssey X86J4105 Universal Power Adapter
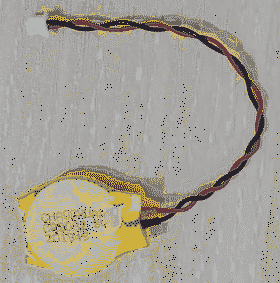
A CMOS battery for the RTC clock, as in fig 6.
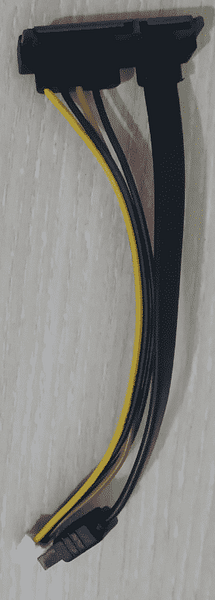
A SATA cable for connecting 2.5 or 3.5 inches SATA hard disk or SSD as in fig 6.
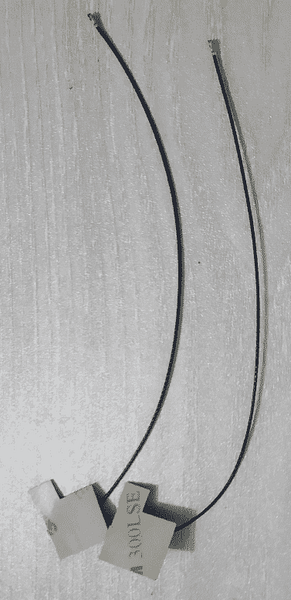
Cellular and Wireless (Wi-Fi and Bluetooth) antennas, as in fig 7.
Adding Storage:
My review unit did not come with built-in eMMC storage. So, I had to add an SSD to my Odyssey X86J4105 mini-computer. So, I have decided to show you how to add an M.2 SSD to Odyssey X86J4105 mini-computer.
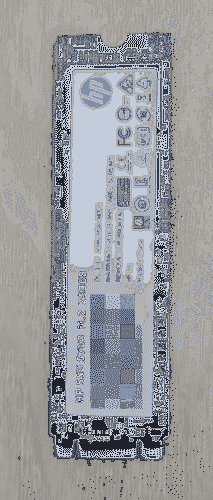
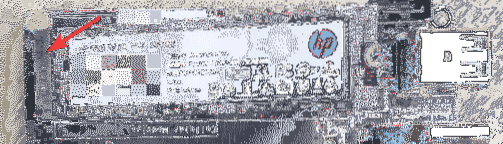
I have used an HP S700 250 GB M.2 SSD for the demonstration (fig 8). Although it is an M.2 SATA SSD, the procedures are the same for adding an M.2 NVME SSD on Odyssey X86J4105 mini-computer. You just add the SSD on the other slot of the mini-computer.
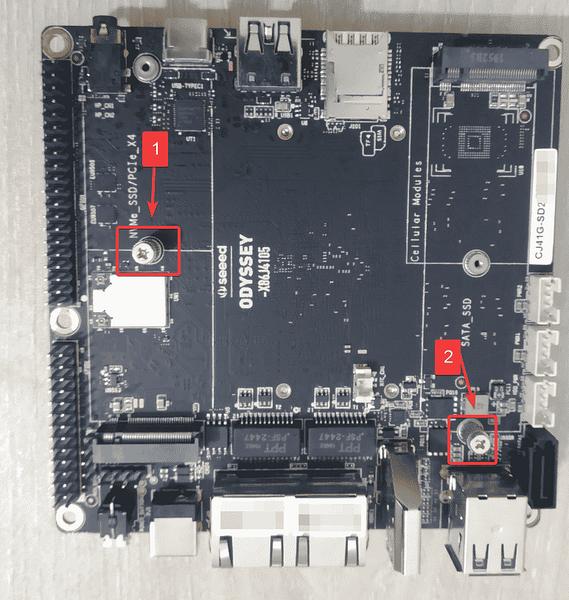
Odyssey X86J4105 mini-computer already provides you with the required screws for adding an M.2 NVME(1) and an M.2 SATA SSD(2), as shown in fig 9.
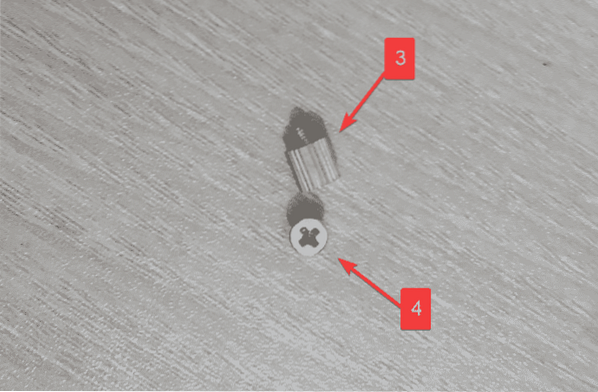
Each of the screws has 2 parts, as shown in fig 10. The bottom part(3) should be screwed below the SSD and the top part(4) on top of the SSD.
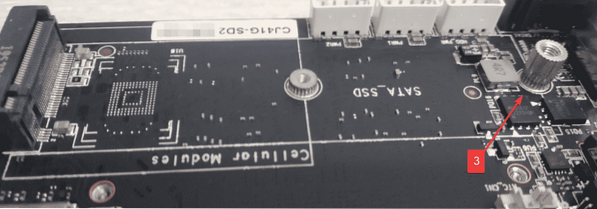
Screw the bottom part(3) on your M.2 SSD slot, as shown in fig 11.
If your SSD size is 2242, then the screw should be in the middle of the slot.
If your SSD size is 2280, then the screw should be at the end of the SSD slot.
Attach the SSD on the M.2 slot, as shown in fig 12.
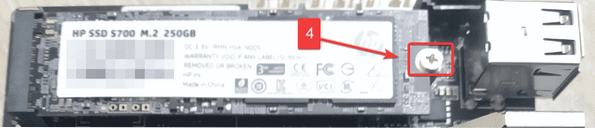
Use your fingers to press on top of the SSD and hold it together with the bottom part of the screw. Then, attach the top part of the screw at the end of the SSD to the bottom part of the screw. The process is shown in fig 13.
Setting Up the CMOS Battery:
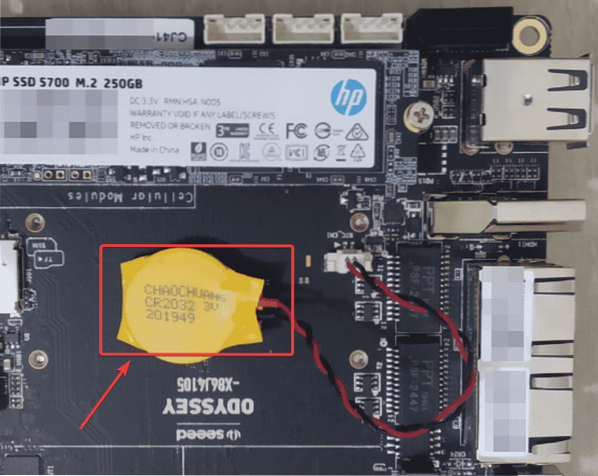
The CMOS battery stores the date and time of your computer and runs a low power clock to keep the date and time updated.
Adding the CMOS battery is optional. If you don't add it, you will have the set the date and time of your computer every time you boot your computer. With the help of NTP (Network Time Protocol) and internet connectivity, this may not be a problem.
If you want to add the CMOS battery, this section is for you.
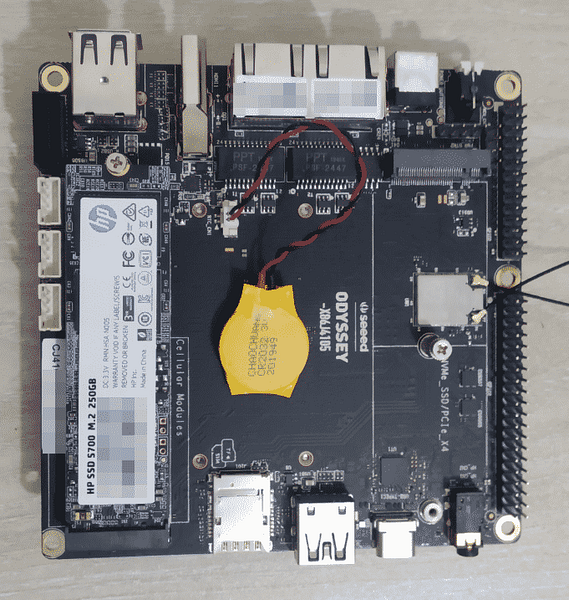
Add the CMOS battery on the header right before the HDMI port, as shown in fig 14.
Then, remove the double-sided tape cover.
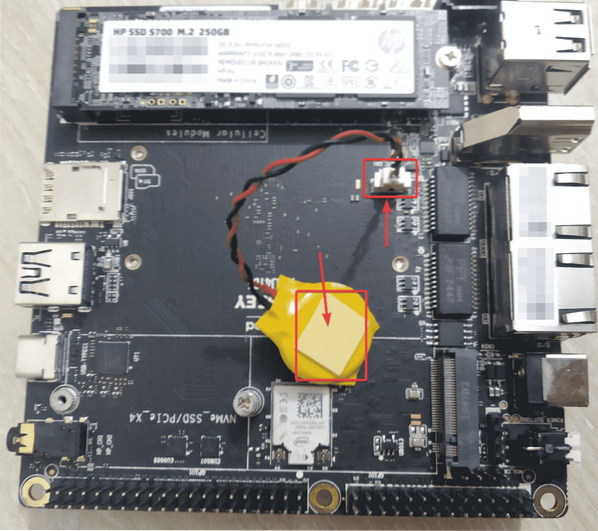
Attach the CMOS battery on an empty place of the board using the double-sided tape, as shown in fig 15. This should hold the battery in position and won't damage your CMOS battery header.
Setting Up the Wi-Fi, Bluetooth, and Cellular Antennas:
This section is optional. Odyssey X86J4105 mini-computer has 2 Gigabit Ethernet ports. So, you may not need wireless connectivity. If you don't need Wi-Fi, Bluetooth, or Cellular connectivity, you can skip this section.
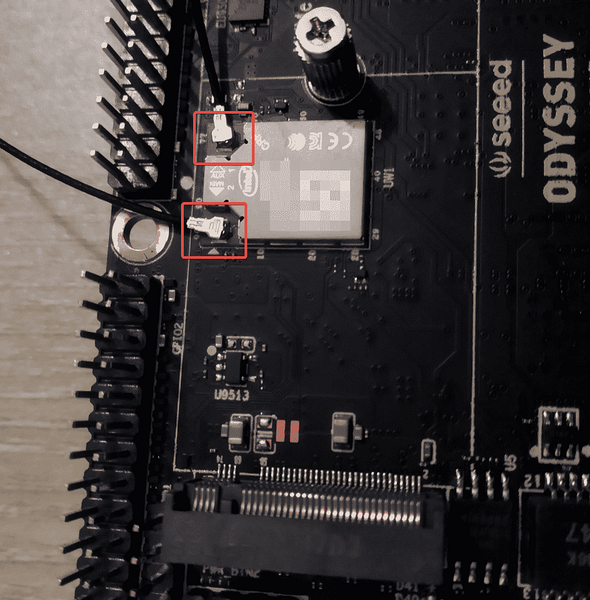
Odyssey X86J4105 mini-computer provides 2 antennas. If you need Wi-Fi, Bluetooth, or Cellular connectivity, you can attach them, as shown in fig 16.
After attaching the CMOS battery and the wireless antennas, the Odyssey X86J4105 mini-computer should look as shown in fig 17.
Downloading Ubuntu 20.04 LTS ISO Image:
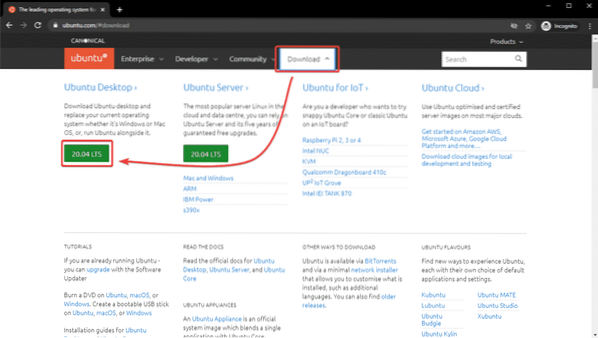
First, visit the official website of Ubuntu. Once the page loads, click on Download > 20.04 LTS, as shown in the screenshot below.
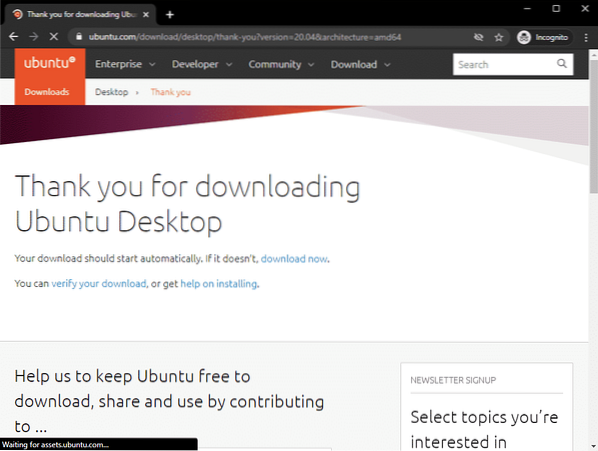
Ubuntu 20.04 LTS ISO image should start downloading without a few seconds. If not, click on download now.
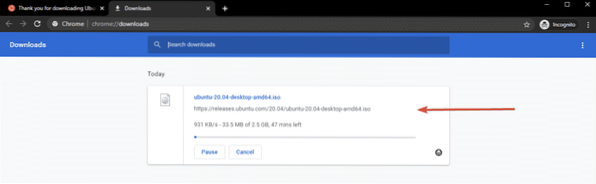
Ubuntu 20.04 LTS ISO image is downloading, as you can see in the screenshot below. It will take a while to complete. I am not going to download it as I have already downloaded it.
Once Ubuntu 20.04 LTS ISO image is download, you can make a bootable USB thumb drive of Ubuntu 20.04 LTS, which you can use to install Ubuntu 20.04 LTS on your Odyssey X86J4105 mini-computer.
Making a Bootable USB Thumb Drive on Windows:
If you're using the Windows operating system, you can use Rufus to easily make a bootable USB thumb drive for installing Ubuntu 20.04 LTS on your Odyssey X86J4105 mini-computer.
To download Rufus, visit the official website of Rufus.
Scroll down a little bit and click on the Rufus portable link, as marked in the screenshot below.
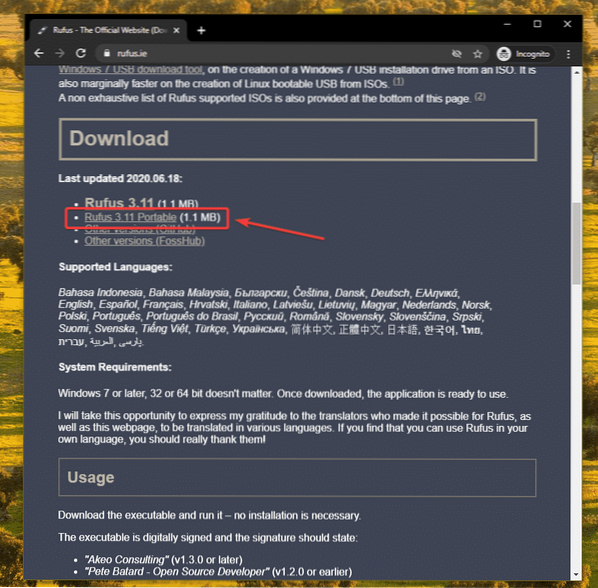
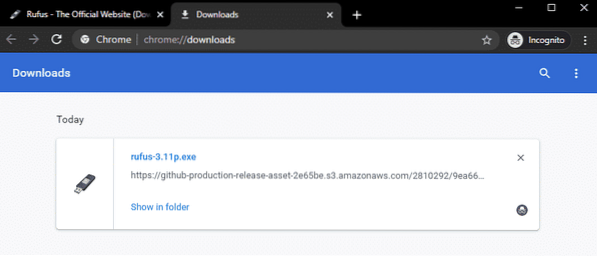
Rufus should be downloaded.
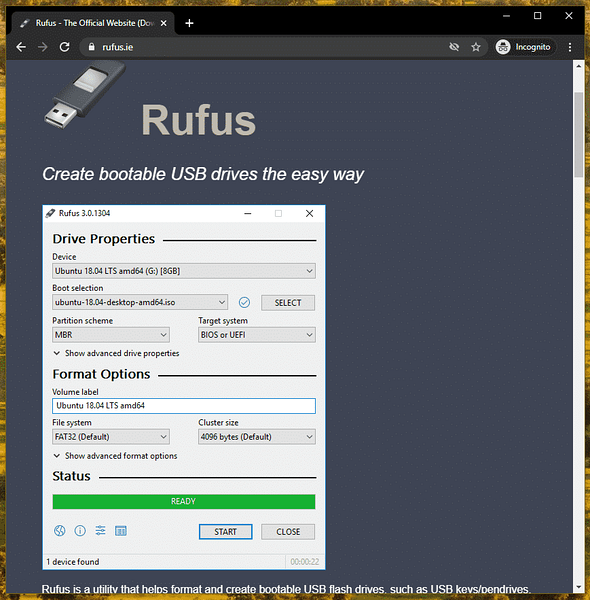
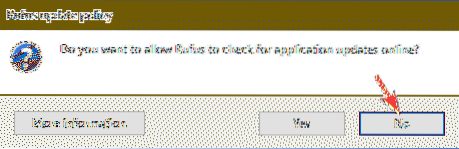
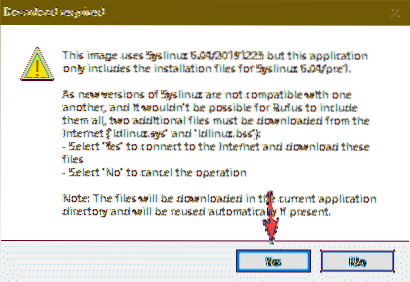
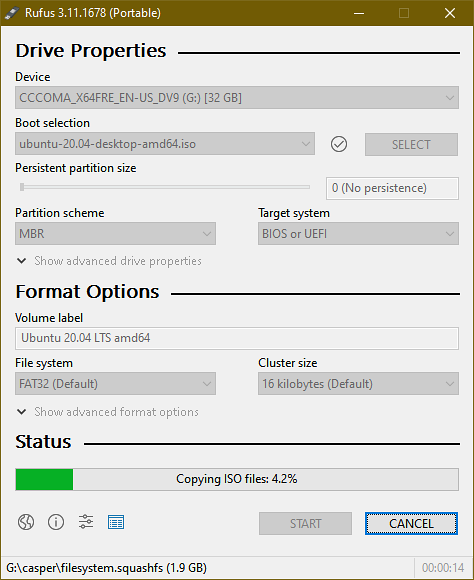
Now, insert a USB thumb drive on your computer and run Rufus. You may see the following window, click on No.
Rufus should start. Click on SELECT.
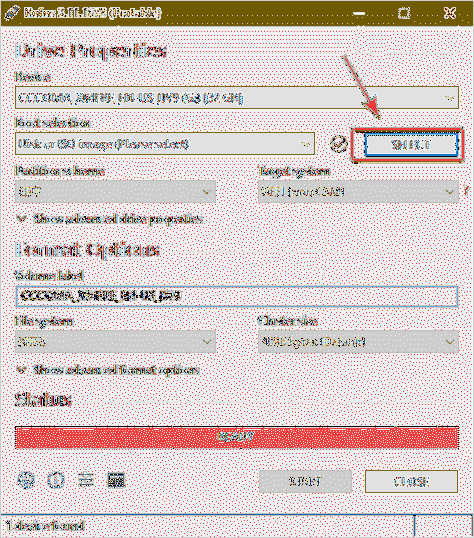
A file manager should open. Select the Ubuntu 20.04 LTS ISO image that you just downloaded and click on Open.

Click on START.
Click on Yes.
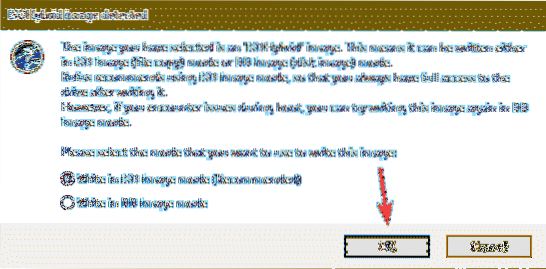
Leave the default option. Write in ISO Image mode (Recommended) selected and click on OK.
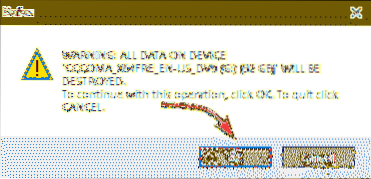
If you have any important data on your USB thumb drive, move them somewhere safe and click on OK.
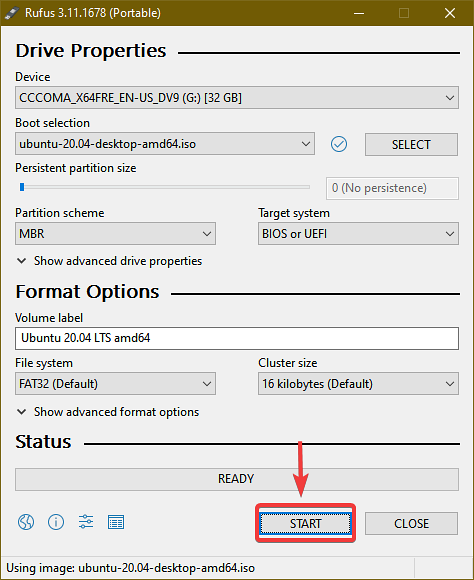
Rufus should copy all the important files from the ISO file to your USB thumb drive. It may take a while to complete.
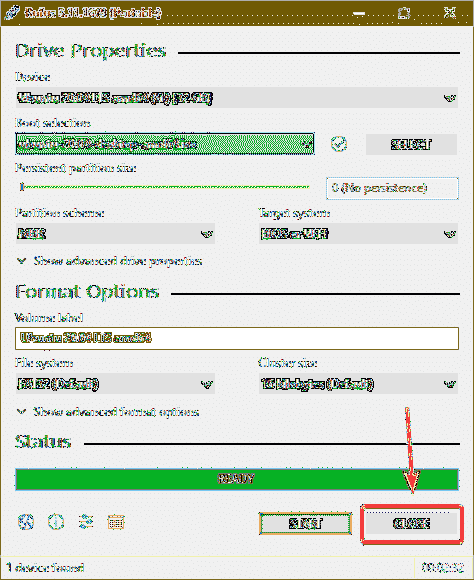
Once all the files are copied, the status should be READY. You can click on CLOSE to close Rufus. Then, eject the USB thumb drive from your computer.
Making a Bootable USB Thumb Drive on Linux:
If you're using a Linux distribution, you can use the dd command to easily make a bootable USB thumb drive for installing Ubuntu 20.04 LTS on your Odyssey X86J4105 mini-computer.
Once you've downloaded the Ubuntu 20.04 ISO image, navigate to the ~/Downloads directory as follows:
$ cd ~/Downloads/
You should find the Ubuntu 20.04 ISO file there.
$ ls -lh
Now, run the following command:
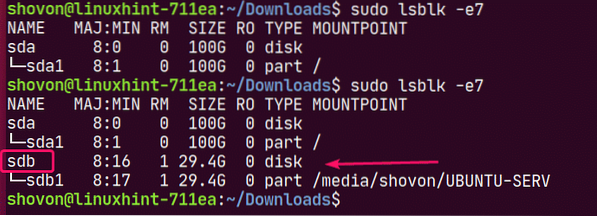
$ sudo lsblk -e7Then, insert the USB thumb drive on your computer and run the following command:
$ sudo lsblk -e7If you compare the outputs, you should see a new disk (sdb in my case). This is your USB thumb drive. You can access it as /dev/sdb.
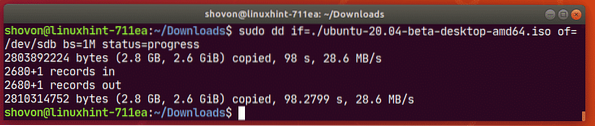
Run the following command to write the Ubuntu 20.04 ISO file to your USB thumb drive /dev/sdb:
$ sudo dd if=./ubuntu-20.04-beta-desktop-amd64.iso of=/dev/sdb bs=1M status=progress
NOTE: Make sure that there are no important files on your USB thumb drive.
The required files are being copied to the USB thumb drive. It should take a while to complete.

At this point, the USB thumb drive should be ready.
Now, eject the USB thumb drive from your computer as follows:
$ sudo eject /dev/sdb
Booting from the USB Thumb Drive:
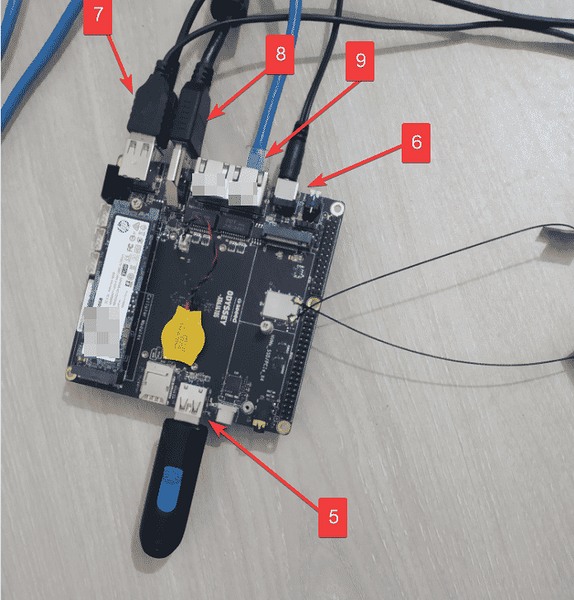
Before you power on the Odyssey Mini-computer, connect a USB keyboard and a mouse in the USB 2.0 ports(7), the HDMI cable of your monitor(8), the DC power jack(6), Ethernet cable to the RJ-45 port(8), and the bootable USB thumb drive on the USB 3.1 port(5) of your Odyssey mini-computer.
Odyssey X86J4105 mini-computer after connecting everything is shown in fig 18.
Once you power on the Odyssey X86J4105 mini-computer, you should see the Seeed Studio logo, as shown in fig 19. When you see this image, press the

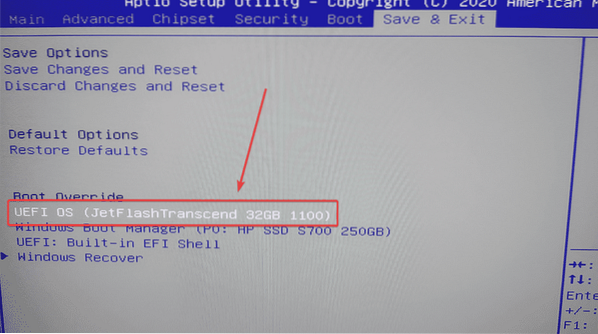
From the BIOS, go to the Save & Exit tab and select your USB thumb drive from the Boot Override list, as shown in fig 20.
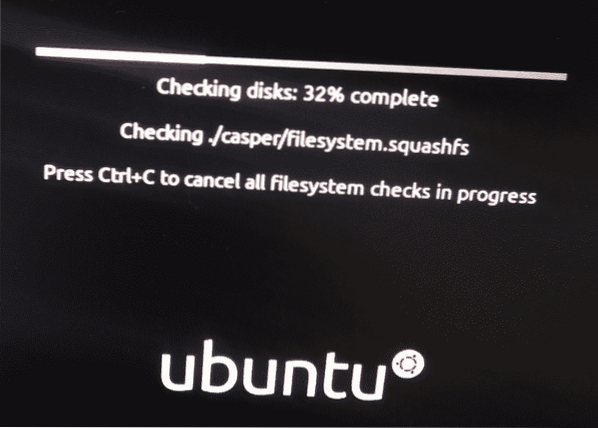
You should see the Ubuntu 20.04 LTS disk checking window shortly.
Once the disk checking is complete, you should see the loading window of the Ubuntu 20.04 LTS installer.

Shortly, you should see the Ubuntu 20.04 LTS installation window.
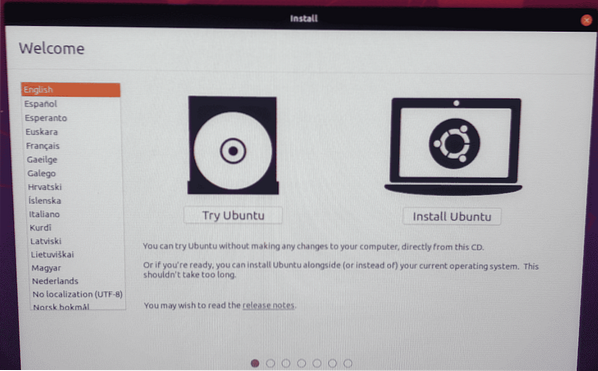
Installing Ubuntu 20.04 LTS:
From the installation window, you can click on Try Ubuntu to start the Ubuntu 20.04 LTS Live Session to check if everything is working as expected. Then, install Ubuntu from the live session if you like it.
You can also click on the Install Ubuntu button to start the installation directly.
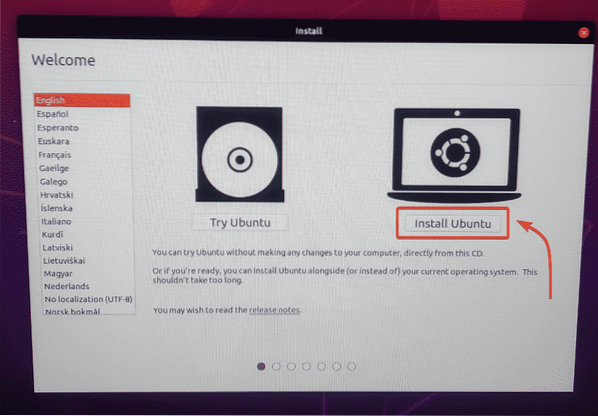
Once you click on the Install Ubuntu button, the Ubuntu installer should start.
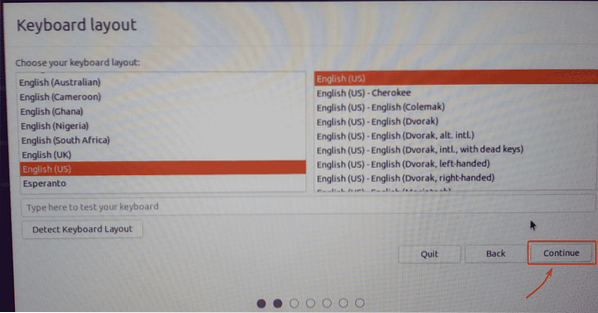
The first thing you should do is to select the Keyboard layout. Then, click on Continue.
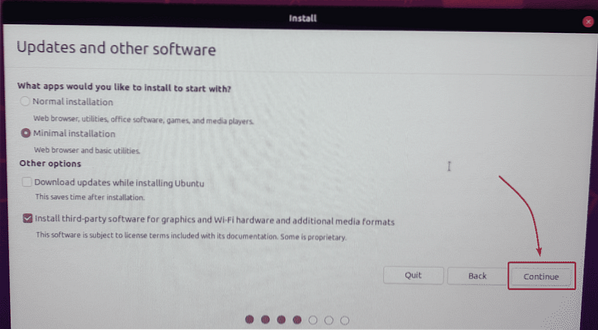
From here, you can do a Normal installation or Minimal installation. The Normal installation comes with all the apps as usual. The Minimal installation comes with a limited number of apps.
If you have an internet connection on your mini-computer, you can check Download updates while installing Ubuntu to download all the necessary updates while installing Ubuntu on your Odyssey X86J4105 mini-computer.
You can also check to Install third-party software for graphics and Wi-Fi hardware and additional media formats if you want the Ubuntu installer to automatically install GPU, Wi-Fi drivers, and multimedia codecs on your Odyssey X86J4105 mini-computer.
Once you're done, click on Continue.
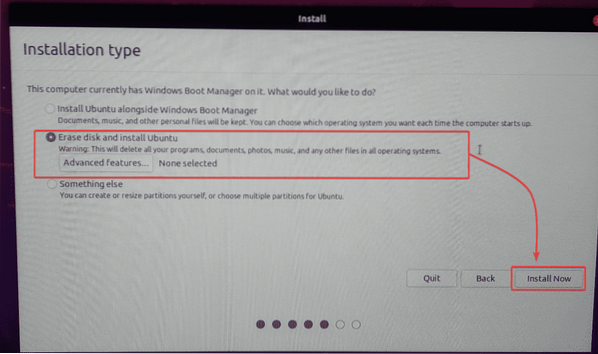
You can to partition your SSD from here or install Ubuntu alongside Windows if you have Windows installed on your SSD already.
As I am using a new M.2 SATA SSD on my mini-computer, and I don't have anything important to keep, I will select Erase disk and install Ubuntu. This option will format my SSD, create all the required partitions, and install Ubuntu on it.
If you want to manually partition your SSD and install Ubuntu there, check my article Installing Ubuntu Desktop 20.04 LTS.
Once you're done, click on Install Now.
To confirm the disk partition changes, click on Continue.

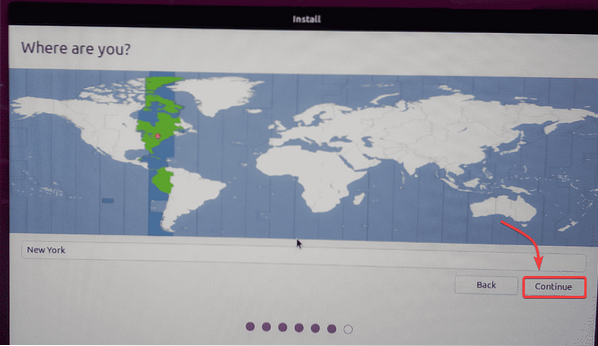
Select your time zone and click on Continue.
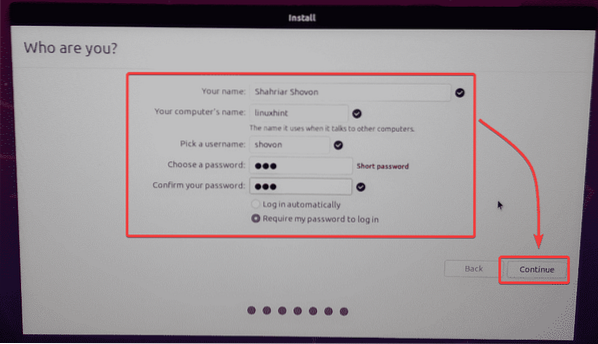
Type in your personal information and click on Continue.
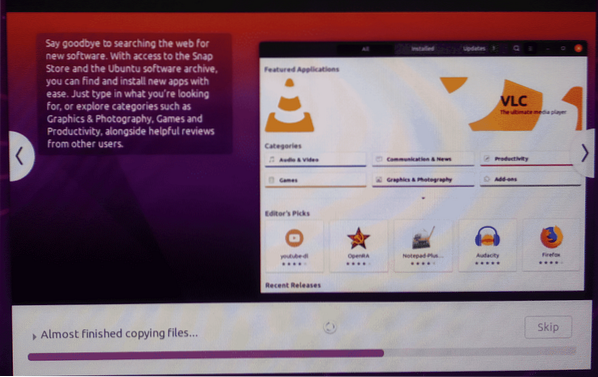
Ubuntu installer should start copying all the required files to your SSD. It may take a while to complete.
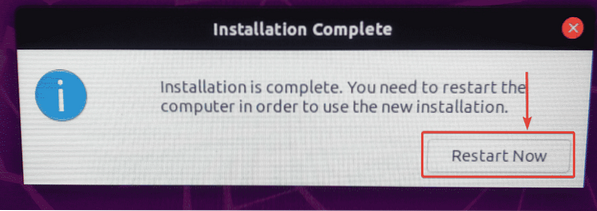
Once the installation is complete, click on Restart Now.
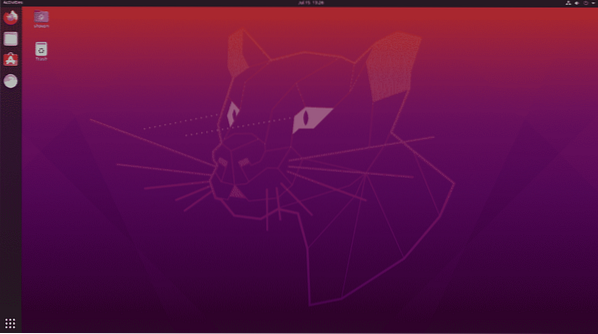
Remove the USB thumb drive from your Odyssey mini-computer and press

The Odyssey mini-computer should reboot, and Ubuntu should load from the SSD, as you can see in the screenshot below.

The Ubuntu 20.04 LTS operating system is running on Odyssey X86J4105 mini-computer.
As you can see, it has 8 GB of memory and 4 processor cores. The processor cores are not that busy. It's very useful.

Conclusion:
Odyssey X86J4105 mini-computer can be a very good Linux desktop alternative. It's fully compatible with Linux. So, you won't have any hardware compatibility issues at all. You can just buy this hardware and be sure that your favorite Linux distribution will run.
If you don't need very high processing power, you just want to do software development, or remote software development, office works, watch movies, listen to music, and other light tasks. I highly recommend you Odyssey X86J4105 Linux compatible mini-computer.


