Oracle Linux 8 is a free and open-source operating system specially created for developers to work on different tools and technologies. If you find it difficult to install the Linux Oracle 8 Server on your system, then you are in the right place. Follow the steps included in this tutorial to successfully install Oracle Linux 8 on your system.
Note: Make sure that you have a virtual box already installed on your Windows system before beginning the installation of Oracle Linux 8.
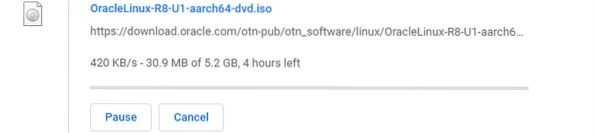
Download Oracle Linux 8 ISO File
Open your favorite browser to download the Oracle Linux 8 .iso file. Search for the particular file and download it, as shown.
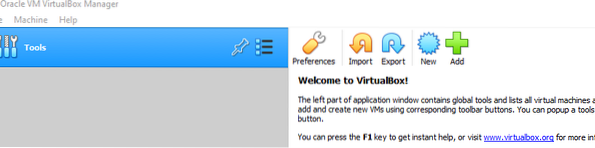
Create New Virtual Machine
Open your virtual box and you will see the following window appear. Click the New button to create a new virtual machine.
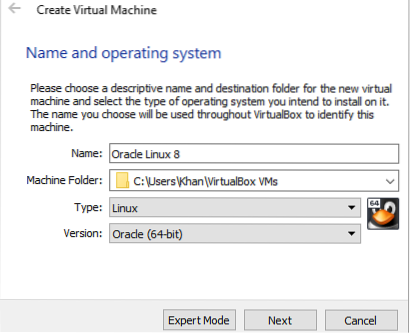
Name the operating system to be recognized and select the Oracle(64-bit) version. Click Next to proceed.
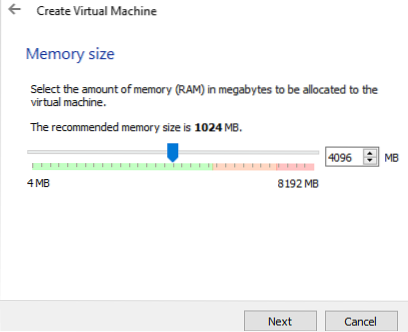
Select the RAM for this particular disk. 4GB is recommended for processing. Click Next to jump to the next step.
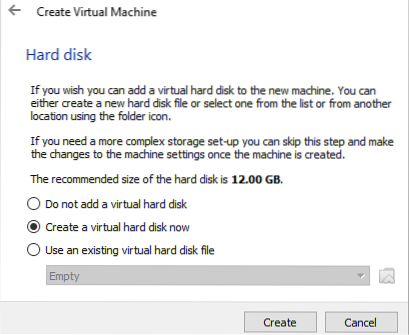
Now, select the Create a virtual hard disk now option and click Next to proceed with the creation.
Here, you will select the VDI (VirtualBox Disk Image) option because you have downloaded the .iso file as a disk image. Click the Next button to continue.

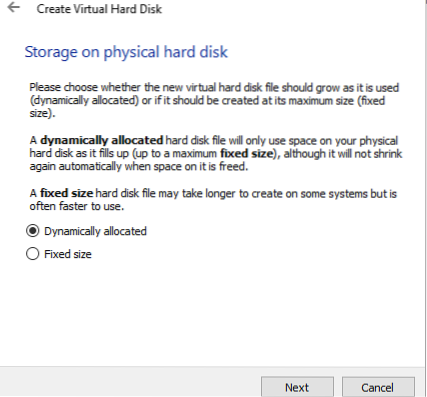
Select the Dynamically allocated storage option on the physical hard disk, then click Next to continue.
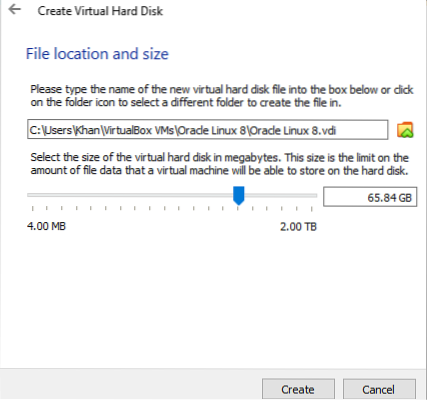
Select the location and size of the file to be installed and, after that, click Create to finish the virtual disk creation. You will now be re-routed to the Virtual Box screen.
Load ISO File in Virtual Machine
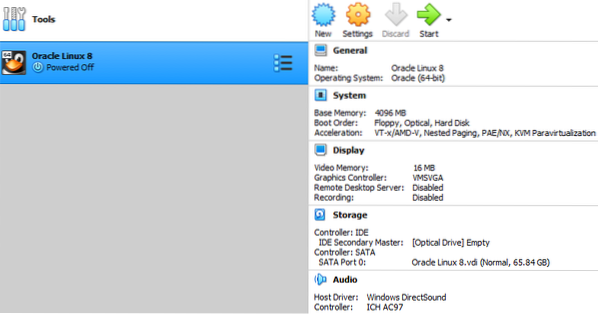
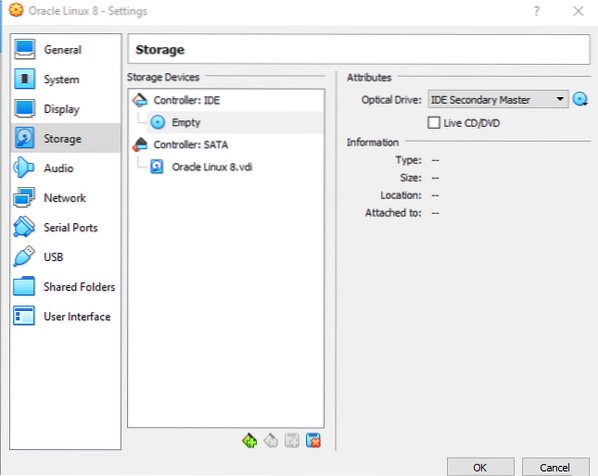
Choose the Settings option from the right side of the Virtual box.
In Settings, navigate to Storage and then click the CD icon, followed by Empty. On the far-right side of the window, under the Attributes column, click the CD icon to add the .iso file into it.
After this, the following window will appear. Click the Add icon to add a file with the .iso extension.
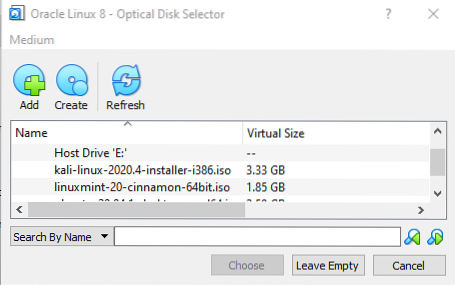
The window will then navigate to the Downloads folder. Now, select the Oracle Linux 8 .iso file that you recently downloaded.

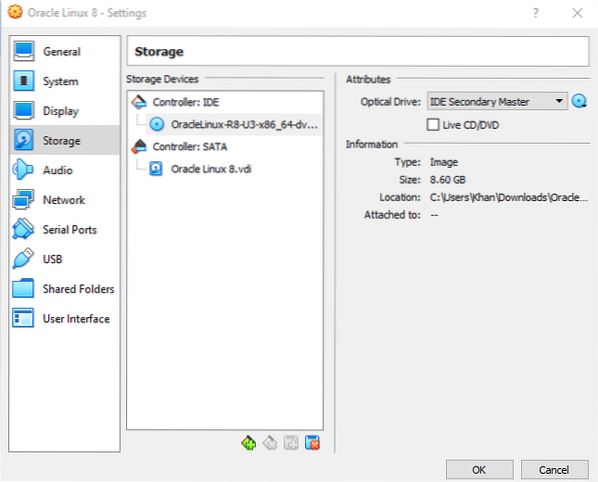
The file with the .iso extension has now been loaded in Controller IDE. Press the OK button to go for a successful installation. This window closes automatically immediately after you do this.
Installation
In the right corner of the virtual box, click the Start icon to start the Oracle Linux 8 Virtual Machine. You will then see the window below open. You may select the Install Oracle Linux 8.3.0 option and press Enter to begin the installation. Otherwise, the installation will automatically start in 60 seconds.

You will see the following process in the virtual machine boot processing.

You will have to wait a bit to begin the installation of Oracle Linux 8.

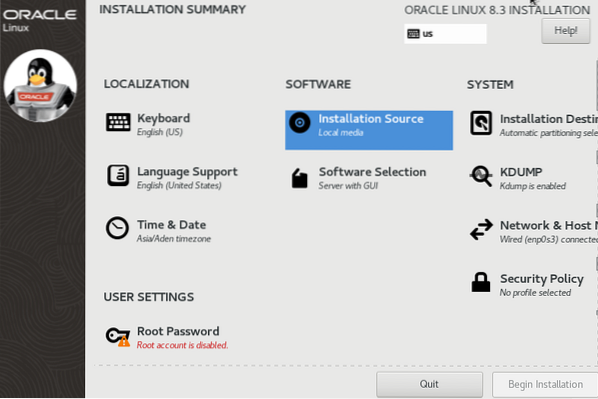
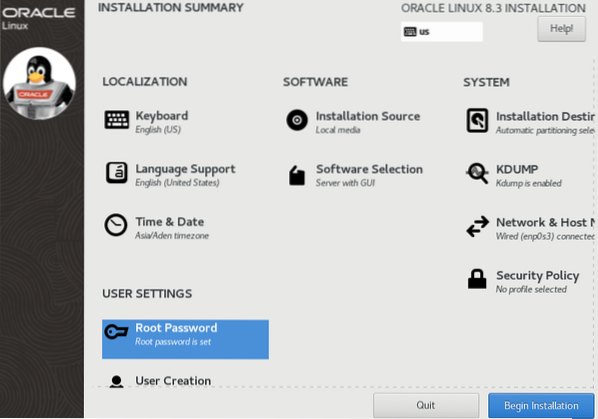
After some time, you will see the following Installation Summary screen, which contains several different configuration options. You will have to update every one of these, especially the options with alert marks, before starting the installation process. Before that, as you can see, the Begin Installation button has been disabled.
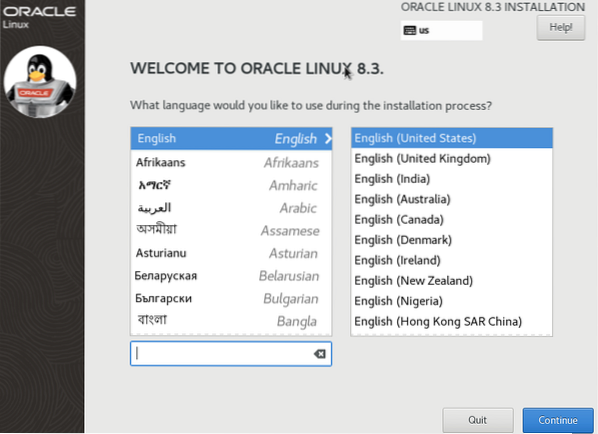
You will then see a welcome screen. Select English and press the Continue button. After that, you can carry on with the installation.
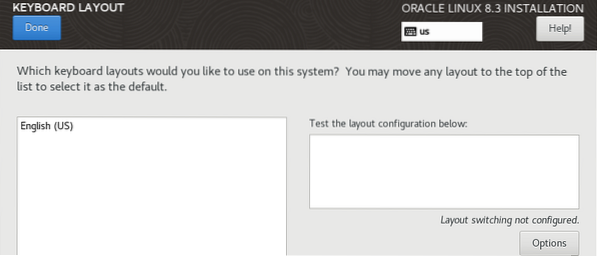
Click the Keyboard option under the Localization section. Select English as your default keyboard and click Done to configure this setting.
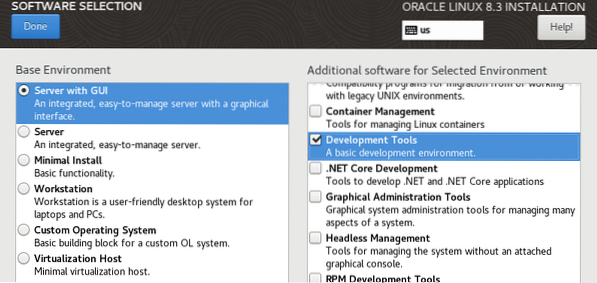
Open the Software Selection option in the Software section. Choose the Server with GUI selection from the left-side column and checkmark the Development Tools option in the right- side column of the window.
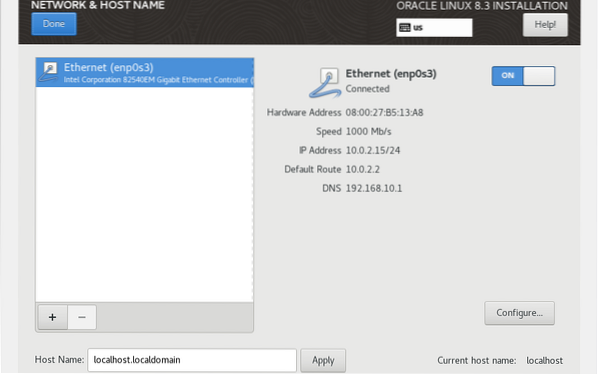
In the System section, open the Network and Host Name window. Turn on the Ethernet and then press Done.
Another important option is the Installation Destination option under the System section. Select the Hard disk from the Local Standard Disks. After that, choose the Automatic option from the section and click Done to continue.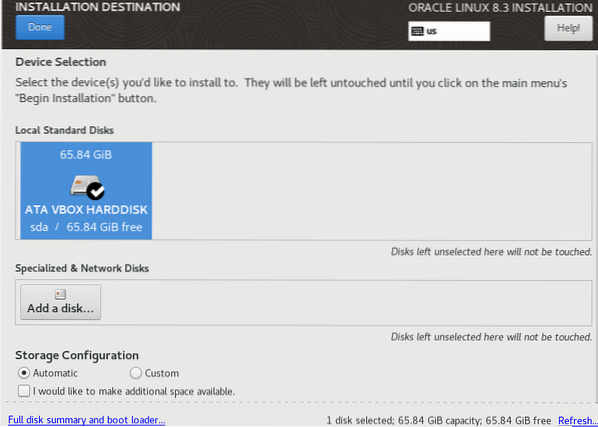
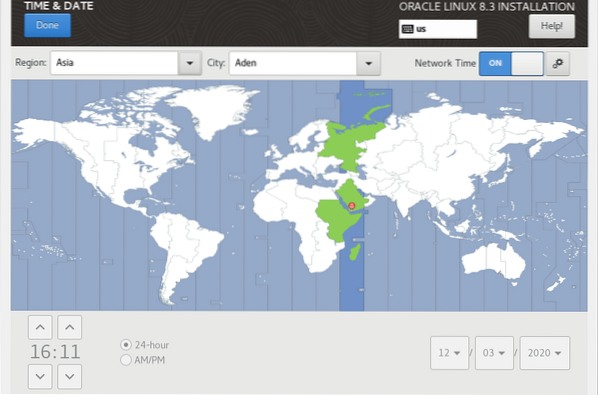
Now, select the Time and Date options under the Localization section. Set the Region and City according to your own time zone. Press Done to proceed.
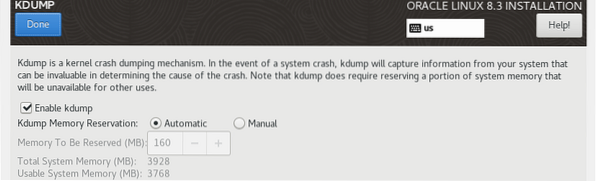
Under the System section, choose KDUMP. Enable KDUMP by check-marking it and press Done.
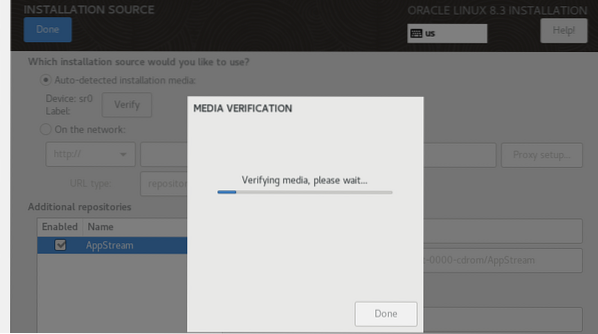
Now, the most important option is the Installation Source option under the Software section. Open this option and select the Auto-detected installation media option. After that, click the Verify button.
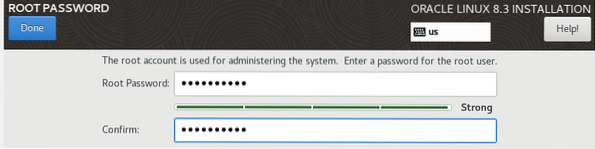
Under the User Settings section, you will see the Root Password option. You will have to set this option first to configure the root user for the system to be installed. So, add a password and click Done to continue.
Now, the Begin Installation button is enabled. After all the settings have been configured, you are now able to start the installation using the Begin Installation button. Click this button to start the installation.
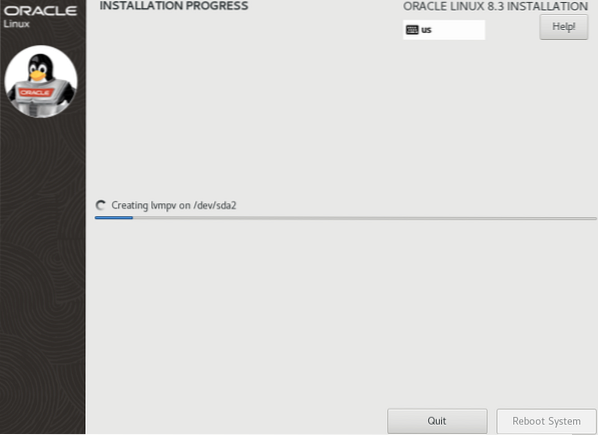
You will have to sit idle and wait for some time until your Oracle Linux 8 system has been installed on the virtual box, as you can see in the image below.
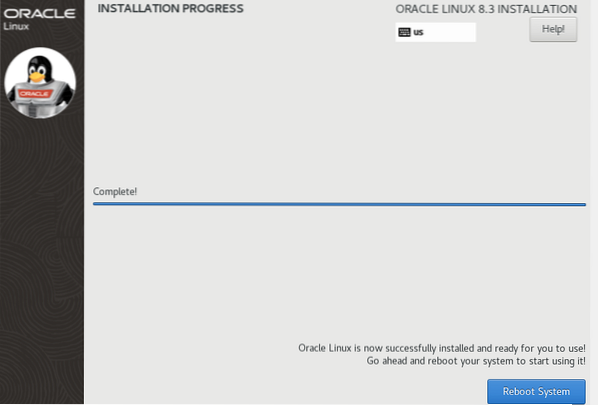
After waiting for some time, you will eventually see a message stating that the installation process has been completed. Click the Reboot System button to continue the installation process.
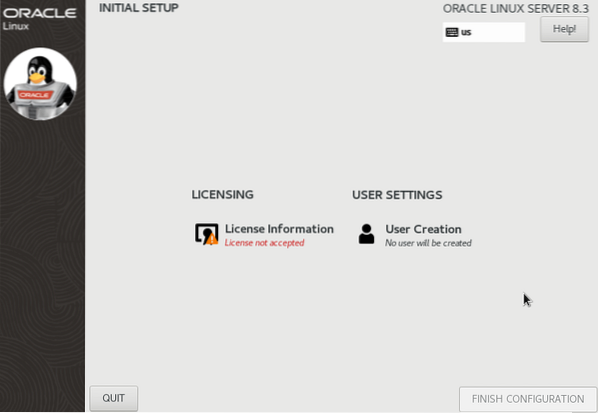
Wait for some time while your system is rebooting. After that, you will encounter the following screen, with the Finish Configuration button disabled. Now, click the License Information option under the Licensing section to continue.
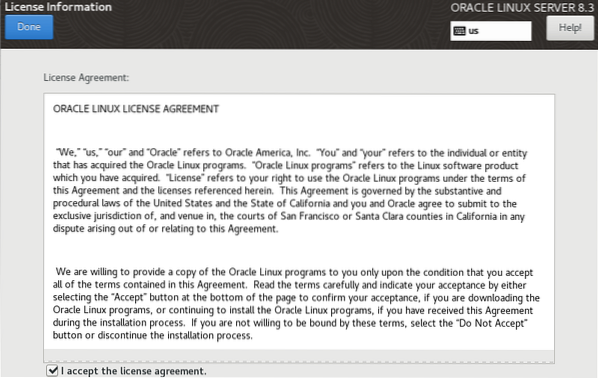
Checkmark the checkbox I Accept the License Agreement and click Done to continue.
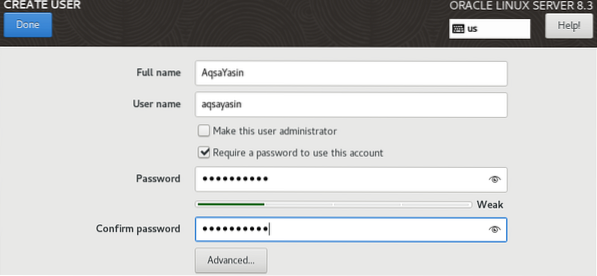
Now, choose the User Creation option and add the Full name and Password to it. You will see that the username will automatically be added when you complete this field. If you want to make this user the administrator of the system, then checkmark the correct option for this. Click the Done button to proceed.
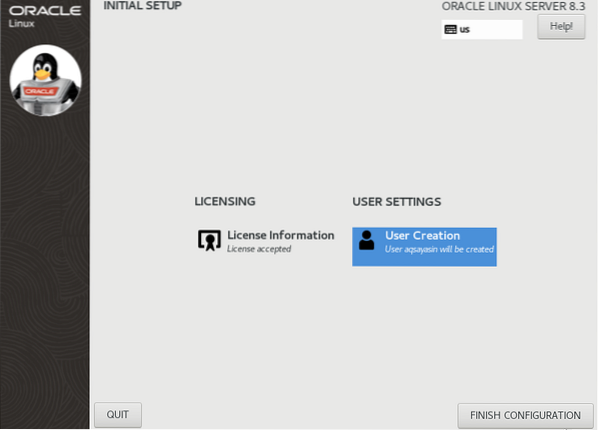
Finally, the Finish Configuration button has been enabled! Click this button to finish the configuration and installation.
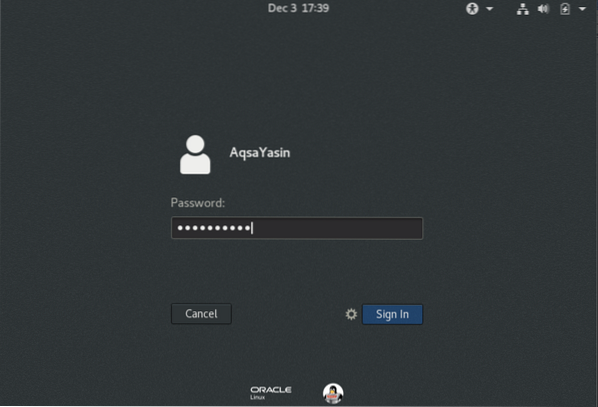
Now, log in to your Oracle Linux 8 virtual system by providing your password and clicking the Sign In button.
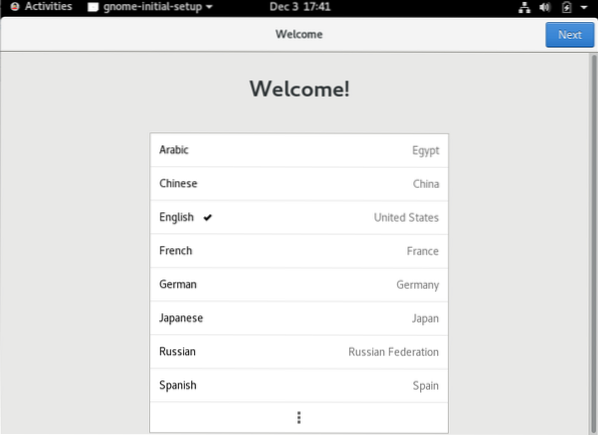
You then see the welcome screen. Choose English and hit the Next button.
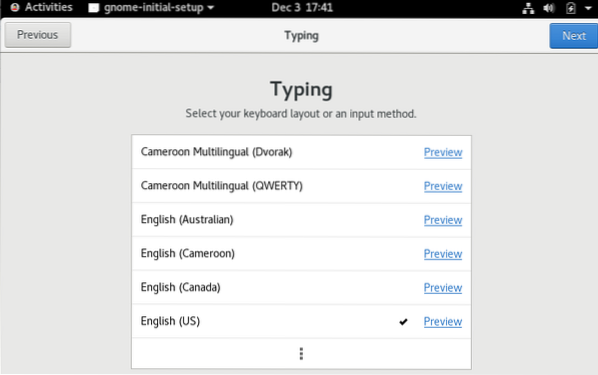
Select the Typing keyboard and hit the Next button to move forward.
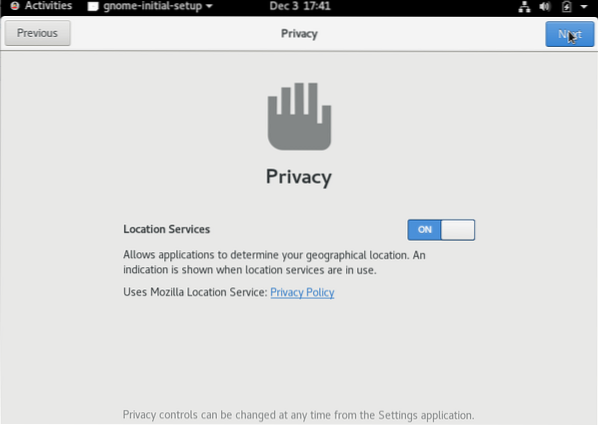
After that, turn on the Location Services and click Next.
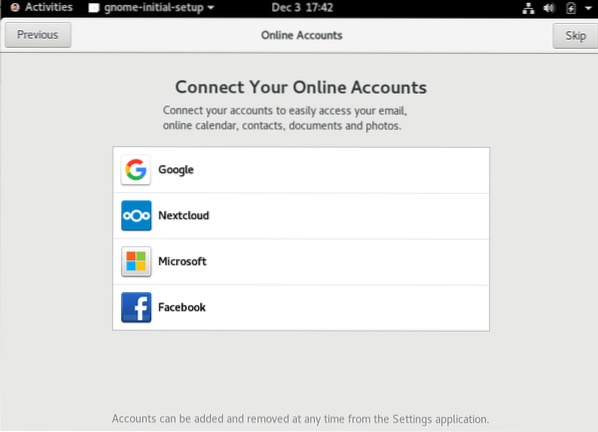
You can connect any Online Account by providing its credentials; otherwise, click Skip to continue.
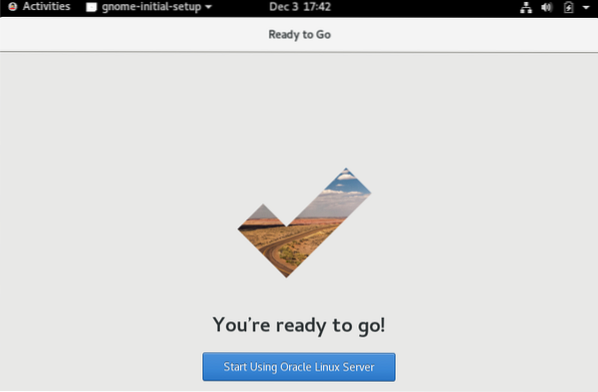
Now, you are ready to go. Press the Start Using Oracle Linux Server button.
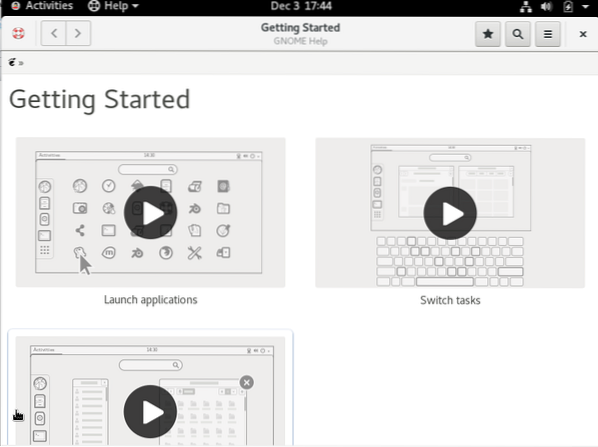
You will then see the following Getting Started Window. Close this window to continue using Oracle Linux 8.
You can see that Oracle Linux 8 has been successfully installed. Now, you can use this system and make changes to it by installing different modules on it.
Conclusion
This article taught you how to download the .iso file, how to create a virtual machine for the .iso file, and how to install Oracle Linux 8 using the .iso file. This is indeed a very easy-to-do task with the help of this tutorial! I hope that you are skilled enough to install Oracle Linux 8 on your own Virtual Box.


