In one of our previous posts, we showed you how to easily install Macrium Reflect Free edition in your Windows. After installing Reflect, it's always a good idea to create the rescue media so that you can backup and restore from a bootable media. You can use the rescue media to restore your drive images if your PC ever fails to boot.

The free edition of Macrium Reflect rescue media sports an easy-to-use interface and offers you backup drives by creating images of them and also lets you restore previously created drive images.
If you have created drive images using Macrium Reflect and haven't created the rescue media yet, you should create the Macrium Reflect rescue media as it enables you restore drive images if your Windows ever fails to boot.
Complete the below mentioned steps to prepare Macrium Reflect rescue media. You can either use a CD/DVD or USB drive to prepare the rescue media.
Step 1: Run Macrium Reflect software.
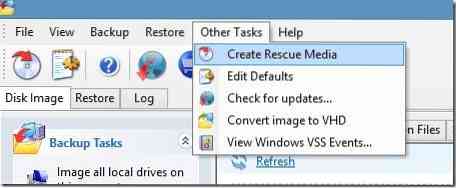
Step 2: Click on the Create bootable rescue media icon (the first one) in the toolbar or click Other Tasks menu and then click Create Rescue Media option to open Rescue Media wizard.
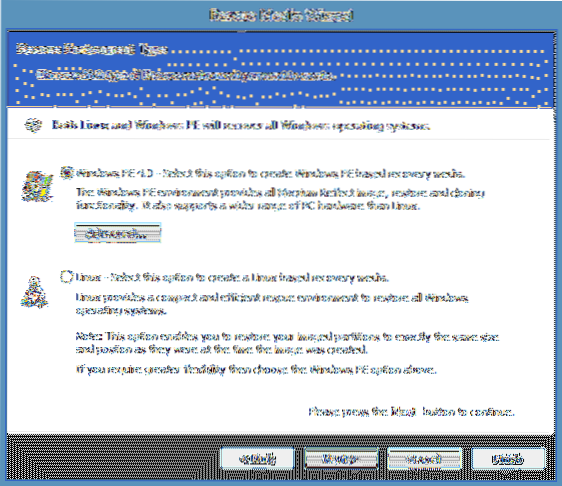
Here, we recommend you select Windows PE 4.0 not because you're running Windows operating system but because Windows PE provides all Macrium Reflect restore and cloning functionality, and also supports a wide range of PC hardware.
Click Next button to proceed to the next step.
If you have already downloaded Windows PE components while downloading Macrium Reflect, you can safely skip Step 3, and follow instructions in Step4. In other words, you'll see the picture provided in Step 4 when you click on the next button.
And if you have selected Reflect Installer Only option while downloading Reflect, you have to follow instructions provided in Step 3.
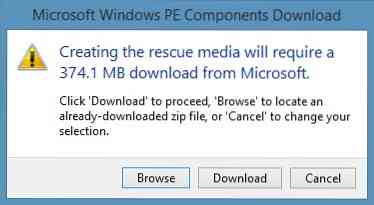
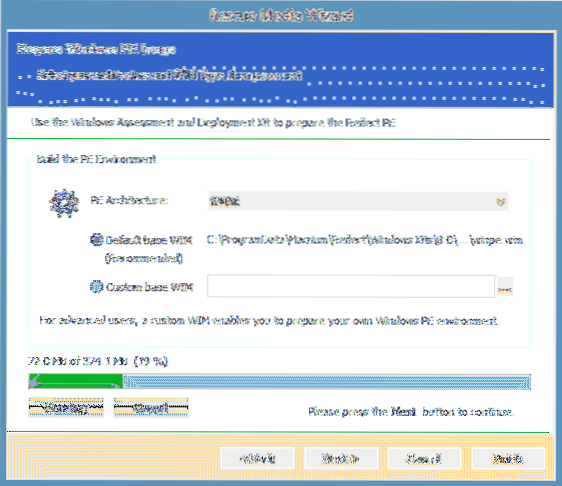
Step 3: Here, select Windows PE architecture (32-bit rescue media isn't compatible with 64-bit Windows, and vice versa), click Next button, and then click on the Download button when it asks your permission to download PE components (~375 MB) from Microsoft server.
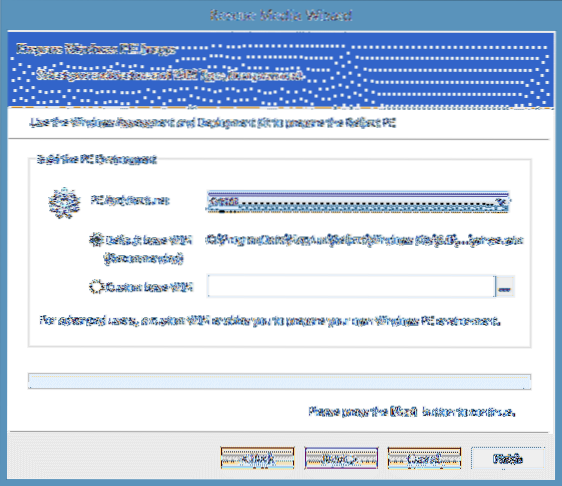
NOTE: You need to carefully select the architecture as 32-bit rescue media can't be used on a 64-bit Windows machine. Likewise, 64-bit rescue media doesn't support 32-bit Windows. However, if you're preparing the rescue media to use on another machine, you can select the architecture of Windows installed on another machine.
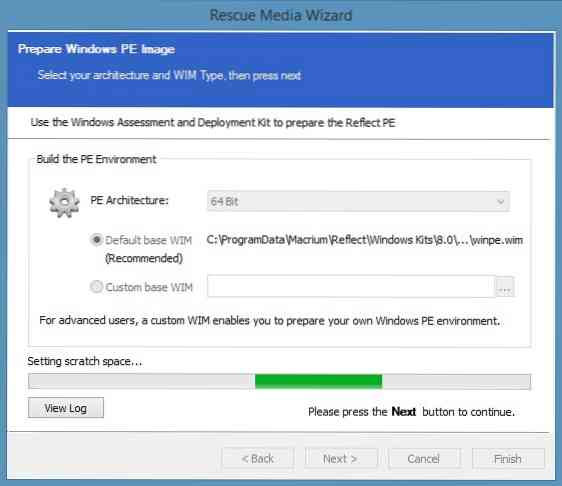
Depending on your connection speed, the download process may take a few minutes to hours.
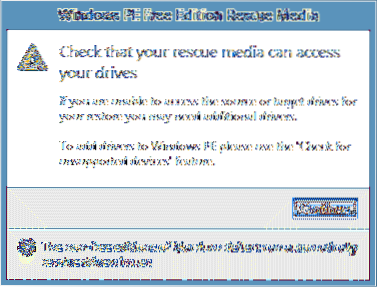
Step 4: When you see the following dialog box, simply click Continue button.
Step 5: Select your CD/DVD drive or select a USB device that you would like to use to create bootable rescue media.
WARNING: If you have selected USB drive, backup all data before proceeding to the next step as your device will be erased while preparing the rescue media.
Here, make sure that Check for unsupported devices each time the Rescue media loads and Prompt for key press to continue (this option will not appear if you have selected USB) from the rescue media options are selected.
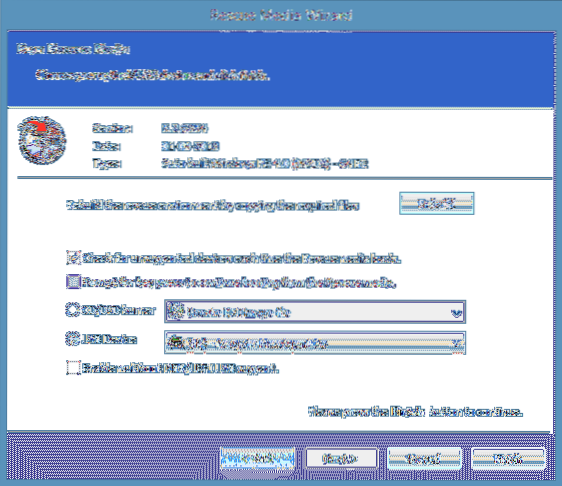
Step 6: Finally, click Finish button to start transferring rescue media files to your USB drive. Once its job is done, the wizard will show “Rescue Media Successfully Created” message. That's it! Keep the rescue media in a safe and easily accessible location.