
By default settings, Ubuntu 17.10 displays one clock with one time zone setting in the status bar. I have my family and friends living in other countries, and so I thought it will be handy if I can have multiple clocks on my Ubuntu desktop for which I can specify different time zones in each of the clocks.
Adding multiple clocks with different time zone settings
We need to install GNOME clocks utility to get our thing done. Let's get started.
Step 1) Launch 'Terminal'.
Step 2) Enter the following command to install GNOME clocks. You will have to enter root password.
sudo apt-get install gnome-clocks
Step 3) Pay attention to the Terminal and enter 'Y' when requested.
Step 4) After the installation is complete, go to “Activities” and launch “Clocks”.

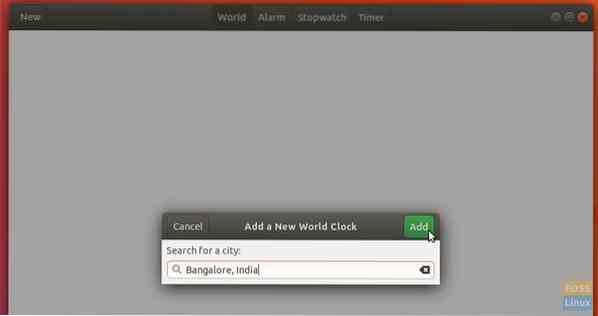
Step 5) Click “New” and start entering the city name. You should see suggestions of the city as you start typing in. Select the city and click “Add”.
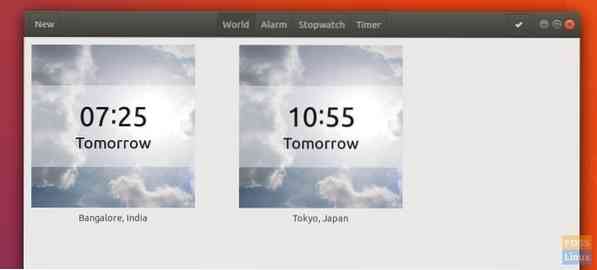
Step 6) Similarly, add clocks as needed.
Step 7) Close everything and restart the computer.
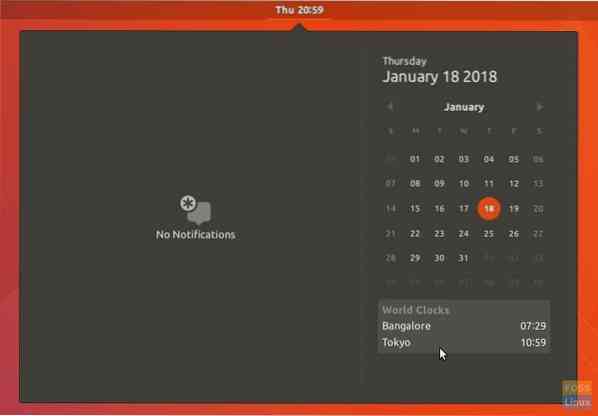
Step 8) After logging in, click on the time in the status bar. You should see the new clocks in “World Clocks” section.
That's it!


