Installing Pyautogui
Before using functions of PYAUTOGUI module, we have to install it. To install this module, run the following command in Terminal.
$ pip install pyautoguiOR
$ pip3 install pyautoguiNow PYAUTOGUI is ready to use.
Getting Resolution of Display
Before automating mouse actions, it is a good practice to know the resolution of the display. We can get the resolution of the display using .size() method of
PYAUTOGUI. See below getting resolution of the screen in form of 'width X height':
Python 2.7.15+ (default, Oct 7 2019, 17:39:04)[GCC 7.4.0] on linux2
Type “help”, “copyright”, “credits” or “license” for more information.
>>> import pyautogui>>> width, height = pyautogui.size()
>>> print(width)
1366
>>> print(height)
768
It means, we have 1366 pixels in horizontal direction of display and 768 pixels in vertical direction of display.
Moving the Mouse on Display
So we know the resolution of our display. Now we can move the mouse anywhere on the display within the limits of resolution of display. We can move the mouse using .moveTo() method of PYAUTOGUI. Example below of moving mouse to (100,100) position in 2 seconds
>>> import pyautogui>>> pyautogui.moveTo(100,100,duration=2)
We have passed three arguments to .moveTo() method. First two arguments are compulsory and show the position of destination but third argument is not compulsory. If we do not pass the third argument, then mouse moves to the destination within no time.
Clicking, Scrolling and Dragging Mouse
PYAUTOGUI provides some methods to control mouse actions. We can click, scroll and drag mouse using different methods.
Clicking action of mouse can be performed using .click() method. Before clicking, move the mouse to the required pixel then use .click() method to click. Following is the example to perform the clicking action of mouse. Example below will move mouse to (300,201) pixel and click the mouse.
>>> import pyautogui>>> pyautogui.moveTo(300,201)
>>> pyautogui.click()
You can double click the mouse using .doubleClick() method.
>>> pyautogui.moveTo(300,201)>>> pyautogui.doubleClick()
PYAUTOGUI provides a method .scroll() to scroll the mouse up or down. This method takes an integer as an argument, then scrolls up or down depending upon the integer. If you pass a positive integer then it will scroll up and for a negative integer it will scroll down. How much it will scroll? It depends upon the value of integer.
>>> import pyautogui>>> pyautogui.scroll(20)
>>> pyautogui.scroll(-20)
In the above example, first the mouse will scroll up 20 units and then it will scroll down 20 units.
Dragging operation of mouse can also be applied using .dragTo() method of PYAUTOGUI module. Dragging means, moving the mouse while pressing one of the mouse buttons. This method takes three arguments, the first two arguments to display the coordinates of destination and the last argument is duration time that means how much time it will take to move to the destination.
To see the dragging operation, open the paint, maximize the window, pick the pencil and run the following commands into the interactive shell. The code will move mouse to (138,229) pixel in 2 seconds, and then dragg mouse from current pixel to required pixel also in 2 seconds.
>>> import pyautogui>>> pyautogui.moveTo( 138, 229, duration=2)
>>> pyautogui.dragTo( 238, 229, duration=2)
>>> pyautogui.dragTo( 238, 329, duration=2)
>>> pyautogui.dragTo( 138, 329, duration=2)
>>> pyautogui.dragTo( 138, 229, duration=2)
Above code will make a square on paint program by dragging the mouse.
How to Find the Coordinates of a Directory or File Icon
To find the Coordinates of a file or a directory, .position() method is used. This method returns the coordinates at which mouse is currently present. Follow the given steps to find coordinates
- Open the python console
- Type position()
- Before pressing 'ENTER' key, move the mouse arrow to the icon, where you want to find coordinates
- Then press enter to execute the command
Handling PAUSE and FAILSAFE
You are writing a script to automate your mouse actions and you need a short pause between every command. How will you manage it? Will you use .sleep() method of TIME module after every command? But it will increase the length of your code. This can be done by setting pyautogui.PAUSE variable to the number of seconds you want a pause. This will create a pause after every command. The example below pauses 3 seconds between each command.
>>> import pyautogui>>> pyautogui.PAUSE=3
>>> pyautogui.moveTo(100,100)
>>> pyautogui.moveTo(200,200)
Python also has a FAILSAFE feature. To enable this feature, we set pyautogui.FAILSAFE to True. How this works? For example your display has a resolution of 1366 X 768. If you move the mouse to (1500,1500), the program will crash by raising FailSafeException. You can handle this exception either by using try and except statement or by disabling pyautogui.FAILSAFE. By disabling FAILSAFE feature, the program will not raise this exception.
>>> import pyautogui>>> pyautogui.FAILSAFE=False
>>> pyautogui.size()
Size(width=1366, height=768)
>>> pyautogui.moveTo(1500,1500)
>>> pyautogui.moveTo(100,100)
In the above example we moved mouse on (1500,1500) pixel but the screen has (1366,768) pixels. Program ignored this Exception.
Sending a String From Keyboard
PYAUTOGUI provides a feature to pass a string from keyboard. This can be done using .typewrite() method of this module. Before passing string from keyboard, focus on the window where you are going to pass the string. To focus on the required window, we can use .click() method.
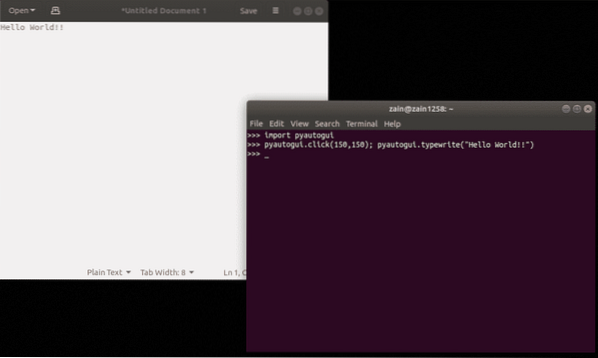
We used a semicolon between the two commands as it focuses on the text editor and pass the string one behind the other. Now the question is how we can pass 'Alt' or 'Shift' keys. These keys can be represented by short string values. Some string values are given below.
Keys String ValuesLeft and Right ALT keys 'altleft' , 'altright'
Left and Right SHIFT keys 'shiftleft' , 'shiftright'
Left and Right CONTROL Keys 'ctrlleft' , 'ctrlright'
PAGE UP and PAGE DOWN Keys 'pageup' , 'pagedown'
BACKSPACE and DELETE Keys 'backspace' , 'delete'
Up, Down, Left and Right Arrow Keys 'up' , 'down' , 'left' , 'right'
CAPS LOCK Key 'capslock'
ENTER Key 'enter'
ESC Key 'esc'
TAB Key 'tab'
HOME and END Keys 'home' , 'end'
F1 to F12 Keys 'f1' , 'f2' ,… . , 'f12'
NUM LOCK Key 'numlock'
PRTSC Key 'printscreen'
INSERT Key 'insert'
In order to pass one of the above keys, we use these string values in form of list. Following Example will clarify this. The code is passing 'capslock' two times. First time in form of list and second time simple string. Passing 'capslock' in list presses the 'CAPS LOCK' key. And second 'capslock' simply write 'capslock' in capital as 'CAPSLOCK' key is pressed first.
>>> import pyautogui>>>pyautogui.typewrite(['capslock']);pyautogui.typewrite('capslock')
CAPSLOCK>>> CAPSLOCK
Pressing Shortcuts
A shortcut is the combination of keys to perform some tasks. For example 'Alt+F4' shortcut is used to close the current window. A combination of keys can also be passed from keyboard using PYAUTOGUI module. To press 'Alt+F4', we first press and hold 'Alt' key then press 'F4' key. After releasing 'F4' key we release 'Alt' key. Here we will use .keyUp() and .keyDown() methods to press a combination of keys. Following example shows pressing and holding 'Alt' key and pressing and holding 'F4' key together.
import pyautoguiimport time
pyautogui.keyDown('alt')
pyautogui.keyDown(<'f4')
time.sleep(.5)
pyautogui.keyUp('f4')
pyautogui.keyUp('alt')
NOTE: In the above example we did not use the list of string value of 'Alt' and 'F4' key. List of string value is only passed to .typewrite() method.
It is very complicated to press and hold 'Alt' key then press 'F4' key and after releasing 'F4' key then release 'Alt' key. This can be done simply by using .hotkey() method. Following example will clear the concept.
import pyautoguiimport time
pyautogui.hotkey('alt','f4')
Taking and Analyzing Screenshot
We can also take screenshot using python. Pyautogui module offers .screenshot() method to take the screenshot of current screen. Screenshot can be displayed by using .show() method. Run the following command to take a screenshot and display it.
>>> import pyautogui>>> img = pyautogui.screenshot()
>>> img.show()
When you run the above commands to take screenshot, it will be saved in 'img' variable. Now we can call further methods on 'img' variable.
We can get a tuple of the RGB values of our required pixel by using .getpixel() method on 'img' variable. Argument passed to .getpixel() method is a tuple containing the x and y coordinates of screenshot. Run the following command into the interactive shell.
>>> img.getpixel((2,3))(85, 82, 74)
Further we can get the image size using the following command
>>> img.size(1366, 768)
We can check whether the given pixels of screen matches with the given RGB value or not. This can be done using .pixelMatchesColor() method. A total of three arguments are passed to this method. First two arguments are x and y coordinates of screen and third argument is a tuple of RGB values. This method returns 'True' if color matches with pixel otherwise 'False'. This method can be used as follows
>>> pyautogui.pixelMatchesColor(2,3,(85,82,74))True
>>> pyautogui.pixelMatchesColor(3,5,(52,85,74))
False
We have seen some basics, and now in the following sections we will see some use cases of automating the GUI using PYAUTOGUI module.
Automatically Opening Different Files for You
Everyday in your office, you have to open many files to enter some data of employees manually. It is a little bit boring thing to do. First go to Documents directory then go to another directory and open a file, then return to the Document directory and goto another directory and do the same thing etc.
This can be done simply by just writing a python script. What you have to do is to run the script only and the script will open all the files.
To perform this task, First of all you have to locate the coordinates of following
- Icon of every directory
- Icon of every file
- Minimize button of files
How to find the coordinates has been explained earlier.
# importing pyautogui moduleimport pyautogui
# generating a pause of 1.5 second after every command
pyautogui.PAUSE=1.5
# moving the mouse to 'This PC' icon on taskbar
pyautogui.moveTo(346,752)
# clicking on the 'This PC' icon
pyautogui.click()
# moving the mouse to 'Documents' directory icon
pyautogui.moveTo(95,184)
# clicking on 'Documents' directory
pyautogui.click()
# moving the mouse to the directory inside 'Documents' directory
pyautogui.moveTo(249,107)
# double clicking to open the directory
pyautogui.doubleClick()
# moving the mouse on the file to open
pyautogui.moveTo(249,108)
# double clicking on the file to open
pyautogui.doubleClick()
# moving the mouse on minimize button
pyautogui.moveTo(1310,47)
# clicking to minimize the file
pyautogui.click()
In the above code, we open one file only. Similarly you can extend the code to open multiple files.
Looking Busy on System
You are at your job and you are not working on system, but your system has an app installed which can guess whether you are sitting idle or working on system using the movement of the mouse. So you want to automate the mouse to move after every short interval of time.
This can be done by writing a small python script using PYAUTOGUI module.
import pyautogui# generating a pause of 5 seconds between the mouse movement
pyautogui.PAUSE=5
try:
# Running infinite loop
while True:
# moving mouse to (200,300) coordinates in 1 second
pyautogui.moveTo(200,300,duration=1)
# moving mouse to (201,310) coordinate in 1 second
pyautogui.moveTo(201,310,duration=1)
except KeyboardInterrupt:
print('Quitting')
In the above code we are moving the mouse from one location to another location after every 5 seconds. We can quit this code by pressing 'Ctrl+C'.
Conclusion
In this blog we discussed how you can use PYAUTOGUI module to automate GUI of system. Different functions of this module has been explained and you can automate almost everything which can be done using keyboard and mouse using these functions.


