Initially, this program was developed only for Linux-based systems, however, today it supports multiple operating systems including, macOS, Windows, BSD, and Solaris. Most of the users get familiar with the Grub Boot Loader only once they install more than one operating system on their machine. By doing this, they essentially cause the Grub Boot Loader to present a menu at the boot-up time through which they can explicitly choose which operating system they want to load.
In this article, we would like to share with you a complete tutorial on Grub Boot Loader, which will be based on customizing this program according to your choice. After going through this tutorial, you will be in a very good position to customize the Grub Boot Loader just the way you want, and hence you can make the experience of seeing the boot-up process all the more interesting.
Note: To walk you through the Grub Boot Loader full tutorial, we have made use of Linux Mint 20. However, any other preferred Linux distribution can also be used for this purpose.
Method of Customizing Grub Boot Loader
The Grub Boot Loader has a settings file which consists of all the default configurations that the Grub Boot Loader uses. However, we are provided with the liberty of customizing these settings according to our choice. Therefore, below we will be sharing with you some of the methods of customizing the Grub Boot Loader by making changes to its settings file.
Backing up the /etc/default/grub file before Customizing Grub Boot Loader
Before making any changes to the settings file of GRUB Boot Loader, it is highly recommended to create its backup copy so that even if you mess up with anything during the whole process, you can still revert to the default settings. But before creating a backup copy of the Grub Boot Loader's settings file, we would like to show you how that file looks like.
First, we will have to launch the Linux Mint 20 terminal, which we can easily do by clicking on its shortcut icon. We have also attached the image of the Linux Mint 20 terminal below for your ease:

Now, we will try to view the contents of the /etc/default/grub file by running the following command in the terminal window that we have just launched:

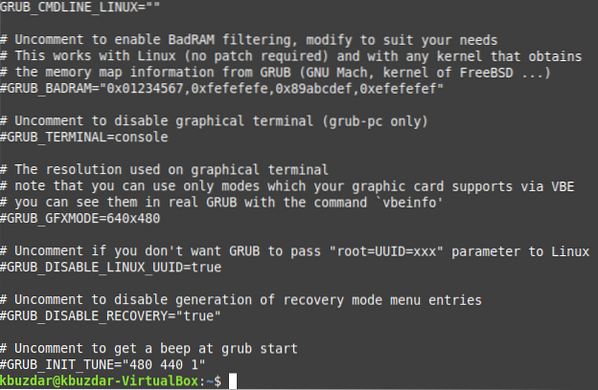
The /etc/default/grub file is shown in the image below:
We can create a backup copy of this file by running the following command in our terminal:
This command will require root privileges to execute properly. Here, /etc/default/grub represent the original settings file of Grub Boot Loader, whereas /etc/default/grub.bak represents the backup copy of this file. The “cp” command will do the needful of creating the backup copy of the settings file.

Now, to verify if the backup file is an exact copy of the “/etc/default/grub” file or not, we will try to view its contents by running the command stated below in our terminal:

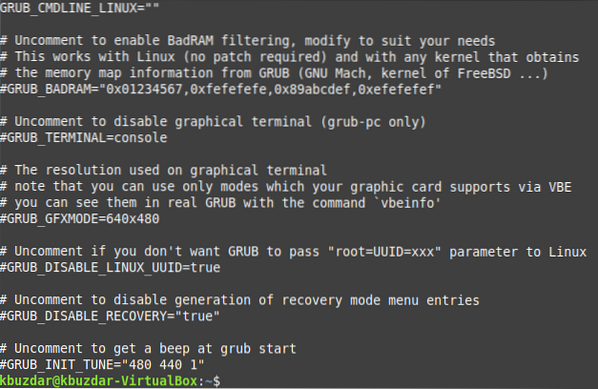
Running this command will display the contents of /etc/default/grub.bak file on your terminal, as shown in the following image, which you can cross-check with the contents of /etc/default/grub file to ensure that both files contain the same contents. Once the backup of the settings file has been successfully created, we are good to go with customizing the Grub Boot Loader.
Method of Choosing Grub Default Operating System
At times, we have more than one operating system installed on our machine. During the boot-up process, our Grub Boot Loader presents us with a menu with which we can select the operating system we want to run. We can make this choice within a specified time, after which the Grub Boot Loader will automatically load the default operating system. However, if we are sure to boot a specific operating system every time we turn on our machine, and we want to save ourselves from the hassle of making that choice at the boot-up time, then we can specify the operating system of our choice as the default operating system in the /etc/default/grub file. So that every time we turn on our computer system, the operating system of our choice automatically gets loaded.
To make this happen, we will need to access the /etc/default/grub file by opening it with any text editor of our choice, preferably the nano editor. This can be done by running the command stated below in our terminal:
sudo nano /etc/default/grubSince we are trying to access the settings file of Grub Boot Loader, this action requires root user privileges, which can be provided by typing the “sudo” keyword before the command mentioned above.

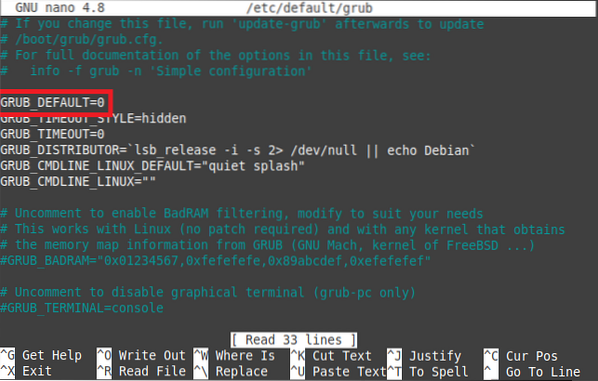
When the /etc/default/grub file opens with the nano editor, we need to locate the line “GRUB_DEFAULT”. This line tells the Grub Boot Loader which operating system it has to load during the boot-up time. The operating systems numbering starts from “0”. It means that if you want to load the first operating system from the list of operating systems provided to you during the boot-up time, then you will have to set the value of “GRUB_DEFAULT” to “0”, as we did in our case. This is also highlighted in the following image:
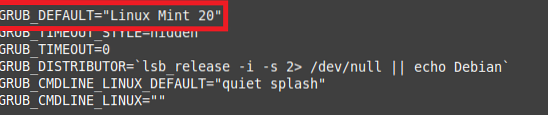
However, at times, you do not know the exact number that corresponds to the operating system of your choice, i.e., you do not remember the order in which the Grub Boot Loader presents the operating systems in its menu. In that case, you need to know the full name of the operating system of your choice, and you can set the value of the “GRUB_DEFAULT” to the name of that operating system. In our case, we have set this value to “Linux Mint 20”, as shown in the image below. After making this change, press Ctrl+ X to save your file and close it.
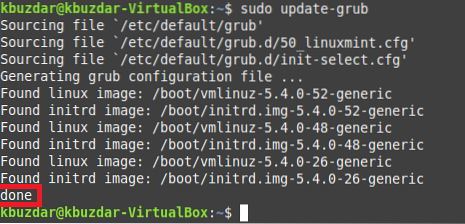
Whenever you make any changes to the /etc/default/grub file, you must update Grub for the newly made changes to take effect. This can be done by running the following command in the terminal:

Once you run this command, it will take a few seconds for Grub to update itself, after which you will be able to see the “done” message, as highlighted in the image shown below, which will indicate that your changes have successfully taken effect.
Method of Changing the Background of Grub Boot Loader Menu
The default background of the Grub Boot Loader menu looks quite dull and boring, but you do not have to worry about it anymore because you can change it any time you want. For that, we again need to tweak the /etc/default/grub file a little bit in the following manner:
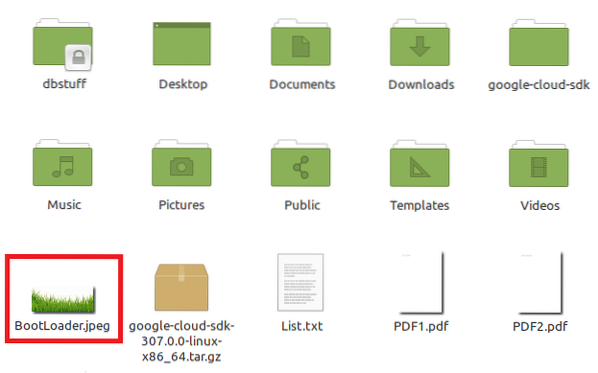
For changing the background of the Grub Boot Loader menu, we have a “jpeg” image stored in our Home directory, which we want to use as the new background. You can also use a “png” or “jpg” image file. This new background image has the title BootLoader.jpeg, as highlighted in the image shown below:
We have also opened this image to show you how the Grub Boot Loader menu is going to look like after we have made this image as its background.

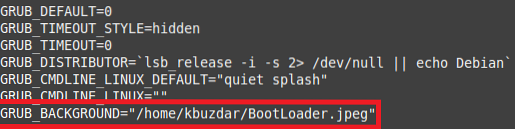
Now, we will open the /etc/default/grub file once again with the nano editor by running the same command as we did in the method above. This time we are going to add a new field to this file, which is as follows:
GRUB_BACKGROUND=”ImageFilePath”Here, you need to replace the ImageFilePath with the actual path where your new background image resides. In our case, it was “/home/kbuzdar/BootLoader.jpeg”, as highlighted in the image shown below:
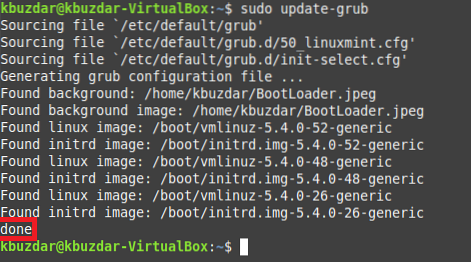
Now, save your file and close it. After that, you will again be required to update Grub so that it can read the changes that you have just made. When you update Grub with the same command that we stated in the method above, you can verify that Grub has been updated by seeing the “done” message at the end of your terminal, as highlighted in the following image:
Method of Modifying the Boot Timeout of the Selected Operating System
If you only have one operating system installed on your machine, then the default value for the Grub Boot Loader's menu timeout will be “0”, i.e., the only operating system that you have will immediately load as soon as you turn on your computer system. However, if you have more than one operating system installed on your machine, then the default timeout value will be “10”, i.e., the Grub Boot Loader menu will appear on your screen for 10 seconds in which you are allowed to choose to load any operating system that you like. After the timeout duration expires, the Grub Boot Loader will automatically load the default operating system. We can always increase or decrease the value of this timeout field according to our requirements.
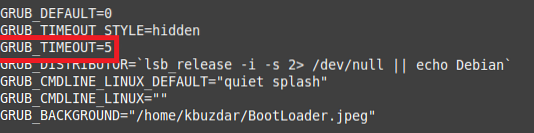
For changing the boot timeout, we will need to open the /etc/default/grub file with nano editor yet again. This time, we will locate the “GRUB_TIMEOUT” field and assign it any value (in seconds) of our choice. For the sake of demonstration, we have set this value to “5” seconds, as highlighted in the image shown below:
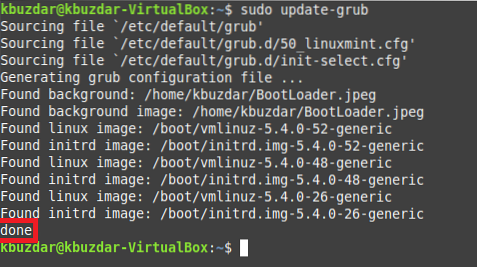
Again, we will need to save our /etc/default/grub file, close it, and then update Grub so that it is fully aware of the changes that we have just made. You can verify if Grub has successfully read all those changes by looking for the “done” message on your terminal, as highlighted in the following image:
Checking if all the Changes Made Above have Taken Place
Now, it is the time to check that all the changes that we have made in the methods shown above have taken place or not. For that, we will reboot our system, and as soon as it starts, we will keep pressing the “Esc” key until we enter the Grub Boot Loader menu. When we enter that menu, we will be able to see that the background image of the Grub Boot Loader has been changed, as shown in the image below:
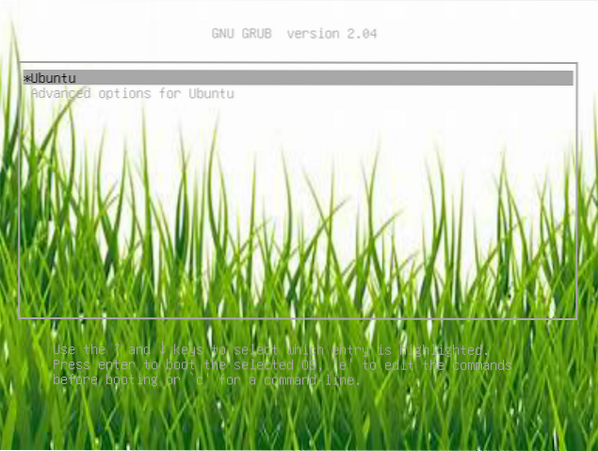
Also, the Grub Boot Loader menu appeared for “5” seconds in our case, i.e., the timeout value that we had set for this menu, after which it loaded the default operating system, which in our case was Linux Mint 20.
Conclusion
This article gave you a brief overview of the Grub Boot Loader and the purpose of using it. We explained to you where this program stores all of its configurations. As well as present the method of backing up the /etc/default/grub file, i.e., the settings file of Grub so that you can easily make changes to its configurations without any worries, as you can always restore all your default settings from the backup settings file. Moreover, to demonstrate the method of customizing your Grub Boot Loader, we shared with you three different cases: 1) Selecting a default operating system 2) Changing the background of the Grub Boot Loader menu 3) Modifying the timeout of the appearance of the Grub Boot Loader menu.
We explained these cases by stating the step-wise procedures to achieve all these goals. In the same manner, you can also change the other parameters of the Grub Boot Loader's settings file. Finally, we verified if the changes that we have made to the /etc/default/grub file have actually taken place or not by rebooting our system and entering the Grub Boot Loader menu. Hopefully, this tutorial will give you a good starting point for experimenting with Grub Boot Loader on your own.


