Let's start with the Git repository. We will create a folder called project.git and initialize it to become the remote repository:
$ mkdir project.git$ cd project.git/
$ git init --bare
Initialized empty Git repository in /Users/zakh_eecs/_work/LearnGIT/git_remote_repository/
project.git/
Now go to a new location where you can create a clean folder. Create the folder project_source and initialize it for Git:
$ mkdir project_source$ cd project_source
$ git init
Initialized empty Git repository in /Users/zakh_eecs/_work/LearnGIT/git_branching_source/
project_source/.git/
$ touch ReadMe.txt
$ git add -A
$ git commit -m "Initial Commit"
[master (root-commit) 176134f] Initial Commit
1 file changed, 0 insertions(+), 0 deletions(-)
create mode 100644 ReadMe.txt
The project_setup is a Git directory with ReadMe.txt file. However, it's not connected to our remote repository. Let's set up project.git to be the remote repository for project_source. We can achieve this through the following command:
$ git remote add origin /Users/zakh_eecs/_work/LearnGIT/git_remote_repository/project.git$ git push origin master
Counting objects: 3, done.
Writing objects: 100% (3/3), 213 bytes | 0 bytes/s, done.
Total 3 (delta 0), reused 0 (delta 0)
To /Users/zakh_eecs/_work/LearnGIT/git_remote_repository/project.git
* [new branch] master -> master
With the git remote add origin command, we have created the connection between project.git and project_source. With the git push origin master command, we have pushed our master branch to the remote repository.
Let's check our branches (still in the project_source folder):
$ git branch* master
$ git branch -r
origin/master
$ git branch -a
* master
remotes/origin/master
The first command is showing only the local branch. The -r option is showing the remote branch. And the -a option is showing both local and remote.
Let's create a few branches in our working directory:
$ git branch development$ git branch hotfix
$ git branch experimental
$ git branch -a
development
experimental
hotfix
* master
remotes/origin/master
We have created branches called development, hotfix and experimental. They are showing up in our local branch list. But in the remotes/origin, there is only master branch because that is the only one we pushed. The star(*) master means we are still in the local master branch. Let's go into the development branch, commit changes and push those changes to the remote repository.
$ git checkout developmentSwitched to branch 'development'
$ echo abc > ReadMe.txt
$ git add -A
$ git commit -m "Modified development branch"
[development dd9933e] Modified development branch
1 file changed, 1 insertion(+)
$ git push origin development
Counting objects: 3, done.
Writing objects: 100% (3/3), 257 bytes | 0 bytes/s, done.
Total 3 (delta 0), reused 0 (delta 0)
To /Users/zakh_eecs/_work/LearnGIT/git_remote_repository/project.git
* [new branch] development -> development
Let's check all the branches now:
$ git branch -a* development
experimental
hotfix
master
remotes/origin/development
remotes/origin/master
We see that we are in the local development branch, but there is also a remote development branch. When we pushed our changes with git push origin development, it created the development branch in remotes/origin.
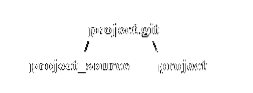
Lets' now get out of the project_source and find a fresh place where we can have a new folder. Here we are going to clone the remote repository with the following command:
$ git clone /Users/zakh_eecs/_work/LearnGIT/git_remote_repository/project.gitCloning into 'project'…
done.
We have cloned a new copy called project from project.git. Get into the project folder and check the branches:
$ cd project$ git branch
* master
When Git makes an initial clone from a remote repository, it only gets the master branch. If we use the -a option, we see:
$ git branch -a* master
remotes/origin/HEAD -> origin/master
remotes/origin/development
remotes/origin/master
Notice there is no local development branch. Also, we never pushed hotfix and experimental branches from project_source to project.git, so we don't see them. The remote repository has master and development branches (remotes/origin/HEAD -> origin/master is not a branch, it is just telling you where the HEAD is pointing to).
Let's get the development branch into our working environment:
$ git fetch --allFetching origin
$ git checkout development
Branch development set up to track remote branch development from origin.
Switched to a new branch 'development'
If you are using an older version of Git, you might have to use:
$ git checkout development origin/developmentNow if we use the branch command, we get:
$ git branch -a* development
master
remotes/origin/HEAD -> origin/master
remotes/origin/development
remotes/origin/master
We can make changes to the development branch, commit the changes and then push it using the git push origin development command.
In Conclusion
When your working with GitHub and BitBucket you might use HTTPS or SSH link to connect to your remote repository. So you will be setting your origin to those links. But the principles of the remote branch is the same as described here.
Further Study:
- https://git-scm.com/docs/git-branch
- https://git-scm.com/book/en/v2/Git-on-the-Server-Setting-Up-the-Server
- https://help.github.com/articles/adding-an-existing-project-to-github-using-the-command-line/
- https://help.github.com/articles/pushing-to-a-remote/


