In this article, I will show you how to check for hardware info on Ubuntu. I will be using Ubuntu 18.04 LTS for the demonstration, but it should work on any version of Ubuntu. Let's get started.
Checking CPU Information:
On Ubuntu, you can find many information about the CPU of your computer with the dmidecode command to as follows:
$ sudo dmidecode -t4 | less
You should see the following information. I am using a Virtual Machine, so I don't get many of the information. But if you're using a real hardware, it should show up here.
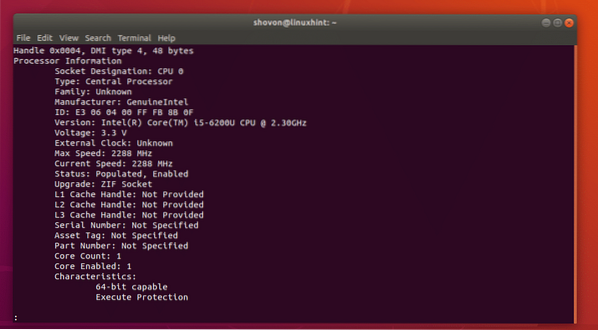
As you can see, the CPU vendor is Intel and its Core i5-6200U CPU with 2.30 GHz clock.
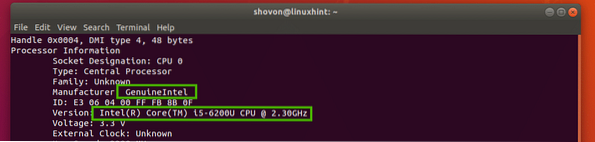
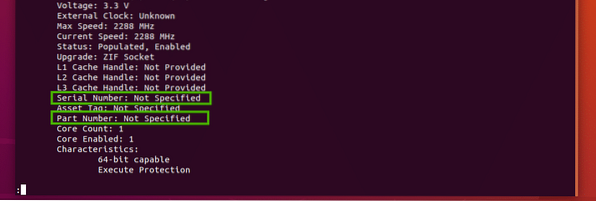
You should also find the serial number and part number of your CPU here as you can see in the marked section of the screenshot below. The serial number and part number of my CPU is not displayed here as I am using a Virtual machine. But it should be visible if you're using a real hardware.
Checking RAM Information:
You can find information about the memory or RAM of your computer with dmidecode command as well as follows:
$ sudo dmidecode -t17 | less
All the information about your RAM should be displayed. Let's talk about some of these information.
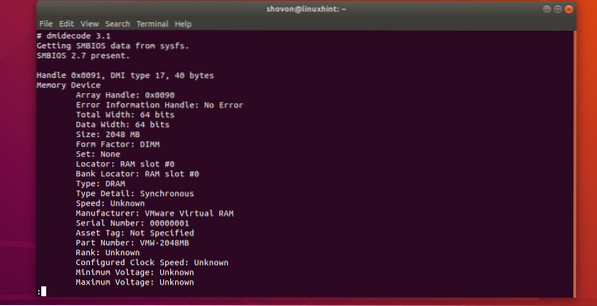
As you can see, the installed RAM of my Virtual machine is 2048 MB or 2 GB.

It is in the first slot of my computer and it's a DRAM.

The manufacturer or vendor is should be listed in the marked section of the screenshot below. As I am using a Virtual Machine, it is listed as VMware Virtual RAM. On real hardware, it should be listed correctly.

Serial number and part number should be listed as in the marked section of the screenshot below.

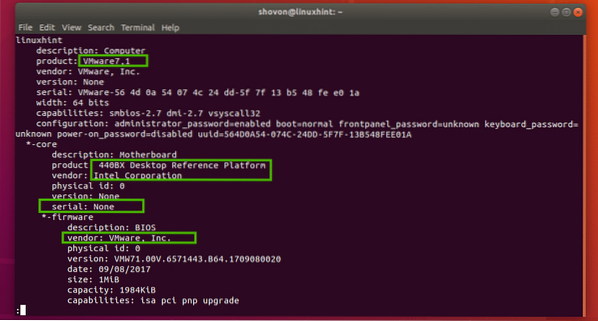
Checking Motherboard Information:
You can find many information about your motherboard using dmidecode command as follows:
$ sudo dmidecode -t2
You should see the following information. The manufacturer or the vendor of your motherboard, the product name and the serial number should be listed here as you can see in the marked sections of the screenshot below.

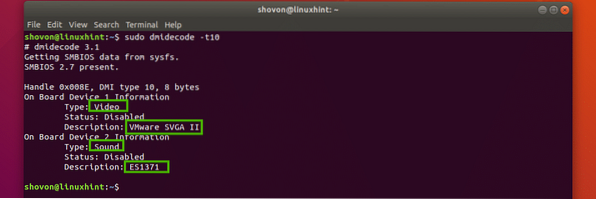
Checking On Board Devices Information:
You can check information about the built in devices on your motherboard such as the graphics card or sound card with dmidecode as follows:
$ sudo dmidecode -t10
As you can see, I have 2 on board devices on my computer (Virtual machine), a video card and a sound card. A short description about each of these devices are also available here.
For more information on dmidecode command, check the man page of the dmidecode with the following command:
$ man dmidecodeChecking Hardware Information with lshw Command:
The lshw command is very powerful. You can use it to find hardware information of all the available hardware of your computer.
To list all the hardware, you can run the following command:
$ sudo lshw | less
As you can see, all the hardware information is listed. It's a very long list. That's why I piped the output of the lshw command to less. You can find the vendor or manufacturer of the hardwares, their serial number, name, part number and many more here.
You can use the
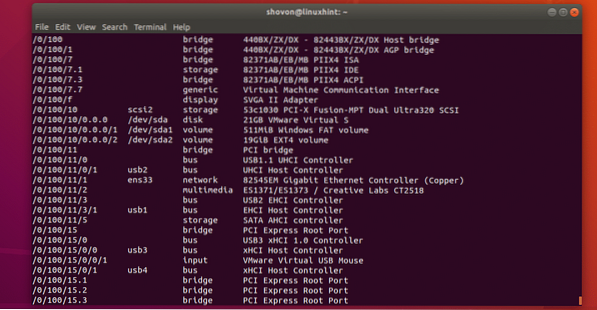
If you want a nicely formatted short list of all the attached hardware, you can run lshw command as follows:
$ sudo lshw -short
As you can see, the output is formatted nicely. It is also a very long list.
You can find information about specify type of hardware as well with lshw.
For example, to find information about all the disk devices, you can run lshw as follows:
$ sudo lshw -class diskAs you can see, information (product name, vendor, size etc) about the disk devices are printed on the screen. I have only one disk device attached to my Virtual machine.

The possible values for the -class option of lshw command are:
system, bus, memory, processor, disk, storage, bridge, generic, display, volume, bus, network, multimedia, input.
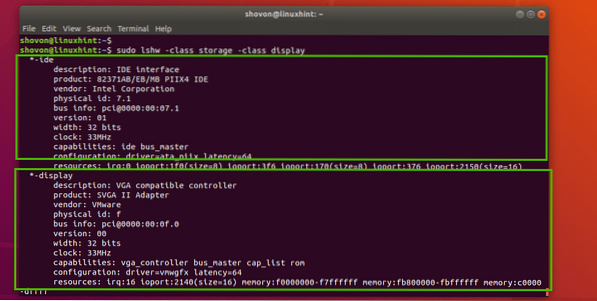
You can list different types of devices together as well. For example, to list storage devices and display devices, run lshw as follows:
$ sudo lshw -class storage -class displayAs you can see, the display and storage devices are listed.
You can chain as many -class options as you want to list only the devices you want to check.
Checking Hardware Information with inxi Command:
You can also check hardware information using the inxi command. The inxi program is not available on Ubuntu by default. But you can easily install it from the official package repository of Ubuntu.
First, update the APT package repository cache with the following command:
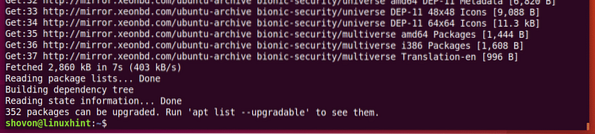
$ sudo apt update
The APT package repository cache should be updated.
Now install inxi with the following command:
$ sudo apt install inxi
Now press y and then press
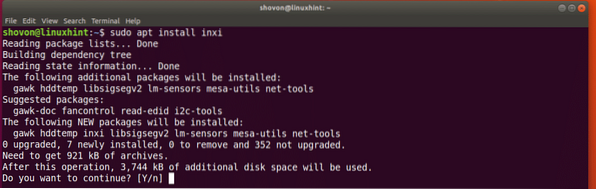
inxi should be installed.

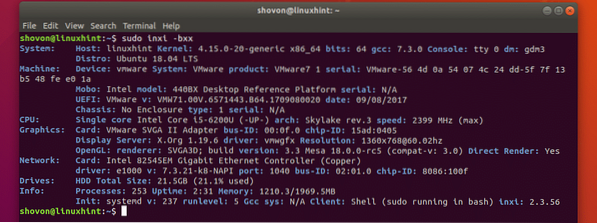
To check the basic hardware information with inxi, run inxi as follows:
$ sudo inxi -bxxAs you can see, all the basic hardware information is nicely printed.
The inxi command has a lot of options. The common ones are:
-B - If you're using a laptop, then this option displays information about the battery of your laptop.
-D - This option displays hard drive information.
-A - This option displays audio/sound device information.
Check the man page of inxi for more command options:
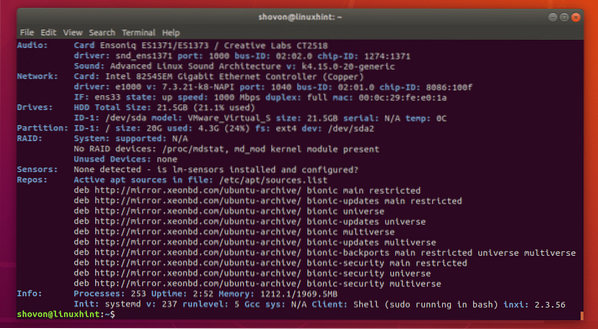
$ man inxiIf you want to see all the information inxi can provide, run inxi as follows:
$ sudo inxi -Frmxx
As you can see, a lot of hardware information is printed nicely.
That's how you check hardware information on Ubuntu. Thanks for reading this article.


