Luckily, for the Linux operating system, all these activities are logged in the ring buffer, which can be accessed by using the diagnostic messages (or dmesg) command. The dmesg command in Linux can be used to display all the messages related to the events taking place within your operating system. This article will teach you how to use this helpful command in Linux.
Note: For this tutorial, we used Linux Mint 20
Command Usage
We will explain the usage of the diagnostic messages command by discussing a few examples.
Example #1: Viewing all Diagnostic Messages
We can view all types of diagnostic messages at once by performing these steps.
First, we need to click the shortcut icon of the Linux Mint 20 terminal to launch it.
You can see the newly launched terminal in the image below:
Now we will simply run the following command in the terminal:
Running this command will display a long list of diagnostic messages on your terminal. You can scroll down to see all the messages, as shown in the image below: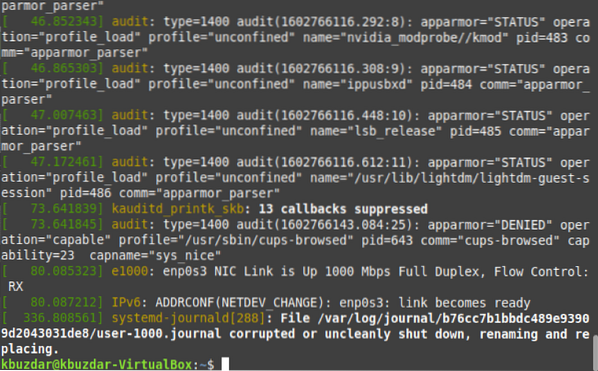
Example #2: Viewing Diagnostic Messages Page by Page
In the previous example, the list of diagnostic messages was very long and impractical to read. Therefore, you might want to view these messages page by page. which can be done by using the less command in Linux. In the command shown below, we are piping the output of the dmesg command to the less command so that diagnostic messages are displayed page by page.
You can see the output of the modified dmesg command in the image below.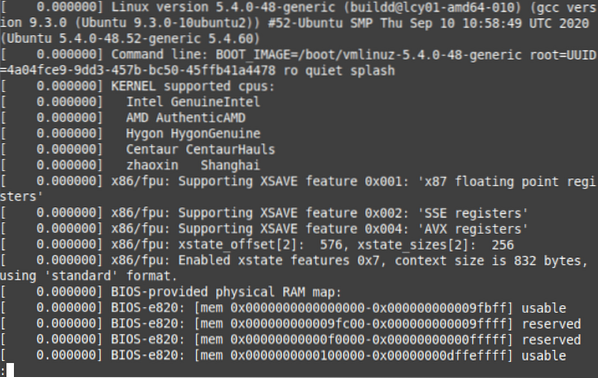
Once you have read through the first page, you can press the spacebar to move to the next page, and so on, until the last page is reached, as indicated by the END keyword in the following image:
Example #3: Viewing Diagnostic Messages with a Specific Severity Level
The severity levels of diagnostic messages vary depending on the purpose they serve. For example, some messages convey general information, while others contain warnings. You can choose to view all the diagnostic messages of a specified severity level as follows:
First, run the command dmesg -level=LEVEL in your Linux Mint 20 terminal. Here, you need to replace LEVEL with a valid level (e.g., err, warn, info, notice). In our example, because we want to view all diagnostic messages of the error level, we replaced LEVEL with err.
This command will return all the diagnostic messages that have the error level, as shown in the following image:
Example #4: Viewing the Linux Version with dmesg Command
When we ran the dmesg command without any other parameters, the output was too large to view at once. Along with all the other information, the version of your Linux system was also displayed in that output, but it was difficult to locate. If you wish to see your Linux version with the dmesg command, then you can run the following command in your terminal:
Running this command will display the Linux version on your terminal as shown in the image below:
Example #5: Viewing Diagnostic Messages with Timestamps
An event occurs on an operating system at a certain time. For logging and auditing tasks, it is important to look at the timestamps of the events that take place within your operating system so that you can figure out when a problem occurred. To view the timestamps of the diagnostic messages, you can run the command below in your terminal:
The output in the following image shows the exact timestamps, including the day, date, and time, before each diagnostic message.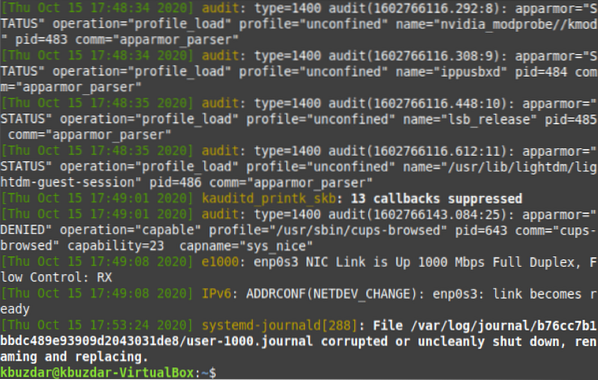
Example #6: Viewing the Diagnostic Messages related to a Specific Device
The diagnostic messages displayed by running the dmesg command alone are not specific to any device; instead, the messages related to all devices are displayed at once. However, you might want to view the diagnostic messages for a particular device to determine the issues related to that device only.
The dmesg command allows you to do so by running the command dmesg | grep -i “DEVICE”. Here, you have to replace DEVICE with the name of the device whose diagnostic messages you want to view. In our case, we want to check the diagnostic messages of the mouse. Therefore, we have replaced DEVICE with Mouse.
When you will run this command, all the diagnostic messages related to the mouse will be displayed on your terminal, as shown in the following image. You can view the diagnostic messages of any I/O device in the same manner.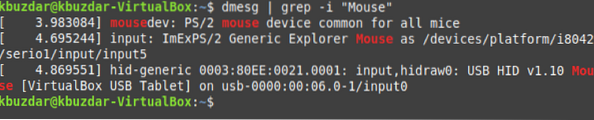
Example #7: Viewing Diagnostic Messages with their Severity Levels
We viewed the diagnostic messages of a particular severity level in Example #3. However, if we want to display all the diagnostic messages with their severity levels, then we can run the command dmesg -x. The -x flag can be used with the dmesg command to display the diagnostic messages with their severity levels.
You can see from the following output that the severity level of a diagnostic message appears at the beginning of the message.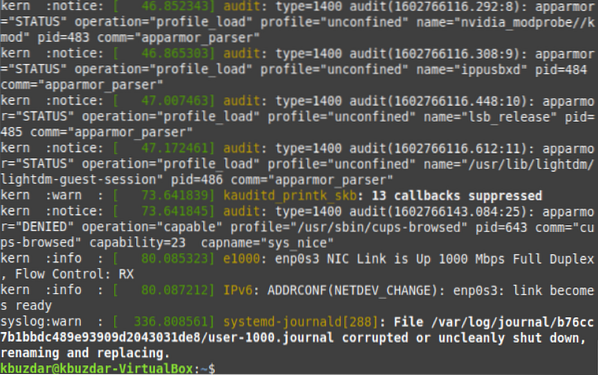
Example #8: Clearing the Diagnostic Messages History
Thousands of events take place in the operating system that renders your OS, and these events generate a long list of diagnostic messages, as shown in Example #1. However, the Linux system also provides a way to clear this log.
To clear your diagnostic messages history, you can run the command sudo dmesg -C. To clear the diagnostic messages history, which is important for auditing purposes, you need to run the dmesg command with sudo privileges. Otherwise, you will not be allowed to perform this operation. Moreover, the -C flag, coupled with the dmesg command, is responsible for clearing the dmesg log.
Once you will run this command, nothing will be displayed on your terminal. Therefore, to verify that the diagnostic messages history has been cleared, we will run the dmesg command again. This time, the dmesg command will not return any diagnostic messages on your terminal because the history has been erased.
Conclusion
This tutorial introduces the diagnostic messages generated by the Linux operating system and shows you how to view the timestamps of the events that occurred on the operating system, how to record all events of a specified severity level, and how to view the diagnostic messages related to a specific device. More advanced variations of the dmesg command shared in this article can be produced to obtain different results.


